Ana içeriğe geç

Kaffelogic Nano 7/LINK (A/B/C-N Serial) Thermocouple Replacement

Neye ihtiyacın var

  1. Kaffelogic Nano 7/LINK (A/B/C-N Serial) Thermocouple Replacement, Removing Panel Screws: adım 1, 2 resimden 1. Kaffelogic Nano 7/LINK (A/B/C-N Serial) Thermocouple Replacement, Removing Panel Screws: adım 1, 2 resimden 2.
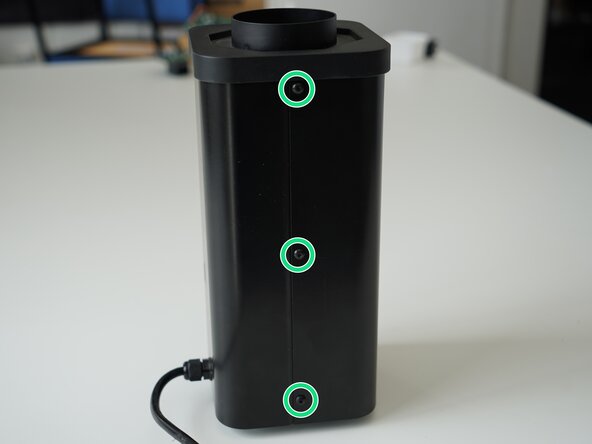
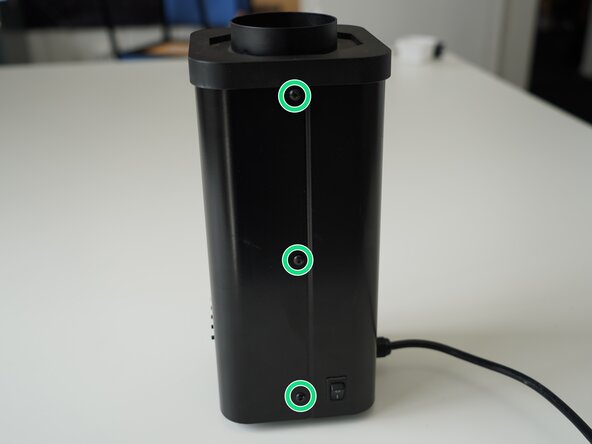
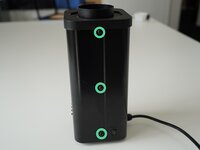
    • Remove the 6x 2.5mm Hex screws on the left and right side of the roaster.

  2. Kaffelogic Nano 7/LINK (A/B/C-N Serial) Thermocouple Replacement, Lift the closure: adım 2, 2 resimden 1. Kaffelogic Nano 7/LINK (A/B/C-N Serial) Thermocouple Replacement, Lift the closure: adım 2, 2 resimden 2.
    • Hold the roaster steady while removing the plastic top/closure.

    • Panels may spring apart slightly once removed.

  3. Kaffelogic Nano 7/LINK (A/B/C-N Serial) Thermocouple Replacement, Remove bottom panel screws: adım 3, 3 resimden 1. Kaffelogic Nano 7/LINK (A/B/C-N Serial) Thermocouple Replacement, Remove bottom panel screws: adım 3, 3 resimden 2. Kaffelogic Nano 7/LINK (A/B/C-N Serial) Thermocouple Replacement, Remove bottom panel screws: adım 3, 3 resimden 3.
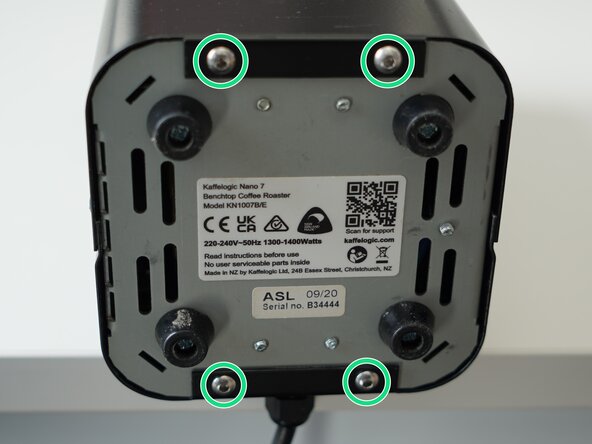
    • Remove the 4x 2.5mm Hex screws on the bottom of the roaster.

  4. Kaffelogic Nano 7/LINK (A/B/C-N Serial) Thermocouple Replacement, Remove the front panel: adım 4, 3 resimden 1. Kaffelogic Nano 7/LINK (A/B/C-N Serial) Thermocouple Replacement, Remove the front panel: adım 4, 3 resimden 2. Kaffelogic Nano 7/LINK (A/B/C-N Serial) Thermocouple Replacement, Remove the front panel: adım 4, 3 resimden 3.
    • Pull away the front panel carefully.

    • Take care not to damage the buttons while maneuvering the front panel.

  5. Kaffelogic Nano 7/LINK (A/B/C-N Serial) Thermocouple Replacement, Remove rear panel: adım 5, 3 resimden 1. Kaffelogic Nano 7/LINK (A/B/C-N Serial) Thermocouple Replacement, Remove rear panel: adım 5, 3 resimden 2. Kaffelogic Nano 7/LINK (A/B/C-N Serial) Thermocouple Replacement, Remove rear panel: adım 5, 3 resimden 3.
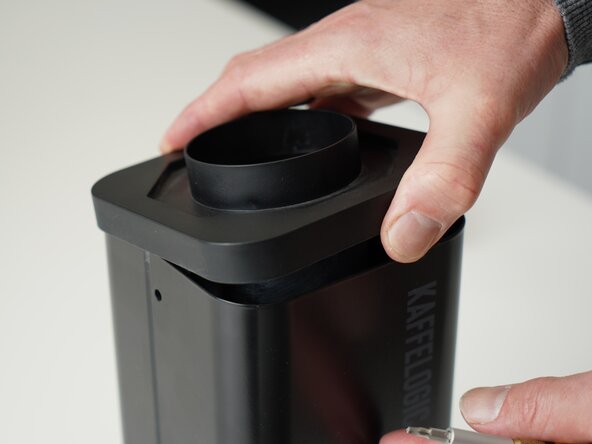
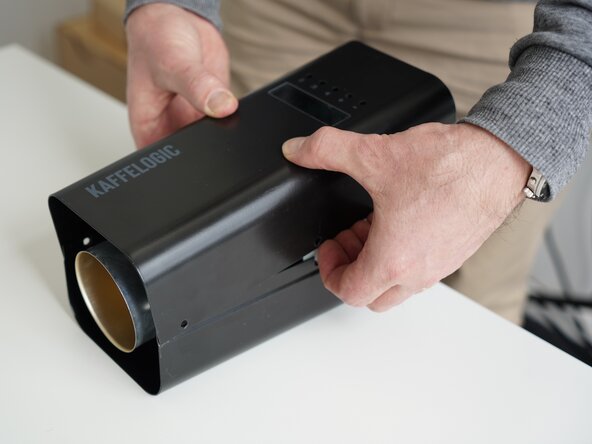
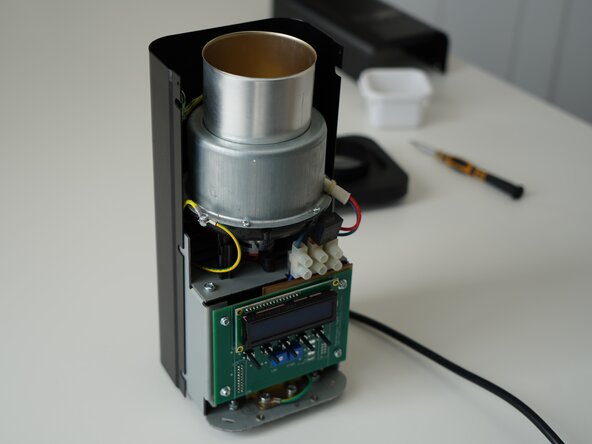
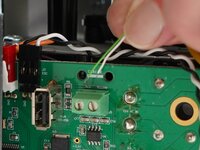
    • Stand the roaster up again and pull away the rear panel from the chassis to expose the remaining components.

    • The mains cable is routed through the panel and it will remain attached, place the panel in a soft bag if you wish to protect the paint throughout the rest of your repairs.

  6. Kaffelogic Nano 7/LINK (A/B/C-N Serial) Thermocouple Replacement, Disconnect the thermocouple: adım 6, 3 resimden 1. Kaffelogic Nano 7/LINK (A/B/C-N Serial) Thermocouple Replacement, Disconnect the thermocouple: adım 6, 3 resimden 2. Kaffelogic Nano 7/LINK (A/B/C-N Serial) Thermocouple Replacement, Disconnect the thermocouple: adım 6, 3 resimden 3.
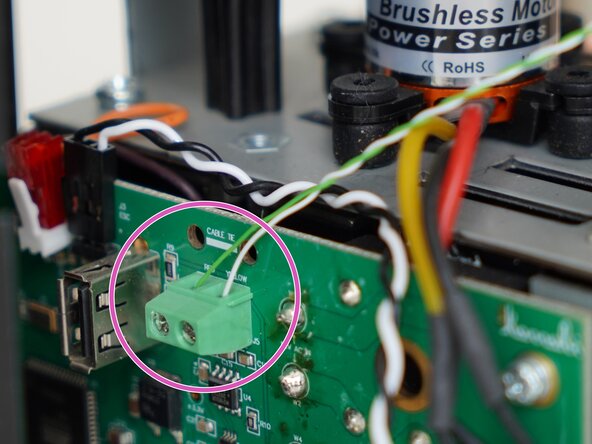
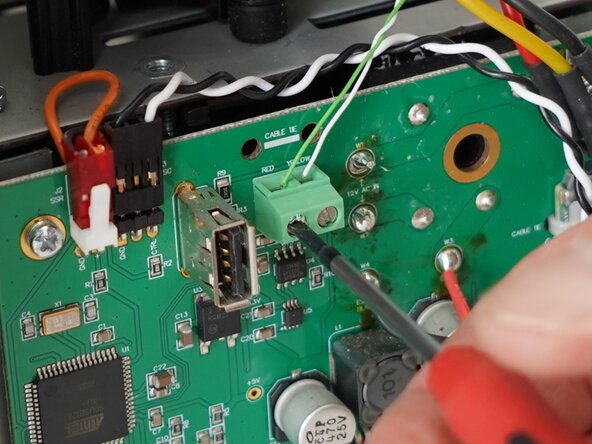
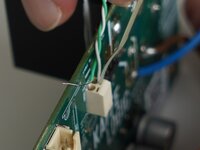
    • Use a 2.0mm slotted screwdriver to remove the thermocouple wires from the PCB-A

  7. Kaffelogic Nano 7/LINK (A/B/C-N Serial) Thermocouple Replacement, White thermocouple connector: adım 7, 3 resimden 1. Kaffelogic Nano 7/LINK (A/B/C-N Serial) Thermocouple Replacement, White thermocouple connector: adım 7, 3 resimden 2. Kaffelogic Nano 7/LINK (A/B/C-N Serial) Thermocouple Replacement, White thermocouple connector: adım 7, 3 resimden 3.
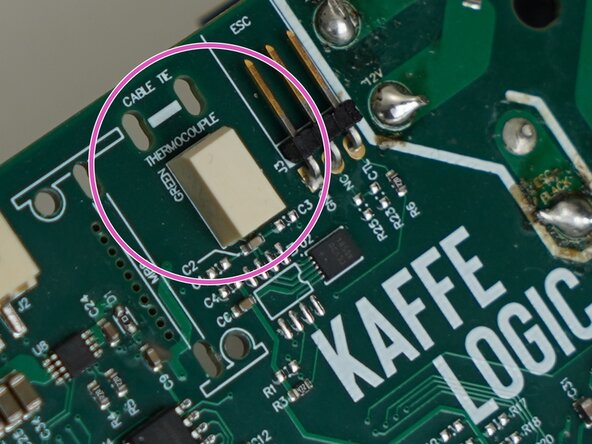
    • If your thermocouple connector looks like this, you will need to follow this step.

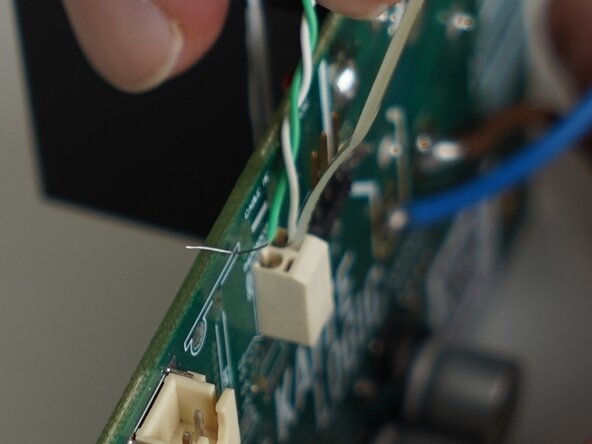
    • Use the end of a cable tie or very small plastic spudger to open the contact and remove/insert your thermocouple wires. You may need to trim the cable tie end to fit into the slot.

  8. Kaffelogic Nano 7/LINK (A/B/C-N Serial) Thermocouple Replacement, Unwrap/unfold thermocouple fixing: adım 8, 2 resimden 1. Kaffelogic Nano 7/LINK (A/B/C-N Serial) Thermocouple Replacement, Unwrap/unfold thermocouple fixing: adım 8, 2 resimden 2.
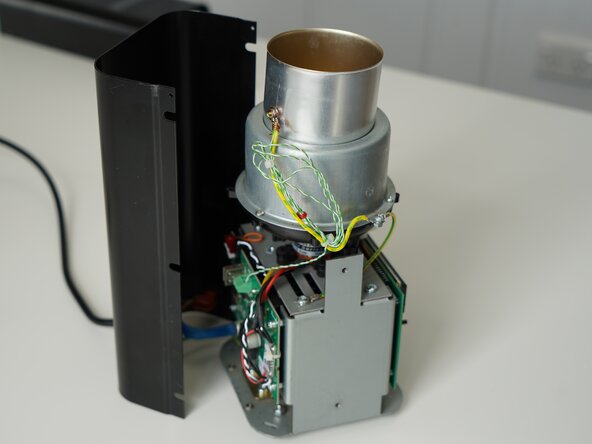
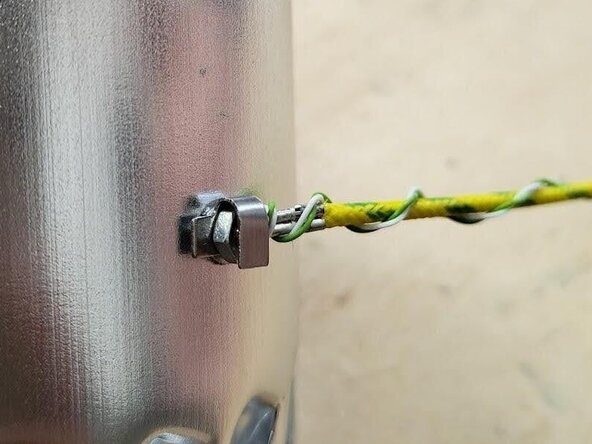
    • Carefully unwrap the copper wire used to secure the thermocouple.

    • Later models feature a reusable folded tab, in-place of the copper wire wrap.

  9. Kaffelogic Nano 7/LINK (A/B/C-N Serial) Thermocouple Replacement, Removing the thermocouple: adım 9, 3 resimden 1. Kaffelogic Nano 7/LINK (A/B/C-N Serial) Thermocouple Replacement, Removing the thermocouple: adım 9, 3 resimden 2. Kaffelogic Nano 7/LINK (A/B/C-N Serial) Thermocouple Replacement, Removing the thermocouple: adım 9, 3 resimden 3.
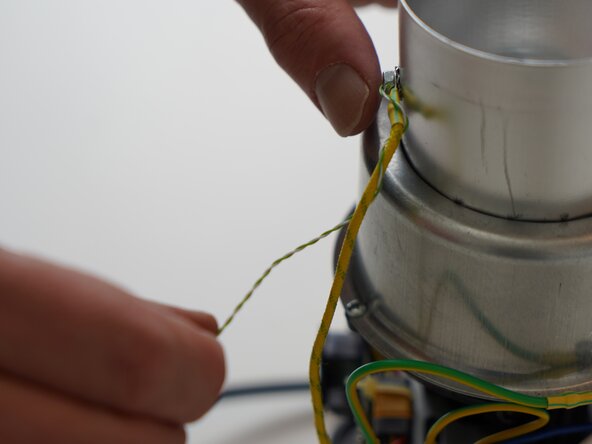
    • Unwind the thermocouple wire from the earth lead, cut any cable ties used to secure excess wire.

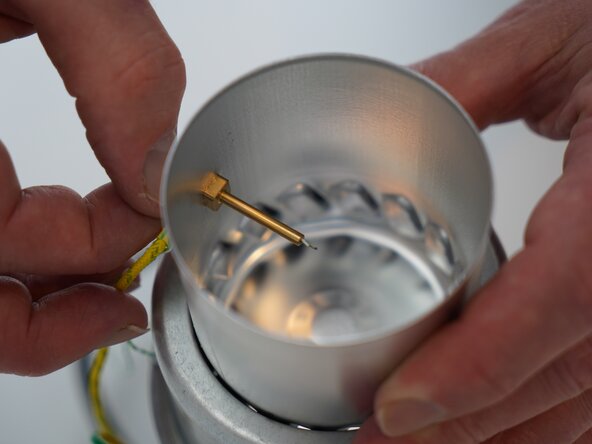
    • Pinch the thermocouple and gently remove it from the tube.

  10. Kaffelogic Nano 7/LINK (A/B/C-N Serial) Thermocouple Replacement, Reassembly notes: adım 10, 2 resimden 1. Kaffelogic Nano 7/LINK (A/B/C-N Serial) Thermocouple Replacement, Reassembly notes: adım 10, 2 resimden 2.
    • Leave 2mm of thermocouple insulation exposed

    • The thermocouple wires have connections points marked. Take care not to clamp the connector on the insulation.

    • Massage the tape firmly over the thermocouple wires to secure the position.

Sonuç

To reassemble your device, follow these instructions in reverse order.

Kaffelogic

Üyelik tarihi: 07/23/25

2.098 İtibar

18 adet Kılavuz yazıldı

0Kılavuz Yorumları

Yorum Ekle

İstatistikleri Görüntüle:

Son 24 Saat: 0

Son 7 gün: 2

Son 30 gün: 29

Her zaman: 62