Neye ihtiyacın var
-
-
Remove five Screens T20 from the bottom and lift the bottom plate up.
-
-
-
Separate nine cables.
-
Remove all screws from the electronic box.
-
Remove the electronic box.
-
-
-
Tilt the machine head.
-
Remove the security washer from the hinge axle.
-
Remove the axle and the machine stand.
-
-
-
-
Pull the spring out.
-
Remove the screw.
-
Remove the design plate.
-
-
-
Remove four screws T20.
-
Remove the cover.
Ich hatte Probleme, den Lichtschalter wieder anzuschließen. Das Kabel ist wirklich knapp.
Habe dann die Motorabdeckung wieder gelöst, und das Kabel einfach nachgezogen.
Genau so weit, dass das andere Kabel aus dem Arm am Ende gleich lang ist.
Und dann ging es problemlos.
-
-
-
Remove two screws T20.
-
Remove the top cover. Note: the cable connecting the top cover and the lower case is very short.
-
Remove the screws from the "Light on/off"-unit and separate it from the top cover.
-
-
-
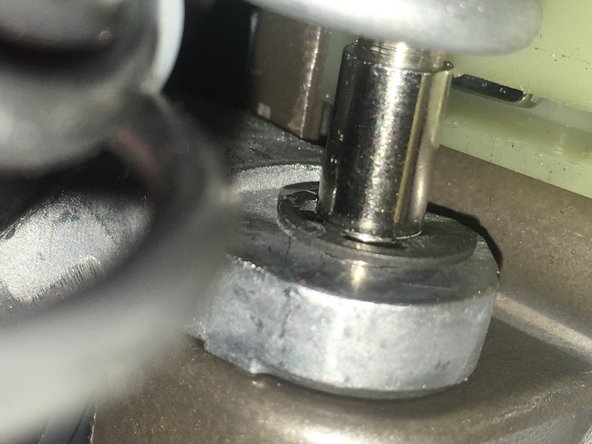
Using a punch and a hammer push out the pin. (Note: support the gear on the opposite side to protect the the motor shaft from damage).
-
The gear ist free.
-


To reassemble your device, follow these steps in reverse order.
To reassemble your device, follow these steps in reverse order.
İptal et: Bu kılavuzu tamamlamadım.
5 farklı kişi bu kılavuzu tamamladı.
Bu çevirmenlere özel teşekkürler:
100%
VauWeh dünyayı onarmamıza yardım ediyor! Katkıda bulunmak ister misiniz?
Çeviriye Başlayın ›
13 Yorum
super Anleitung
hat problemlos geklappt
vielen Dank.
PS: ist schon ein bisschen aufwendig, nur um den Antriebszahn zu wechseln, die gesamte Maschine zu zerlegen.
Gruß Rainer
Great tutorial, however it does not apply for me, as I have a Kenwood titanium KMY60 model, this spare part does NOT have a pin. I can’t say how it is fixed to the gear, could you advice on how to disassemble it?
Hi, how did you manage to disassemble the part without the pin? How is it fixed? Thank you!
Danke für die Anleitung. Wir haben angefangen, nach Gutdünken loszuschrauben und sind kläglich gescheitert. Mit der Anleitung hat es geklappt. Vielen Dank dafür!
Ich bin selber Ingenieur und konstruiere mechanische Bauteile und bin doch sehr verwundert, das Kenwood dermaßen kompliziert baut.
Danke für die präzise Anleitung. Bevor ich mich jedoch ans Werk mache, wollte ich in die Runde fragen, ob jemand eine Idee hat, warm meine Kenwood Chef XL Titanium plötzlich vom Hochgeschwindigkeitsanschluss her ein klackendes Geräusch von sich gibt. Mein Verdacht ist, dass beim Getriebe oder eben das Antriebszahnrad bei der letzten Verwendung gelitten hat. Hat jemand eine Idee und kann ferndiagnostizieren? Vielen lieben Dank.
Gilt die Anleitung auch für das Model Major Classic?
Ich würde es - vorsichtig - probieren. Die Geräte sind alle recht ähnlich. Bei Erfolg: hier posten, damit alle informiert sind.
VauWeh -
Super Anleitung! Danke für die Arbeit, die ihr euch mit den Bildern und Texten gemacht habt. Diese Anleitung kann auch problemlos dazu verwendet werden, um das Getriebe zu wechseln (der Antrieb mit langsamer Geschwindigkeit). Habe schon einiges an Apparaten geschraubt, aber Kenwood erscheint mir weniger "logisch" zusammengesetzt zu sein wie andere Hersteller. 5 Sterne für die Anleitung!
Meine Chef Titanium KM010 hat keinen Spannstift um das Antriebsrad auf der Welle zu fixieren. Das Ersatzteil hat auch keine Bohrung für einen Spannstift. Wie bekomme ich das verschlissene Antriebszahnrad von der Welle? Bin ratlos.
KM020 hat beim Zahnrad auf dem Motor ebenfalls kein Spannstift.Gibt es niemanden der das Problem schon lösen konnte.