Ana içeriğe geç

Kindle 7th Generation Back Panel Replacement

Neye ihtiyacın var

  1. Kindle 7th Generation Back Panel Replacement, Front Panel: adım 1, 2 resimden 1. Kindle 7th Generation Back Panel Replacement, Front Panel: adım 1, 2 resimden 2.
    • Power off your Kindle before beginning disassembly.

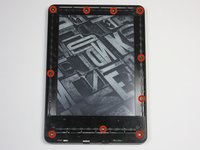
    • At each corner, use the blue plastic opening tool to unhook and separate the front panel from the adhesive.

    • Run the tool along the seams to pry open the front panel.

  2. Kindle 7th Generation Back Panel Replacement: adım 2, 1 resimden 1.
    • Peel the front panel off to remove it from the Kindle.

    • If this is the first time the front panel has been removed, the adhesive may require a significant amount of force to undo.

    • To prevent damaging the front panel, peel the panel from the corners towards the middle of the Kindle.

    • When reassembling your device, if you are replacing the front panel, additional adhesive may be required.

  3. Kindle 7th Generation Back Panel Replacement, Back Panel: adım 3, 2 resimden 1. Kindle 7th Generation Back Panel Replacement, Back Panel: adım 3, 2 resimden 2.
    • Remove the ten 5.0 mm T5 Torx screws.

    • A magnetized screw mat can help you keep track of your screws.

  4. Kindle 7th Generation Back Panel Replacement: adım 4, 1 resimden 1.
    • Working evenly along the corners and edges, separate the internal contents from the back panel.

    • There are many clips securing the screen to the back panel. Force will be required to remove the back, but you should never feel that the Kindle may break.

Sonuç

To reassemble your device, follow these instructions in reverse order.

4 farklı kişi bu kılavuzu tamamladı.

Abby Roulier

Üyelik tarihi: 02/08/15

948 İtibar

3 adet Kılavuz yazıldı

Ekip

Cal Poly, Team 6-28, Amido Winter 2015 Cal Poly, Team 6-28, Amido Winter 2015 üyesi

CPSU-AMIDO-W15S6G28

4 Üyeler

18 adet Kılavuz yazıldı

0 Yorum

Yorum Ekle

İstatistikleri Görüntüle:

Son 24 Saat: 0

Son 7 gün: 10

Son 30 gün: 50

Her zaman: 4,771