Bu sürüm, hatalı düzenlemeler içerebilir. En son doğrulanmış bellek kopyası dönün.
Neye ihtiyacın var
-
Bu adım çevrilmemiş. Çevrilmesine yardım edin
-
At each corner, use the blue plastic opening tool to unhook and separate the front panel from the adhesive.
-
Run the tool along the seams to pry open the front panel.
-
-
Bu adım çevrilmemiş. Çevrilmesine yardım edin
-
Peel the front panel off to remove it from the Kindle.
-
To prevent damaging the front panel, peel the panel from the corners towards the middle of the Kindle.
-
-
Bu adım çevrilmemiş. Çevrilmesine yardım edin
-
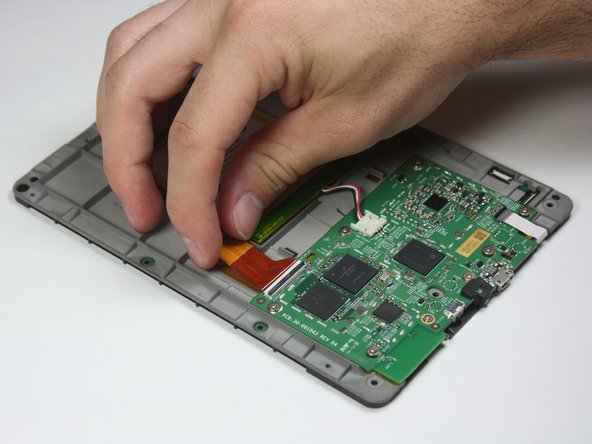
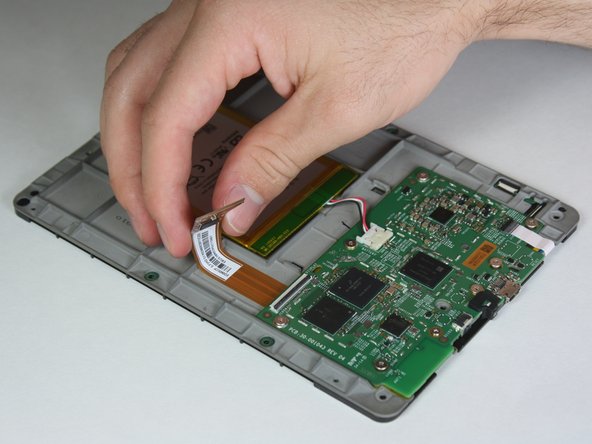
Working evenly along the corners and edges, separate the internal contents from the back panel.
-
-
-
Bu adım çevrilmemiş. Çevrilmesine yardım edin
-
Flip the screen over to face the motherboard and battery pack.
-
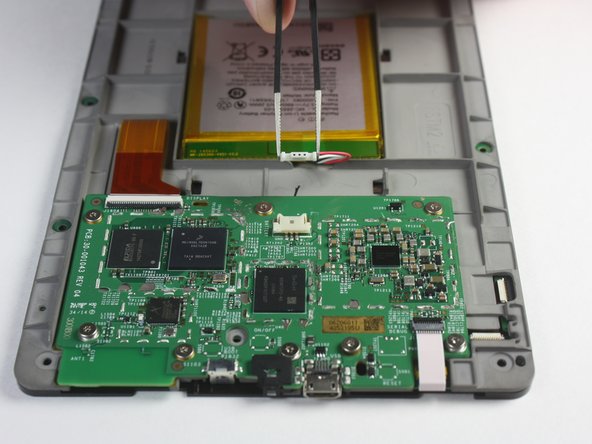
Use the blunted precision tweezers to gently unclip and detach the cable connecting the battery pack and motherboard.
-
-
Bu adım çevrilmemiş. Çevrilmesine yardım edin
-
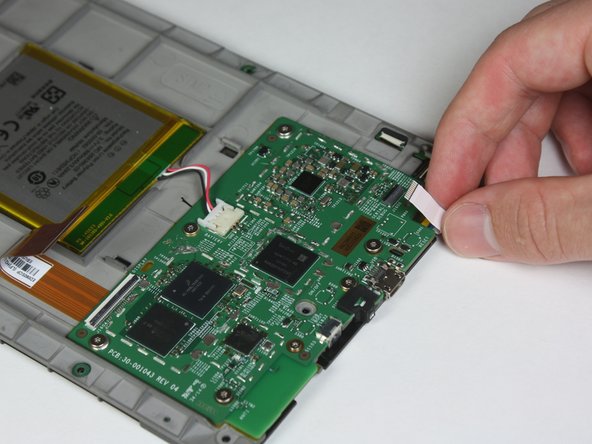
Use the tip of the spudger to flip up the small retaining flap on the copper colored zero insertion force (ZIF) connector.
-
Pull the cable from the connector.
-
-
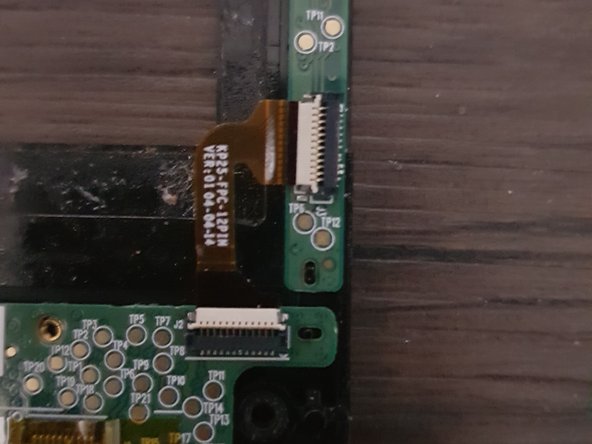
Bu adım çevrilmemiş. Çevrilmesine yardım edin
-
Similar to the previous step, flip up the retaining flap on the white cable connector.
-
Pull the white cable from the connection.
-
-
Bu adım çevrilmemiş. Çevrilmesine yardım edin
-
Disconnect the touch digitiser bridge cable by using your Spudger to lift up the white tabs on both connectors.
-
Use tweezers to pull out the cable.
-
The touch digitiser bridge cable is the one connecting between these two connectors.
-
-
Bu adım çevrilmemiş. Çevrilmesine yardım edin
-
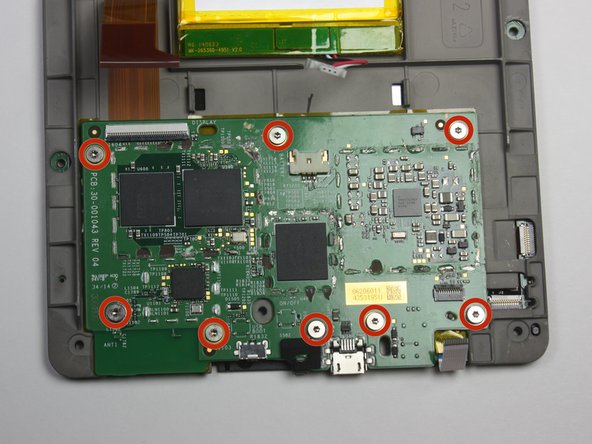
Use the T5 Torx screwdriver to remove the eight 3.0 mm Phillips Head screws.
-


İptal et: Bu kılavuzu tamamlamadım.
4 farklı kişi bu kılavuzu tamamladı.
Ekip

Cal Poly, Team 6-28, Amido Winter 2015 Cal Poly, Team 6-28, Amido Winter 2015 üyesi
CPSU-AMIDO-W15S6G28
4 Üyeler
18 adet Kılavuz yazıldı
3 Yorum
This doesn’t look like my 7th generation. Close but not quite the same. Does the motherboard have to be removed to replace the screen?
yes this is Def not the same as my 7th gen but it's an 8 inch so maybe that's the difference.. all I see is 4 screws holding down the motherboard n I've removed them but still can't get the board loose.. it's like one side of it is held down under these plastic tabs that don't move..