Ana içeriğe geç

Kindle Fire 1st Generation Motherboard Replacement

Neye ihtiyacın var

  1. Kindle Fire 1st Generation Motherboard Replacement, Removing The Back Cover: adım 1, 2 resimden 1. Kindle Fire 1st Generation Motherboard Replacement, Removing The Back Cover: adım 1, 2 resimden 2.
    • May need to use something to pry it open such as a screwdriver.

    • After you pop some of the little clips inside, you can use your fingers to remove it completely.

  2. Kindle Fire 1st Generation Motherboard Replacement, Locating Part Number: adım 2, 3 resimden 1. Kindle Fire 1st Generation Motherboard Replacement, Locating Part Number: adım 2, 3 resimden 2. Kindle Fire 1st Generation Motherboard Replacement, Locating Part Number: adım 2, 3 resimden 3.
    • The first photo shows two red circles over the screw that will need to be removed first.

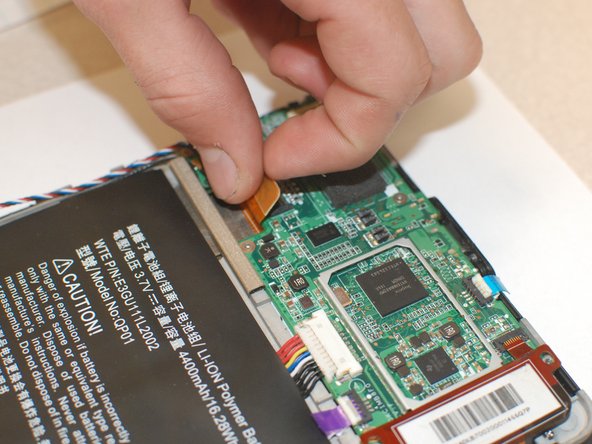
    • After lifting the tab as shown in the third photo you will need the part number located below bar code.

  3. Kindle Fire 1st Generation Motherboard Replacement, Remove All Tabs: adım 3, 1 resimden 1.
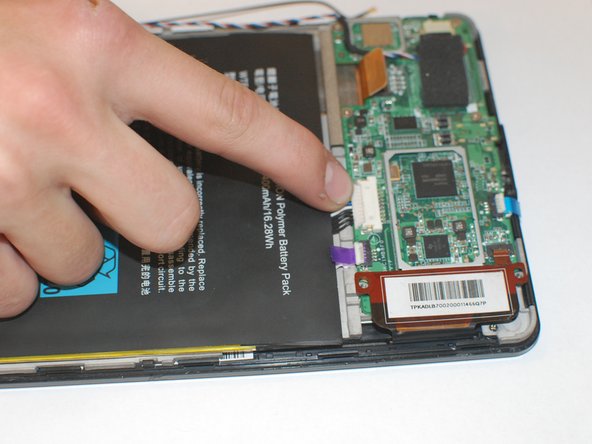
    • Next you will need remove all of the little white sliders that hold tabs down. if your fingernails are any shorter than mine you may need to use something for assistance.

  4. Kindle Fire 1st Generation Motherboard Replacement, Remove All Wires: adım 4, 3 resimden 1. Kindle Fire 1st Generation Motherboard Replacement, Remove All Wires: adım 4, 3 resimden 2. Kindle Fire 1st Generation Motherboard Replacement, Remove All Wires: adım 4, 3 resimden 3.
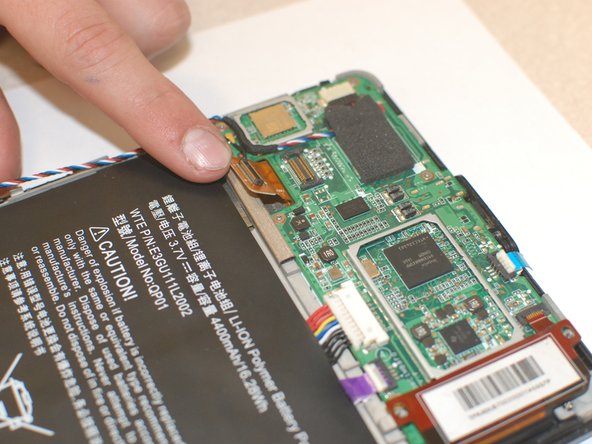
    • Remove all of the wires that trace to the mother board.

    • Two speaker wires

    • Wire for battery

  5. Kindle Fire 1st Generation Motherboard Replacement, Removing The Last Few Pieces: adım 5, 3 resimden 1. Kindle Fire 1st Generation Motherboard Replacement, Removing The Last Few Pieces: adım 5, 3 resimden 2. Kindle Fire 1st Generation Motherboard Replacement, Removing The Last Few Pieces: adım 5, 3 resimden 3.
    • Using your fillips screwdriver, remove the screws that have red circles around them.

    • The screws that have blue circles around them should already be removed at this point but there are two remaining screws under that tab that also need to be removed.

    • In addition, use your fingers to remove the tab that has a purple square around it.

  6. Kindle Fire 1st Generation Motherboard Replacement, Pull The Mother Board Out: adım 6, 1 resimden 1.
    • Pull the motherboard out and order the part.

Sonuç

To reassemble your device, follow these instructions in reverse order.

Reed

Üyelik tarihi: 03/06/18

133 İtibar

1 Kılavuz yazıldı

Ekip

Vegas Room H9 Vegas Room H9 üyesi

Community

13 Üyeler

17 adet Kılavuz yazıldı

0 Yorum

Yorum Ekle

İstatistikleri Görüntüle:

Son 24 Saat: 0

Son 7 gün: 3

Son 30 gün: 9

Her zaman: 365