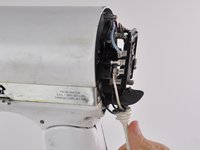
Ana içeriğe geç

KitchenAid Classic Mixer K45SSWH Gasket Replacement

Neye ihtiyacın var

  1. KitchenAid Classic Mixer K45SSWH Gasket Replacement, Motor Housing Cover: adım 1, 2 resimden 1. KitchenAid Classic Mixer K45SSWH Gasket Replacement, Motor Housing Cover: adım 1, 2 resimden 2.
    • Using a spudger, gently pry off the aluminum drip ring.

  2. KitchenAid Classic Mixer K45SSWH Gasket Replacement: adım 2, 1 resimden 1.
    • Using a 4 mm pin punch and hammer, hammer the pin until it is dislodged from the planetary gear cover.

  3. KitchenAid Classic Mixer K45SSWH Gasket Replacement: adım 3, 2 resimden 1. KitchenAid Classic Mixer K45SSWH Gasket Replacement: adım 3, 2 resimden 2.
    • Using a spudger, pry the planetary gear cover from the mixer shaft.

  4. KitchenAid Classic Mixer K45SSWH Gasket Replacement: adım 4, 1 resimden 1.
    • Using a flathead screwdriver, remove the five 28 mm front motor housing screws.

    • Using the same flathead screwdriver, remove the two 28 mm locking screws.

    • One of the locking screws contains a safety locking mechanism. Do not interchange these screws with the front motor housing screws.

  5. KitchenAid Classic Mixer K45SSWH Gasket Replacement: adım 5, 1 resimden 1.
    • Turn your device around. Using the same flathead screwdriver, remove the two 28 mm rear locking screws.

    • One of the rear motor housing screws contains a safety locking mechanism. Do not interchange these screws with the front motor housing screws.

  6. KitchenAid Classic Mixer K45SSWH Gasket Replacement: adım 6, 2 resimden 1. KitchenAid Classic Mixer K45SSWH Gasket Replacement: adım 6, 2 resimden 2.
    • Using a Phillips #2 screwdriver, remove the 10 mm screw from top of back cover.

    • The rear cover is now completely free from the mixer.

  7. KitchenAid Classic Mixer K45SSWH Gasket Replacement: adım 7, 2 resimden 1. KitchenAid Classic Mixer K45SSWH Gasket Replacement: adım 7, 2 resimden 2.
    • Carefully pull the power cord from the notch in back of the mixer.

    • The motor housing cover is now completely free from the base of the mixer.

  8. KitchenAid Classic Mixer K45SSWH Gasket Replacement: adım 8, 1 resimden 1.
    • Lift the motor housing cover from the mixer base.

    • Be sure to place the cover upside-down to prevent grease from leaking out.

  9. KitchenAid Classic Mixer K45SSWH Gasket Replacement, Gasket: adım 9, 2 resimden 1. KitchenAid Classic Mixer K45SSWH Gasket Replacement, Gasket: adım 9, 2 resimden 2.
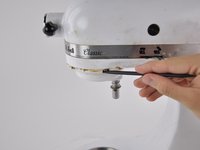
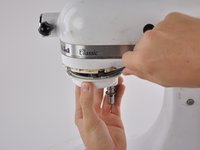
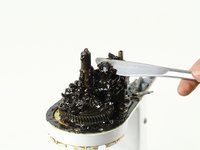
    • Use a butter knife or putty knife to remove grease from around the gasket.

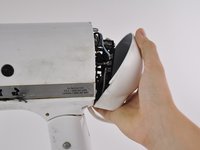
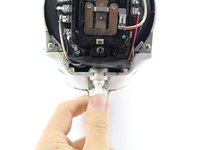
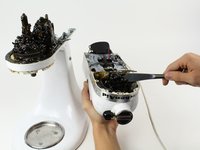
    • Place grease in motor housing cover.

  10. KitchenAid Classic Mixer K45SSWH Gasket Replacement: adım 10, 1 resimden 1.
    • Lift the gasket up with your hands or a spuger and remove it.

Sonuç

To reassemble your device, follow these instructions in reverse order.

7 farklı kişi bu kılavuzu tamamladı.

Joey Gavin

Üyelik tarihi: 10/13/14

244 İtibar

1 Kılavuz yazıldı

Ekip

Cal Poly, Team 14-28, Maness Fall 2014 Cal Poly, Team 14-28, Maness Fall 2014 üyesi

CPSU-MANESS-F14S14G28

4 Üyeler

22 adet Kılavuz yazıldı

2 Yorum

I got all the way to the last step of replacing the pin when i notice the mixer seemed to lock there in place and not move. What did i do wrong?

Dawn dawn6463@yahoo.com

Dawn Bennett - Yanıt

Hi there - There is a gasket around the engine part that you can see in step 7. Mine tore when I removed it. Is that a bad thing? I put the machine back together and it seems to work.

RES - Yanıt

Yorum Ekle

İstatistikleri Görüntüle:

Son 24 Saat: 3

Son 7 gün: 30

Son 30 gün: 115

Her zaman: 9,013