Giriş
This guide is still a WIP. The Arduino + NeoPixels are not compatible with Klipper as is. Instead Pawel Drylenko has developed a script that runs on the Pi. This guide is missing the wiring diagrams and setup files for the NeoPixels as well as the custom Mainsail theme from Ben Levi. This guide will be fully completed within the next few days.
There are a number of methods to install Klipper. After a number of botched installs I found this method to be the most consistent and easiest.
You can use virtually any RPI model but it’s recommended to use Raspberry Pi 4. You’ll need at least a Class-10 8gb SD card. If a UHS(Ultra High Speed) is available, you’ll want at least a UHS-1.
For my setup I’m using a Raspberry Pi 4 8GB and a SanDisk 64GB USB3.1 Flash Drive.
I’m using a Raspberry Pi4 8GB because I had a spare one laying around and I wanted to be able to connect to 5G wifi.
I’ve also chosen to use a flash drive instead of a SD card because the date transfer rate is 3-4x faster.
I’m powering the RPI with a Raspberry Pi Foundation approved power adapter
Videoya Genel Bakış
-
-
Download and extract the latest version of Mainsail from their Github
-
Open the Raspberry Pi Imager
-
Select Operating System > Use custom > Select the Mainsail OS you downloaded.
-
Select Storage > Select your SD.
-
Bring up the Advanced Settings menu by pressing "Ctrl + Shift + X".
-
Here you can setup your WiFi, locale, enable SSH and numerous other options.
-
Write > Yes to confirm
-
After imaging is complete the SD is automatically ejected. Insert it into the RPI and power it on.
-
-
-
With the Raspberry Pi connected to the Duet 2 WiFi via USB, power on the RPI and SSH into the Pi.
-
You can find the IP address of the Pi by looking at the connected client list in your router or by opening cmd.exe on your PC and running
-
ping mainsailos.local -4
-
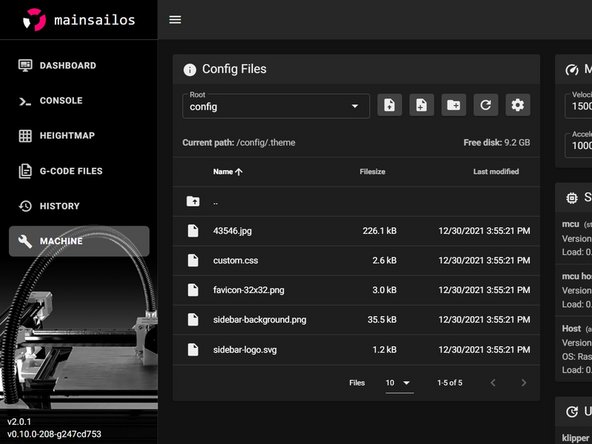
In a webpage enter http://mainsailos.local or your printers IP address
-
Navigate to the Machine tab on the left.
-
Select Upgrade to update the RPI image and Update to install updates for Klipper, Mainsail and Moonraker. Once the updates are complete reboot the RPI
-
-
-
With the board powered off place a jumper on the erase pins.
-
Connect the USB cable from the Duet 2 WiFi to a 5v power source(your PCs USB Port).
-
Once the diag light comes on remove the jumper
-
Any firmware saved to the Duet has been erased.
-
-
-
Connect the Duet 2 WiFi to the Pi with a USB cable. Power on the Pi and SSH into it.
-
cd klipper
-
make clean
-
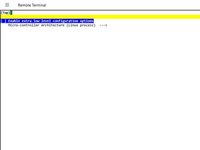
make menuconfig
-
Micro-Controller > SAM3/SAM4 (Due and Duet)
-
Processor > SAM4e8e (Duet WiFi/Eth)
-
Communication Interface > USB
-
Press the escape key on your keyboard and enter Y to save the config
-
-
-
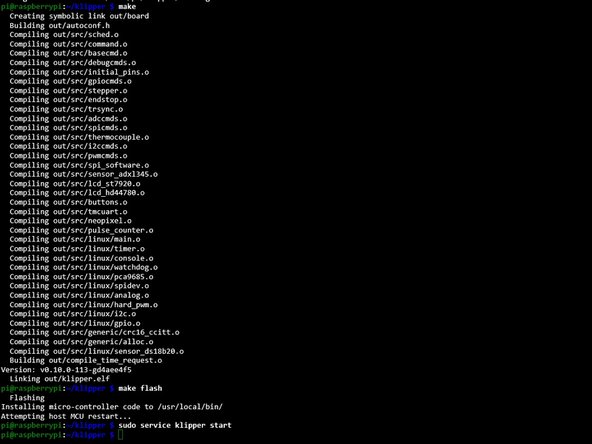
Enter make
-
Stop the Klipper service.
-
sudo service klipper stop
-
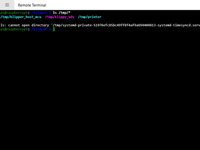
Get the Duet's serial ID # and copy it down.
-
ls /dev/serial/by-id/*
-
Enter "make flash FLASH_DEVICE=" and paste your serial after the =
-
Enter make "flash FLASH_DEVICE=" and paste your serial your new serial after the =
-
-
-
-
Make sure you're in the klipper directory:
-
cd ~/klipper/
-
Enter the following commands:
-
sudo cp ./scripts/klipper-mcu.service /etc/systemd/system/
-
sudo systemctl enable klipper-mcu.service
-
make clean
-
make menuconfig
-
-
-
Micro-Controller Architecture > Linux Process. Press esc than Y
-
make
-
make flash
-
sudo service klipper start
-
Verify klipper_host_mcu is in the tmp directory with ls /tmp/*
-
Add the pi to the TTY group
-
sudo usermod -a -G tty pi
-
sudo reboot -h now
-
-
-
Next we will go to a Web browser to the Pi's IP address. You will see an error for "Unable to open config file /home/pi/klipper_config/printer.cfg"
-
Download the printer.cfg file from github and upload it to the config directory
-
Open your newly created "printer.cfg". Scroll down to line 169. Make sure you update the config with your serial ID you got from "ls /dev/serial/by-id/*"
-
Double check the mcu rpi serial ID in line 181 maches "ls /tmp/*"
-
Click SAVE and restart the printer
-
-
-
If you use a separate 5v PSU for PS_ON You'll need to add the following lines
-
[output_pin psupower] pin: PD15
-
[gcode_macro M80] gcode: SET_PIN PIN=psupower VALUE=1
-
[gcode_macro M81] gcode: SET_PIN PIN=psupower VALUE=0
-
-
-
-
SSH into the RPI.
-
sudo nano /boot/config.txt
-
At the bottom of the config file enter:
-
dtoverlay=pi3-miniuart-bt
-
Press Ctrl+X > Y to save > Enter to accept
-
-
-
We need to disable the serial console
-
sudo nano /boot/cmdline.txt
-
Remove the following string
-
console=serial0,115200
-
Press Ctrl+X > Y to save > Enter to accept
-
-
-
Disable serial console
-
Sudo raspi-config
-
3 Interface Options > P6 Serial Port > No > Yes
-
Yes to reboot the RPI
-
Make sure you change the baud rate on the paneldue to 115200
-
There's also a number of configs that need to be added to your moonraker.cfg. Those details can be found here.
-
-
-
Download the file and extract.
-
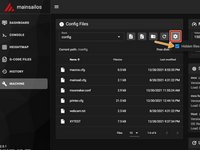
Under "machine" menu, click on the Gear icon and select the checkbox for "show hidden files".
-
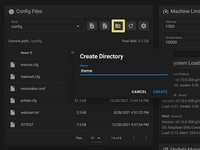
Select "Create Directory".
-
In the name field enter “.theme” and select CREATE.
-
it has to be named as seen in the screenshot.
-
Select the newly created ".theme" folder. Upload all the files from the zip archive into .theme folder.
-
hit Ctrl+F5 and Enjoy.
-


I wasn’t paid to write these guides. Ben asked me to do it as a favor to him. Considering all that he’s done for our community I felt it was the least I could do. To be honest even though it took about 2 months to build and document, I had a lot of fun doing it. It forced me to write guides in a manner that was easy for everyone to understand and cleanup my Github so I could share any files that were used that aren’t part of the original download. You’re not obligated but if you would like, feel free to donate.
I wasn’t paid to write these guides. Ben asked me to do it as a favor to him. Considering all that he’s done for our community I felt it was the least I could do. To be honest even though it took about 2 months to build and document, I had a lot of fun doing it. It forced me to write guides in a manner that was easy for everyone to understand and cleanup my Github so I could share any files that were used that aren’t part of the original download. You’re not obligated but if you would like, feel free to donate.
İptal et: Bu kılavuzu tamamlamadım.
4 farklı kişi bu kılavuzu tamamladı.
7Kılavuz Yorumları
Hello. I get this error: ls: cannot access '/dev/serial/by-id/*': No such file or directory
I tried to erase the board, i tried three different usb cables, i tried everything i could think of
Do you know a solution for this?
I use a Rpi 4 and a duet wifi board.
Thanks!
Did you use the Mainsail image from step 1?
Hi David,
I was wondering if you can lead me to the right track .
I am completely new to mainsail/klipper.
i think i set up all that i should do but when i want to load a file it comes with an error message :
20:28:18
Unable to open file
when i enter this error in google it comes a lot of times with make sure you got the [virtual_sdcard] right.
I got the virtual card set as path: /home/pi/sdcard
in terminal: pi@Mainsail:~ $ ls
crowsnest gcode_files klipper klipper_config klipper_logs klippy-env mainsail moonraker moonraker-env moonraker-timelapse pi printer_data sonar
pi@Mainsail:~/pi $ ls
sdcard
so the directories are there.
it might be something else to look for but I am a bit lost in the solutions found on the world wide web.
i was used to use cura and prusa slicer and just send it to octoprint.
it might be that i have to use one of the macro's start print and or end print, just don't know how to use them at the moment.
Can you please get me back on the right track.
Regards,
Ronald
"[virtual_sdcard]" needs to be defined in printer.cfg like this:
[virtual_sdcard]
path: ~/gcode_files
If you continue to have issues please post your issues on the BLV Facebook page. I just updated my printer to the latest version of mainsail and I didn't receive any errors.
Hi David,
I have solved my problem.
It needed to be changed in the mainsail.cfg and not in printer.cfg
kind regards,
Ronald