Bu sürüm, hatalı düzenlemeler içerebilir. En son doğrulanmış bellek kopyası dönün.
Neye ihtiyacın var
-
Bu adım çevrilmemiş. Çevrilmesine yardım edin
-
Unsnap the six buttons holding the storage basket under the seat.
-
-
Bu adım çevrilmemiş. Çevrilmesine yardım edin
-
Unsnap the “Child Tray” by pulling outwards on the plastic connectors on either side of the stroller. As you pull, lift upwards to completely remove the tray from its connection to the stroller’s frame.
-
-
Bu adım çevrilmemiş. Çevrilmesine yardım edin
-
Remove the "Parent Tray" by pulling outwards on the plastic connectors on either side of the stroller. Lift straight up to remove completely.
-
-
Bu adım çevrilmemiş. Çevrilmesine yardım edin
-
Unscrew the three, 14mm Phillips #2 screws on the outer frame of the stroller and repeat for the opposite side.
-
Remove the plastic washers that come off with the screws.
-
-
-
Bu adım çevrilmemiş. Çevrilmesine yardım edin
-
Unscrew the two, 14mm Phillips #2 screws on either side of the outside frame near the foot rest.
-
-
Bu adım çevrilmemiş. Çevrilmesine yardım edin
-
Unscrew the two, 14mm Phillips #2 on the underside of the seat and repeat for the opposite side of the stroller.
-
-
Bu adım çevrilmemiş. Çevrilmesine yardım edin
-
Unscrew 14mm Phillips #2 screw on the underside of the stroller and repeat this process for the opposite side.
-
-
Bu adım çevrilmemiş. Çevrilmesine yardım edin
-
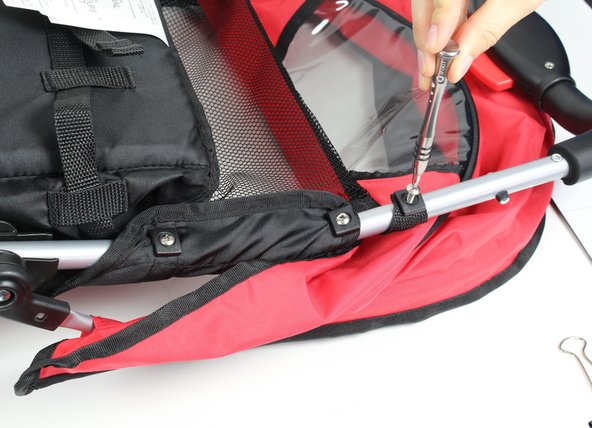
Pull the cover down the metal frame to reveal a 14mm Phillips #2 screw on either side of the inside frame.
-
-
Bu adım çevrilmemiş. Çevrilmesine yardım edin
-
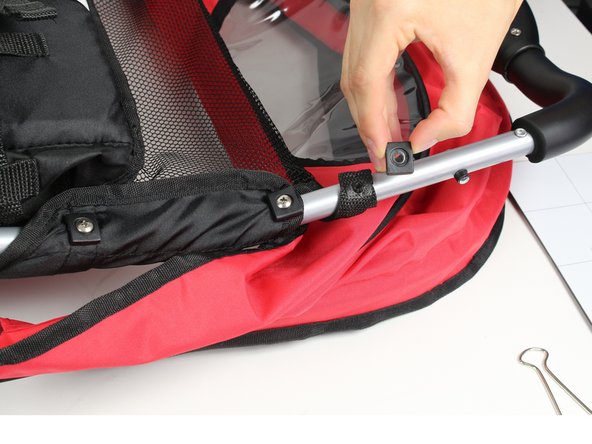
Unscrew the 14mm Phillips #2 screws located under the cover on either side of the inside frame.
-
-
Bu adım çevrilmemiş. Çevrilmesine yardım edin
-
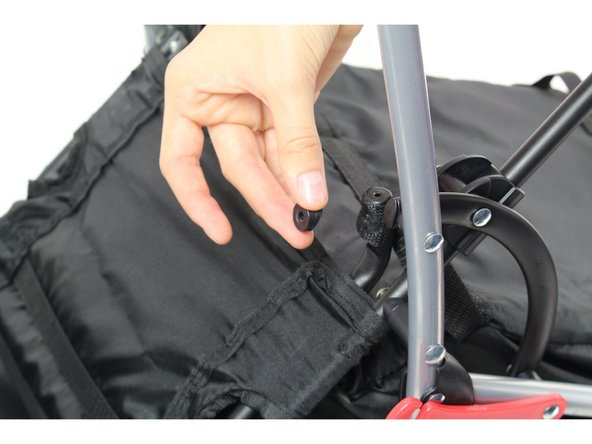
Using the spudger, pop out the small, white ball that's on the underside of the plastic part of the frame. Repeat this process for the opposite side.
-
-
Bu adım çevrilmemiş. Çevrilmesine yardım edin
-
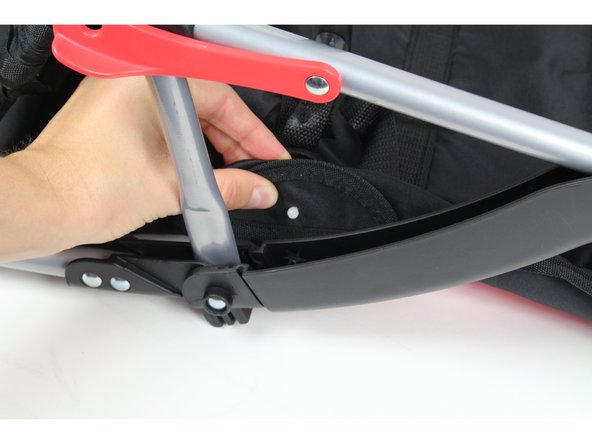
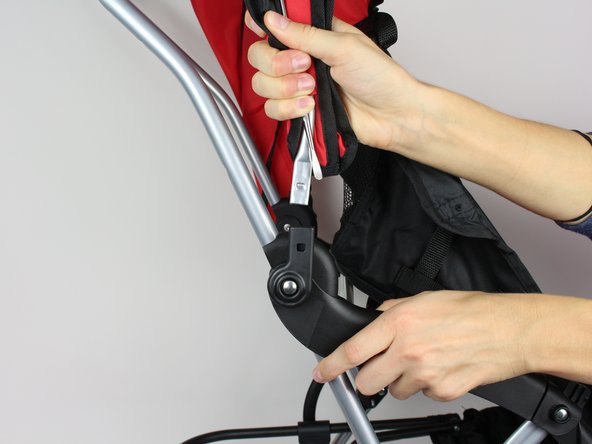
Place the metal spudger between the plastic connector and the metal frame of the sun shade.
-
Use the spudger to pry outwards on the plastic while simultaneously pulling straight up on the metal frame of the sun shade.
-
Repeat this process for the opposite side to completely remove the seat.
-


Ekip

Cal Poly, Team 11-1, Forte Fall 2015 Cal Poly, Team 11-1, Forte Fall 2015 üyesi
CPSU-FORTE-F15S11G1
4 Üyeler
3 adet Kılavuz yazıldı