Ana içeriğe geç

Kyocera DuraForce Pro Headphone Jack Replacement

Neye ihtiyacın var

  1. Kyocera DuraForce Pro Headphone Jack Replacement, Headphone Jack: adım 1, 3 resimden 1. Kyocera DuraForce Pro Headphone Jack Replacement, Headphone Jack: adım 1, 3 resimden 2. Kyocera DuraForce Pro Headphone Jack Replacement, Headphone Jack: adım 1, 3 resimden 3.
    • Flip the phone on its side so that the volume button is facing up.

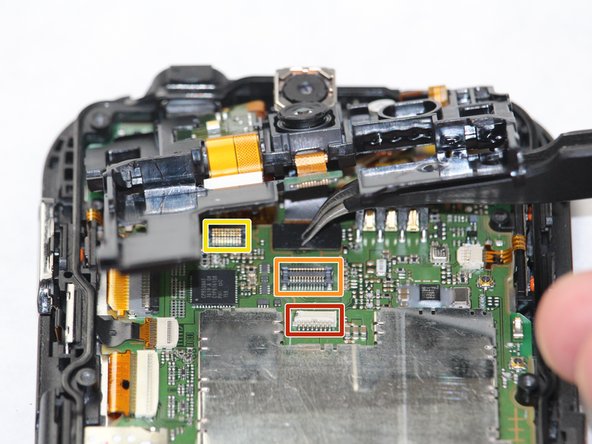
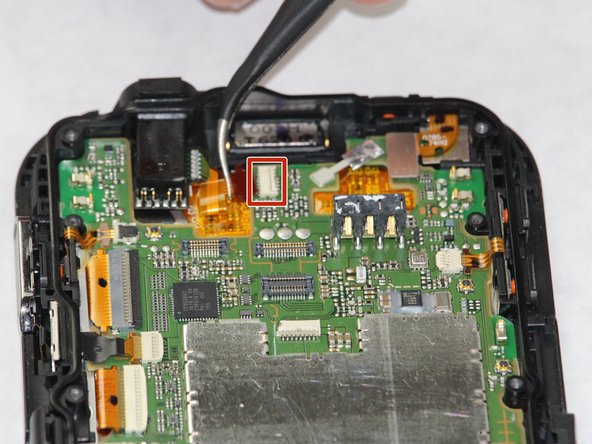
    • Use the plastic opening tool to remove outer case of the phone.

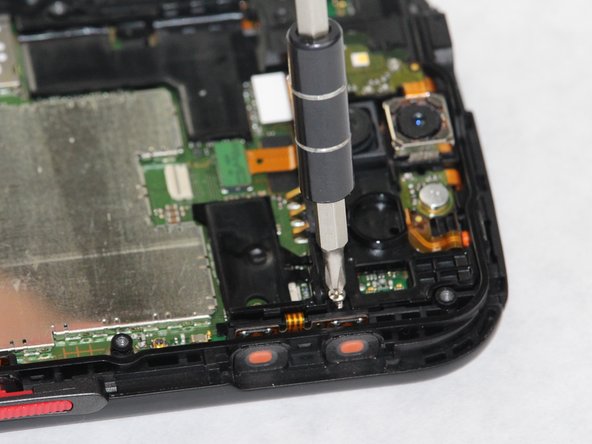
    • Remove the 8 screws around the outer portion of the phone with a JIS #0 screwdriver.

  2. Kyocera DuraForce Pro Headphone Jack Replacement: adım 2, 3 resimden 1. Kyocera DuraForce Pro Headphone Jack Replacement: adım 2, 3 resimden 2. Kyocera DuraForce Pro Headphone Jack Replacement: adım 2, 3 resimden 3.
    • Remove the 2 screws with the same screwdriver bit.

    • Remove battery from the phone with plastic opening tool.

  3. Kyocera DuraForce Pro Headphone Jack Replacement: adım 3, 3 resimden 1. Kyocera DuraForce Pro Headphone Jack Replacement: adım 3, 3 resimden 2. Kyocera DuraForce Pro Headphone Jack Replacement: adım 3, 3 resimden 3.
    • Once the battery pops out, use tweezers to gently pull the ribbon out along with it.

    • Remove the 2 screws along the sides of the mounting bracket, then remove the bracket.

  4. Kyocera DuraForce Pro Headphone Jack Replacement: adım 4, 3 resimden 1. Kyocera DuraForce Pro Headphone Jack Replacement: adım 4, 3 resimden 2. Kyocera DuraForce Pro Headphone Jack Replacement: adım 4, 3 resimden 3.
    • Remove final ribbon cable, lift the latch up, and then slide it down. The audio jack will then slide out.

Sonuç

To reassemble your device, follow these instructions in reverse order.

Bir başkası bu kılavuzu tamamladı.

Dylan Ulbricht

Üyelik tarihi: 10/08/18

735 İtibar

5 adet Kılavuz yazıldı

Ekip

0 Yorum

Yorum Ekle

İstatistikleri Görüntüle:

Son 24 Saat: 0

Son 7 gün: 3

Son 30 gün: 10

Her zaman: 1,298