Ana içeriğe geç

Kyocera Event Motherboard Replacement

Neye ihtiyacın var

  1. Kyocera Event Motherboard Replacement, Battery: adım 1, 3 resimden 1. Kyocera Event Motherboard Replacement, Battery: adım 1, 3 resimden 2. Kyocera Event Motherboard Replacement, Battery: adım 1, 3 resimden 3.
    • Locate the small notch on the bottom right side of the phone.

    • To remove the cover, hook your thumb or fingernail into the slot. Then, gently lift the cover up and off.

    • The back cover may flex slightly as you remove it. This is normal, but avoid applying excessive force.

  2. Kyocera Event Motherboard Replacement: adım 2, 1 resimden 1.
    • Locate the small notch below the battery. You may see a white plastic notch sticking out of this space; if so, grasp that tab to pull the battery out of its compartment. If you do not see a white plastic tab, then place your fingernail in the notch and pull upward to release the battery from its compartment.

    • The plastic prying tool can be used to help remove the battery.

  3. Kyocera Event Motherboard Replacement, Remove the screws.: adım 3, 2 resimden 1. Kyocera Event Motherboard Replacement, Remove the screws.: adım 3, 2 resimden 2.
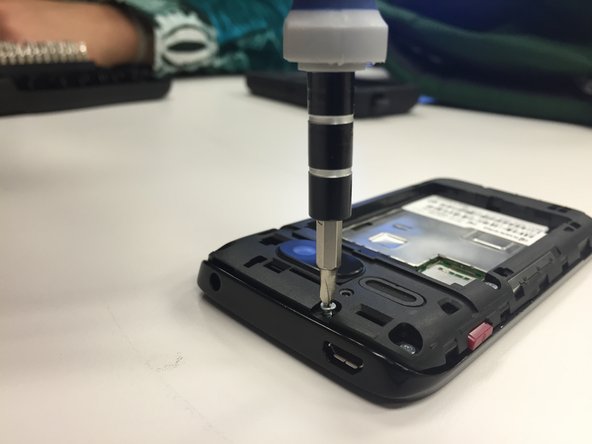
    • Remove seven of the 4.9mm tri-head screws. Keep them in a secure location.

  4. Kyocera Event Motherboard Replacement, Remove the back assembly: adım 4, 3 resimden 1. Kyocera Event Motherboard Replacement, Remove the back assembly: adım 4, 3 resimden 2. Kyocera Event Motherboard Replacement, Remove the back assembly: adım 4, 3 resimden 3.
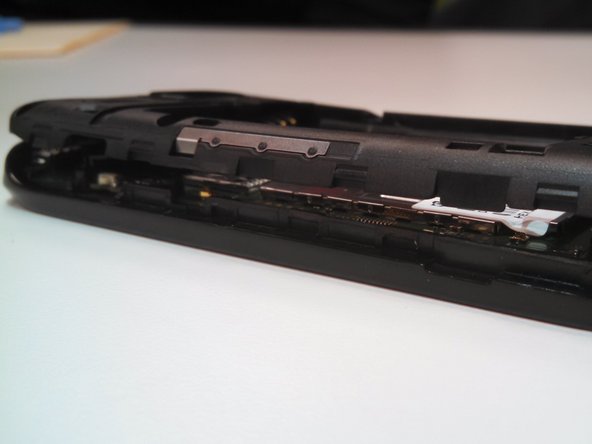
    • Pry the back assembly away from the body on all four sides of the phone.

    • Start prying at the top and work around.

    • Remove the buttons for the volume and power-this will allow for easier disassembly.

    • The back assembly is firmly attached to the body of the phone so removing it will require some force.

  5. Kyocera Event Motherboard Replacement, Motherboard: adım 5, 2 resimden 1. Kyocera Event Motherboard Replacement, Motherboard: adım 5, 2 resimden 2.
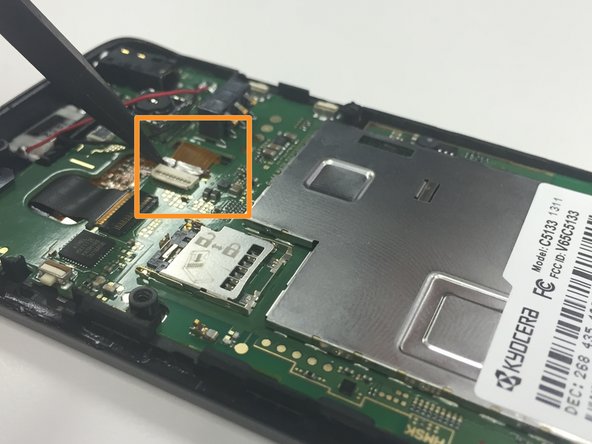
    • Locate the black L-shaped cover at the top center of the phone.

    • Remove the piece, including the attached ribbon, and set it aside.

  6. Kyocera Event Motherboard Replacement, Disconnect Cables: adım 6, 3 resimden 1. Kyocera Event Motherboard Replacement, Disconnect Cables: adım 6, 3 resimden 2. Kyocera Event Motherboard Replacement, Disconnect Cables: adım 6, 3 resimden 3.
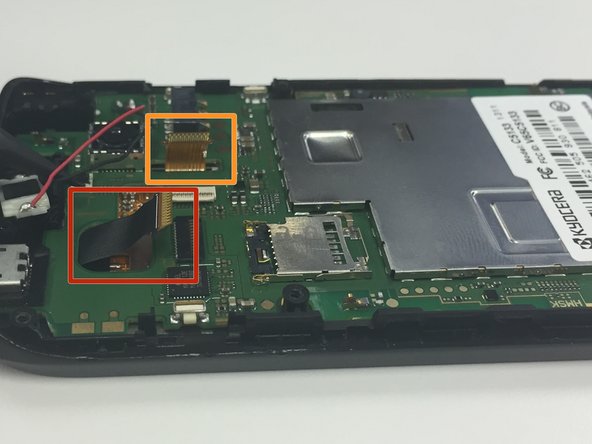
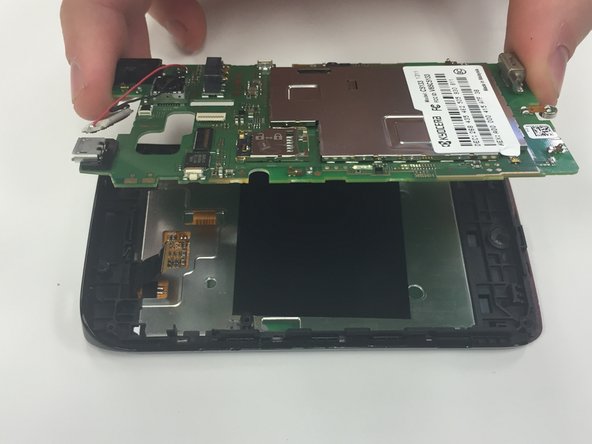
    • Use a spudger to carefully disconnect the black cable.

    • Use the spudger to carefully disconnect the brown cable.

  7. Kyocera Event Motherboard Replacement: adım 7, 2 resimden 1. Kyocera Event Motherboard Replacement: adım 7, 2 resimden 2.
    • Locate the hook at the bottom of the phone. Use the spudger unlatch the hook connecting the motherboard to the front assembly of the phone.

    • Using your fingers, gently grab the motherboard and pull.

  8. Kyocera Event Motherboard Replacement: adım 8, 1 resimden 1.
    • Prior to removing the motherboard, remove the speaker from the top of the device.

  9. Kyocera Event Motherboard Replacement: adım 9, 1 resimden 1.
    • Using fingers, remove the motherboard from its casing.

Sonuç

To reassemble your device, follow these instructions in reverse order.

Sydney

Üyelik tarihi: 02/11/15

19 İtibar

1 Kılavuz yazıldı

Ekip

Ohio State, Team 1-3, Michaels Spring 2015 Ohio State, Team 1-3, Michaels Spring 2015 üyesi

OSU-MICHAELS-S15S1G3

4 Üyeler

2 adet Kılavuz yazıldı

0 Yorum

Yorum Ekle

İstatistikleri Görüntüle:

Son 24 Saat: 0

Son 7 gün: 0

Son 30 gün: 4

Her zaman: 829