Bu sürüm, hatalı düzenlemeler içerebilir. En son doğrulanmış bellek kopyası dönün.
Neye ihtiyacın var
-
Bu adım çevrilmemiş. Çevrilmesine yardım edin
-
Remove the back cover by firmly pressing the triangle and push upwards.
-
Lift the bottom section to remove the cover.
-
-
Bu adım çevrilmemiş. Çevrilmesine yardım edin
-
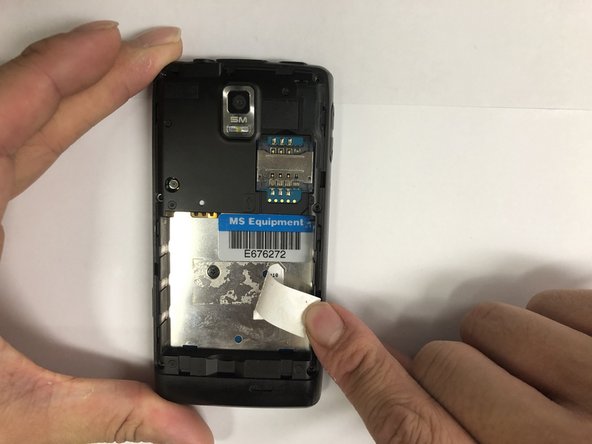
Peel off the sticker with the metal spudger.
-
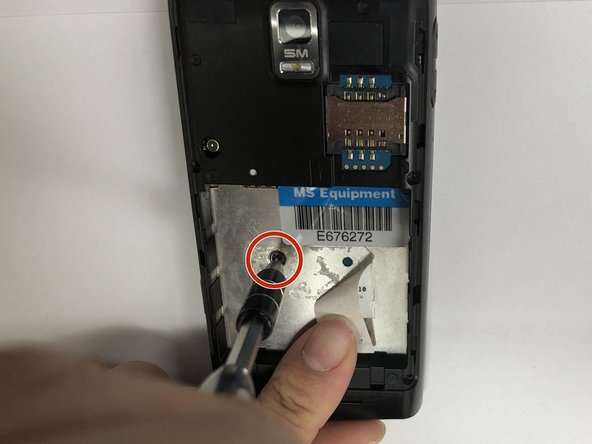
Remove one 1mm PH000 screw.
-
-
-
Bu adım çevrilmemiş. Çevrilmesine yardım edin
-
Pry open all four sides of the back-frame gently, using the metal spudger.
-
-
Bu adım çevrilmemiş. Çevrilmesine yardım edin
-
Pry off the connector using the iFixit opening tool to remove the communication board.
-
-
Bu adım çevrilmemiş. Çevrilmesine yardım edin
-
Pry off the connectors using the iFixit opening tool.
-
Disconnect the antenna using the iFixit opening tool.
-
-
Bu adım çevrilmemiş. Çevrilmesine yardım edin
-
Peel off the tape to expose the hidden screw.
-
Remove one 1mm PH000 screw.
-
-
Bu adım çevrilmemiş. Çevrilmesine yardım edin
-
Pry off the board from the side using the metal spudger tool.
-
Disconnect the antenna.
-


İptal et: Bu kılavuzu tamamlamadım.
Bir başkası bu kılavuzu tamamladı.
Ekip

IUPUI, Team S1-G6, Hovde Fall 2018 IUPUI, Team S1-G6, Hovde Fall 2018 üyesi
IUPUI-HOVDE-F18S1G6
3 Üyeler
6 adet Kılavuz yazıldı