Bu sürüm, hatalı düzenlemeler içerebilir. En son doğrulanmış bellek kopyası dönün.
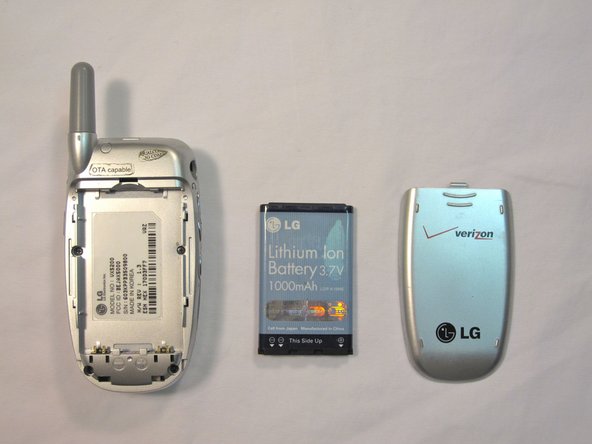
Neye ihtiyacın var
-
Bu adım çevrilmemiş. Çevrilmesine yardım edin
-
Orient the phone as shown.
-
Remove the battery cover by pushing upward with your thumb.
-
-
Bu adım çevrilmemiş. Çevrilmesine yardım edin
-
Place your fingernail at the top of the battery and pry the battery out towards you.
-
-
Bu adım çevrilmemiş. Çevrilmesine yardım edin
-
Orient the phone as shown with the battery already removed.
-
-
-
Bu adım çevrilmemiş. Çevrilmesine yardım edin
-
Remove the 2 plastic plugs located on the side and upper quadrant of the rear body panel by using the push-pin and lifting outwards.
-
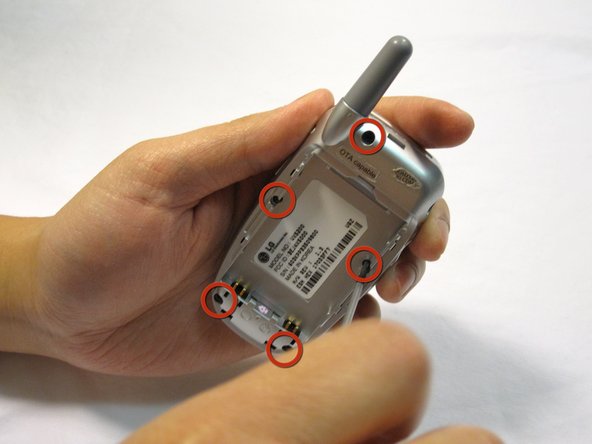
Use a Phillips #00 screwdriver to remove the 5 screws as shown here.
-
-
Bu adım çevrilmemiş. Çevrilmesine yardım edin
-
Place an iPod opener tool in the seam above the antenna.
-
Run the tool around the perimeter of the entire phone.
-
-
Bu adım çevrilmemiş. Çevrilmesine yardım edin
-
Check to see that your device looks like the attached photo.
-
-
Bu adım çevrilmemiş. Çevrilmesine yardım edin
-
Locate the tabs that hold the logic board in place.
-
Pull the outer frame of the phone outwards to release the board from the tabs.
-
-
Bu adım çevrilmemiş. Çevrilmesine yardım edin
-
Locate the copper connection (orange-colored) on the back of the board.
-
Pry the connector free from the board with your fingernail.
-
-
Bu adım çevrilmemiş. Çevrilmesine yardım edin
-
Check to see that your device looks like the image shown.
-


İptal et: Bu kılavuzu tamamlamadım.
2 farklı kişi bu kılavuzu tamamladı.

Ekip

Cal Poly, Team 4-13, Forte Winter 2010 Cal Poly, Team 4-13, Forte Winter 2010 üyesi
CPSU-FORTE-W10S4G13
5 Üyeler
15 adet Kılavuz yazıldı