Bu sürüm, hatalı düzenlemeler içerebilir. En son doğrulanmış bellek kopyası dönün.
Neye ihtiyacın var
-
Bu adım çevrilmemiş. Çevrilmesine yardım edin
-
Insert a plastic opening tool above the AUX jack and slide it around the perimeter to pop the back cover off.
-
-
Bu adım çevrilmemiş. Çevrilmesine yardım edin
-
Remove the twelve 2.5mm Phillips #0 screws from the back of the phone.
-
-
Bu adım çevrilmemiş. Çevrilmesine yardım edin
-
Insert a plastic opening tool underneath the mid-frame and pry upwards until you hear a click.
-
With the plastic opening tool still underneath the mid-frame, work your way around the perimeter until it's free from the smartphone.
-
-
-
Bu adım çevrilmemiş. Çevrilmesine yardım edin
-
Use the flat end of a spudger to disconnect the front and rear cameras from the motherboard.
-
Pull the cameras out to remove them.
-
-
Bu adım çevrilmemiş. Çevrilmesine yardım edin
-
Use the flat end of a spudger to disconnect the battery from the motherboard.
-
-
Bu adım çevrilmemiş. Çevrilmesine yardım edin
-
Insert a plastic opening tool underneath the motherboard and pry upwards to remove it.
-
-
Bu adım çevrilmemiş. Çevrilmesine yardım edin
-
Use a spudger and plastic opening tool to carefully pry up the battery.
-
-
Bu adım çevrilmemiş. Çevrilmesine yardım edin
-
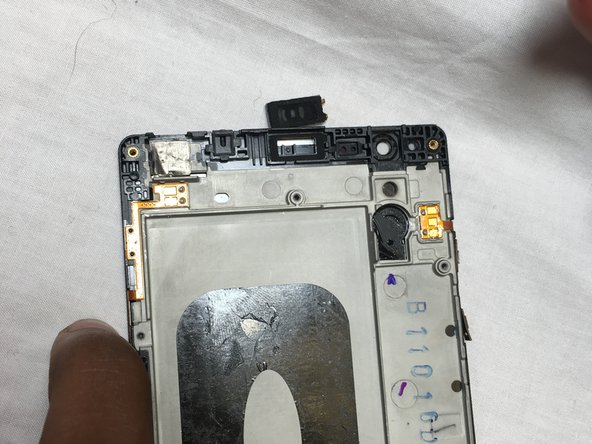
Carefully peal off the glued vibration motor by using the plastic opening tool.
-
-
Bu adım çevrilmemiş. Çevrilmesine yardım edin
-
Using the plastic opening tool, pry off the ear speaker.
-


İptal et: Bu kılavuzu tamamlamadım.
16 farklı kişi bu kılavuzu tamamladı.
Ekip

USF Tampa, Team S3-G6, Nance Spring 2018 USF Tampa, Team S3-G6, Nance Spring 2018 üyesi
USFT-NANCE-S18S3G6
3 Üyeler
12 adet Kılavuz yazıldı
7 Yorum
If you are just replacing the screen, this is wrong. This would help if you are replacing with a “screen in frame”
What is the right way for just the screen?
Where’s the part where you actually remove the screen and add in the new one?
The last step seems to be prying off the ear speaker.
Could you please fix this guide when you get the chance? I might replace the screen on my LG Power X [K210]. Thanks.