Bu sürüm, hatalı düzenlemeler içerebilir. En son doğrulanmış bellek kopyası dönün.
Neye ihtiyacın var
-
Bu adım çevrilmemiş. Çevrilmesine yardım edin
-
At the top of the laptop you will see two switches, like in image one and two.
-
Pull the switches outwards with your thumb, towards the unlocked lock.
-
-
Bu adım çevrilmemiş. Çevrilmesine yardım edin
-
Once both switches are pulled, the battery should pop out.
-
-
-
Bu adım çevrilmemiş. Çevrilmesine yardım edin
-
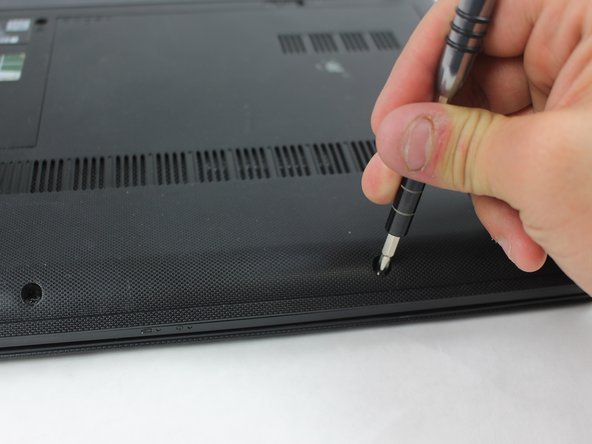
Use a JIS #1 screwdriver to remove the two 7 mm screws.
-
-
Bu adım çevrilmemiş. Çevrilmesine yardım edin
-
Remove the back panel by sliding it away from the battery.
-
-
Bu adım çevrilmemiş. Çevrilmesine yardım edin
-
Use a JIS #1 screwdriver to remove the three 7 mm screws.
-
-
Bu adım çevrilmemiş. Çevrilmesine yardım edin
-
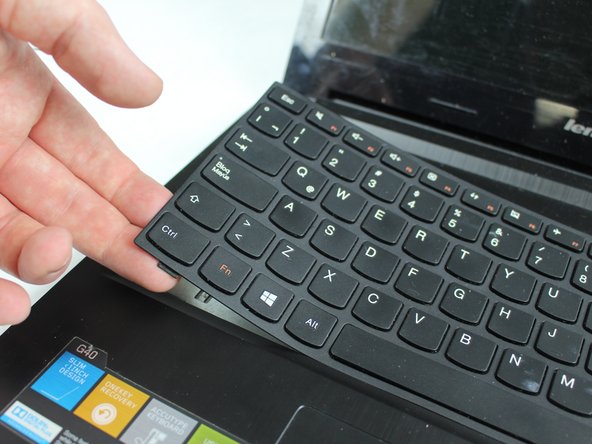
Wedge the plastic opening tool in-between the keyboard and the base of the laptop.
-
Continue using the plastic opening tool to pry around the edge until the keyboard is completely freed form the frame.
-
The keyboard should only be connected by a ribbon on the underside of the keyboard.
-
-
Bu adım çevrilmemiş. Çevrilmesine yardım edin
-
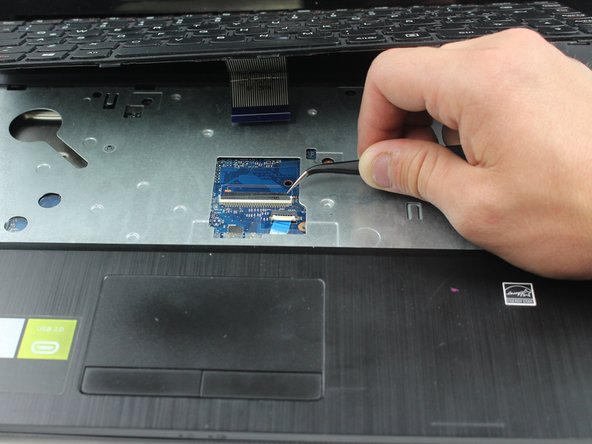
Use the tweezers to lift the black hinge on the ribbon connector.
-
Then pull the ribbon from the connector and remove the keyboard from the laptop.
-


İptal et: Bu kılavuzu tamamlamadım.
2 farklı kişi bu kılavuzu tamamladı.
Ekip

Sam Houston State, Team S16-G4, Nardone Spring 2018 Sam Houston State, Team S16-G4, Nardone Spring 2018 üyesi
SHSU-NARDONE-S18S16G4
5 Üyeler
5 adet Kılavuz yazıldı