Ana içeriğe geç

Lenovo IdeaPad 110-17IKB Hard Disk Drive Replacement

Neye ihtiyacın var

  1. Lenovo IdeaPad 110-17IKB Hard Disk Drive Replacement, Lower Case: adım 1, 1 resimden 1.
    • First, before you do anything, make sure the computer has been turned off and unplugged.

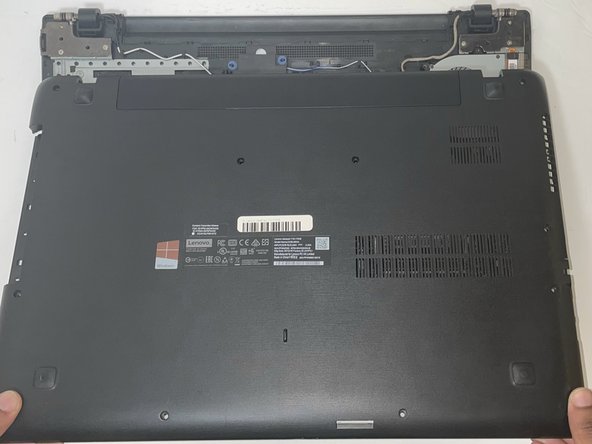
    • Place the the computer bottom facing up. Unscrew the eleven 6 mm screws using a Phillips #0 screwdriver.

  2. Lenovo IdeaPad 110-17IKB Hard Disk Drive Replacement: adım 2, 2 resimden 1. Lenovo IdeaPad 110-17IKB Hard Disk Drive Replacement: adım 2, 2 resimden 2.
    • Use an opening tool to gently disconnect the clips on the side of the back panel.

    • DO NOT try to force open the panel, as this may cause damage to it.

  3. Lenovo IdeaPad 110-17IKB Hard Disk Drive Replacement: adım 3, 2 resimden 1. Lenovo IdeaPad 110-17IKB Hard Disk Drive Replacement: adım 3, 2 resimden 2.
    • Pry out the optical drive opposite of the laptop.

    • Since the screws have already been removed, you will not need to worry about any more screws on the optical drive.

  4. Lenovo IdeaPad 110-17IKB Hard Disk Drive Replacement: adım 4, 3 resimden 1. Lenovo IdeaPad 110-17IKB Hard Disk Drive Replacement: adım 4, 3 resimden 2. Lenovo IdeaPad 110-17IKB Hard Disk Drive Replacement: adım 4, 3 resimden 3.
    • Release the remaining clasp and remove the lower case.

  5. Lenovo IdeaPad 110-17IKB Hard Disk Drive Replacement, Hard Disk Drive (HDD): adım 5, 1 resimden 1.
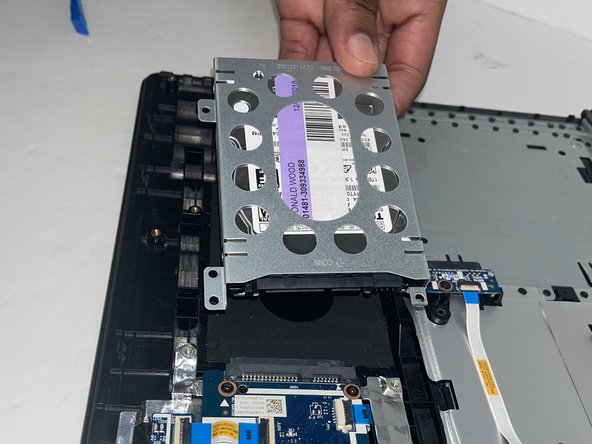
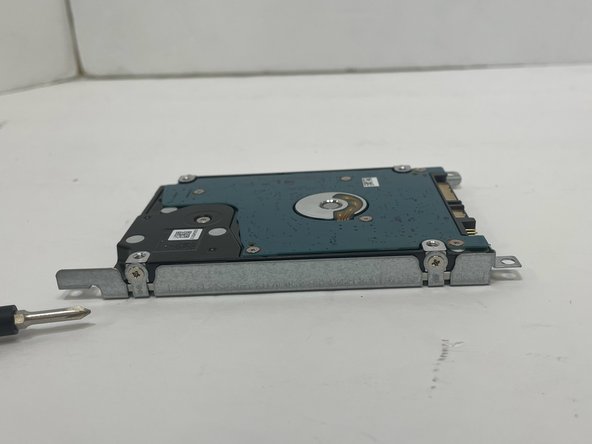
    • Use a Phillips #1 screwdriver to unscrew the four 5 mm screws that are holding the hard drive in place.

  6. Lenovo IdeaPad 110-17IKB Hard Disk Drive Replacement: adım 6, 2 resimden 1. Lenovo IdeaPad 110-17IKB Hard Disk Drive Replacement: adım 6, 2 resimden 2.
    • Do not lift the hard drive straight up; this might break the connection port.

    • Softly slide the hard drive away from the port.

  7. Lenovo IdeaPad 110-17IKB Hard Disk Drive Replacement: adım 7, 2 resimden 1. Lenovo IdeaPad 110-17IKB Hard Disk Drive Replacement: adım 7, 2 resimden 2.
    • Use a Phillips #1 screwdriver remove the 2 screws from both sides of the hard drive (total of 4 screws).

  8. Lenovo IdeaPad 110-17IKB Hard Disk Drive Replacement: adım 8, 1 resimden 1.
    • Remove the hard drive from the housing mount.

Sonuç

To reassemble your device, follow these instructions in reverse order.

Cameron Mounce

Üyelik tarihi: 09/05/23

668 İtibar

5 adet Kılavuz yazıldı

Ekip

Gateway, Team 1-3, Pee Fall 2023 Gateway, Team 1-3, Pee Fall 2023 üyesi

GCC-PEE-F23S1G3

4 Üyeler

7 adet Kılavuz yazıldı

0 Yorum

Yorum Ekle

İstatistikleri Görüntüle:

Son 24 Saat: 1

Son 7 gün: 2

Son 30 gün: 13

Her zaman: 119