Ana içeriğe geç

Lenovo IdeaPad Y580-2099 Fan Replacement

Neye ihtiyacın var

  1. Lenovo IdeaPad Y580-2099 Fan Replacement, Battery: adım 1, 1 resimden 1.
    • Slide out both locks for the battery, located on the back of the device.

  2. Lenovo IdeaPad Y580-2099 Fan Replacement: adım 2, 2 resimden 1. Lenovo IdeaPad Y580-2099 Fan Replacement: adım 2, 2 resimden 2.
    • Remove the battery.

  3. Lenovo IdeaPad Y580-2099 Fan Replacement, Keyboard: adım 3, 2 resimden 1. Lenovo IdeaPad Y580-2099 Fan Replacement, Keyboard: adım 3, 2 resimden 2.
    • Unscrew the 2 screws on the bottom of the device.

    • Slide the back panel out.

  4. Lenovo IdeaPad Y580-2099 Fan Replacement: adım 4, 1 resimden 1.
    • Unscrew the 3 "keyboard" detected screws.

  5. Lenovo IdeaPad Y580-2099 Fan Replacement: adım 5, 2 resimden 1. Lenovo IdeaPad Y580-2099 Fan Replacement: adım 5, 2 resimden 2.
    • Flip the laptop over and open up.

    • Then pry up the whole keyboard using the spudger.

    • Make sure to use a plastic spudger. You could damage the device using anything else.

    • Make sure not to take the frame that goes around the keys off. This part is not removable.

  6. Lenovo IdeaPad Y580-2099 Fan Replacement, Motherboard: adım 6, 3 resimden 1. Lenovo IdeaPad Y580-2099 Fan Replacement, Motherboard: adım 6, 3 resimden 2. Lenovo IdeaPad Y580-2099 Fan Replacement, Motherboard: adım 6, 3 resimden 3.
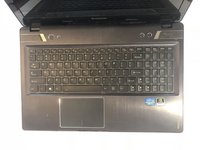
    • Flip laptop back over and unscrew the disc drive screw.

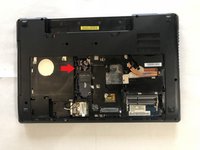
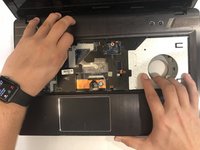
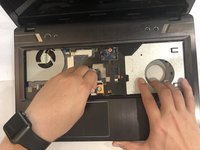
    • Remove the disc drive.

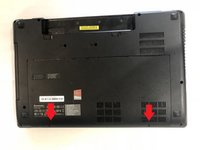
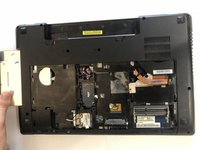
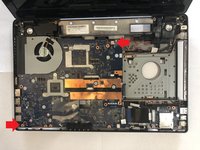
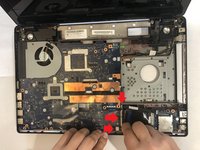
    • Unscrew all of the screws on the back of the device.

  7. Lenovo IdeaPad Y580-2099 Fan Replacement: adım 7, 3 resimden 1. Lenovo IdeaPad Y580-2099 Fan Replacement: adım 7, 3 resimden 2. Lenovo IdeaPad Y580-2099 Fan Replacement: adım 7, 3 resimden 3.
    • Flip the device over.

    • Unplug the two wires, as shown in the images.

    • Lift up on the keyboard bezel.

    • The bezel should come up easy, if not go back and make sure all screws have been removed.

  8. Lenovo IdeaPad Y580-2099 Fan Replacement: adım 8, 2 resimden 1. Lenovo IdeaPad Y580-2099 Fan Replacement: adım 8, 2 resimden 2.
    • Unscrew the screws on the motherboard.

    • Disconnect the three connectors the two black and one white.

  9. Lenovo IdeaPad Y580-2099 Fan Replacement: adım 9, 1 resimden 1.
    • Carefully lift up the motherboard.

    • Unplug the wires underneath the motherboard.

    • Be careful not to rip the wires underneath the motherboard while lifting it up.

  10. Lenovo IdeaPad Y580-2099 Fan Replacement, Fan: adım 10, 1 resimden 1.
    • Use a Phillips #0 screwdriver to remove the four 6.5 mm screws.

  11. Lenovo IdeaPad Y580-2099 Fan Replacement: adım 11, 1 resimden 1.
    • Unplug the connector circled in red.

    • To minimize the risk of damaging the wires, pull on the connector directly and do not try to disconnect by pulling on the wires.

  12. Lenovo IdeaPad Y580-2099 Fan Replacement: adım 12, 1 resimden 1.
    • Lift the fan assembly clear of the motherboard.

Sonuç

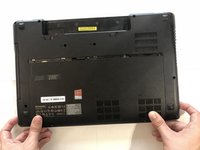
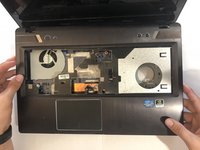
To reassemble your device, follow these instructions in reverse order.

Jeryn Fast

Üyelik tarihi: 04/12/22

421 İtibar

3 adet Kılavuz yazıldı

Ekip

IUPUI, Team 1-1, Beck Spring 2022 IUPUI, Team 1-1, Beck Spring 2022 üyesi

IUPUI-BECK-S22S1G1

3 Üyeler

3 adet Kılavuz yazıldı

0 Yorum

Yorum Ekle

İstatistikleri Görüntüle:

Son 24 Saat: 0

Son 7 gün: 1

Son 30 gün: 5

Her zaman: 237