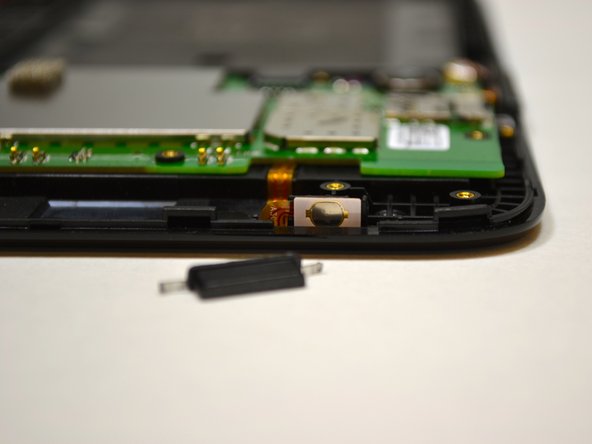
Ana içeriğe geç

Lenovo IdeaTab A1000L Power and Volume Buttons Replacement

Neye ihtiyacın var

  1. Lenovo IdeaTab A1000L Power and Volume Buttons Replacement, Power and Volume Buttons: adım 1, 3 resimden 1. Lenovo IdeaTab A1000L Power and Volume Buttons Replacement, Power and Volume Buttons: adım 1, 3 resimden 2. Lenovo IdeaTab A1000L Power and Volume Buttons Replacement, Power and Volume Buttons: adım 1, 3 resimden 3.
    • Be sure to power off your device before taking it apart.

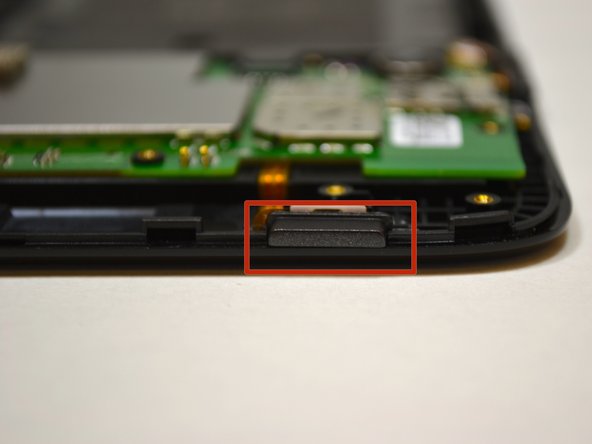
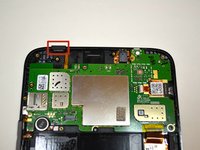
    • Locate the small tab, marked with the lock symbol on the upper right hand of your IdeaTab above the volume control buttons. Use your fingernail to gently loosen this tab.

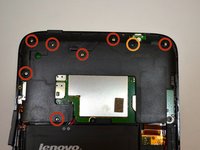
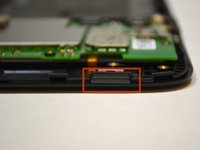
    • Use your Phillips #000 screwdriver and remove the 3.5mm screw and put it aside.

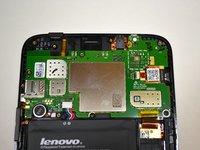
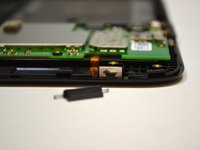
    • Using your blue, plastic opening tool, begin to gently pry the back panel away from the front panel starting by where the screw was.

  2. Lenovo IdeaTab A1000L Power and Volume Buttons Replacement: adım 2, 2 resimden 1. Lenovo IdeaTab A1000L Power and Volume Buttons Replacement: adım 2, 2 resimden 2.
    • Locate the volume control button on the right hand side of the tablet.

    • Now, gently slide the volume button upward to remove.

  3. Lenovo IdeaTab A1000L Power and Volume Buttons Replacement: adım 3, 3 resimden 1. Lenovo IdeaTab A1000L Power and Volume Buttons Replacement: adım 3, 3 resimden 2. Lenovo IdeaTab A1000L Power and Volume Buttons Replacement: adım 3, 3 resimden 3.
    • Locate the black back plate, above the battery.

    • Using a Phillips #000 screwdriver remove the 7 silver 3.5mm screws from the back plate.

    • Next with the same screwdriver remove the black 4.1mm screw.

    • Gently remove the back plate from the device.

  4. Lenovo IdeaTab A1000L Power and Volume Buttons Replacement: adım 4, 3 resimden 1. Lenovo IdeaTab A1000L Power and Volume Buttons Replacement: adım 4, 3 resimden 2. Lenovo IdeaTab A1000L Power and Volume Buttons Replacement: adım 4, 3 resimden 3.
    • Locate the power button on the top right hand corner of your device.

    • Gently slide the button up to remove.

Sonuç

To reassemble your device, follow these instructions in reverse order.

3 farklı kişi bu kılavuzu tamamladı.

Lauren Pluim

Üyelik tarihi: 04/22/14

428 İtibar

2 adet Kılavuz yazıldı

Ekip

Cal Poly, Team 7-21, Regan Spring 2014 Cal Poly, Team 7-21, Regan Spring 2014 üyesi

CPSU-REGAN-S14S7G21

4 Üyeler

6 adet Kılavuz yazıldı

0 Yorum

Yorum Ekle

İstatistikleri Görüntüle:

Son 24 Saat: 0

Son 7 gün: 0

Son 30 gün: 6

Her zaman: 5,319