Ana içeriğe geç

Lenovo Ideatab A1107 Screen Replacement

Neye ihtiyacın var

  1. Lenovo Ideatab A1107 Screen Replacement, Back Cover: adım 1, 2 resimden 1. Lenovo Ideatab A1107 Screen Replacement, Back Cover: adım 1, 2 resimden 2.
    • Insert a plastic opener in-between the black back panel and the silver body of the tablet.

    • Use the plastic opener to pry the back panel off by moving the plastic opener around the outside edge of the device.

  2. Lenovo Ideatab A1107 Screen Replacement: adım 2, 2 resimden 1. Lenovo Ideatab A1107 Screen Replacement: adım 2, 2 resimden 2.
    • Use a Phillips #000 screwdriver to remove the seventeen 4mm screws.

  3. Lenovo Ideatab A1107 Screen Replacement: adım 3, 1 resimden 1.
    • Lift up and remove the interior casing to expose the inner components.

    • Do not be alarmed if the volume button and lock button fall off when removing the interior casing.

  4. Lenovo Ideatab A1107 Screen Replacement, Battery: adım 4, 1 resimden 1.
    Bu adımda kullanılan alet:
    Tweezers
    $4.99
    Satın Al
    • Use tweezers to remove the tape covering the battery's wiring.

  5. Lenovo Ideatab A1107 Screen Replacement: adım 5, 2 resimden 1. Lenovo Ideatab A1107 Screen Replacement: adım 5, 2 resimden 2.
    • Do not puncture the lithium-ion battery. Ruptured batteries can catch fire or explode.

    • Do not use metal tools to remove the battery wire. They present the risk of electrocution.

    • Use a plastic spudger tool to push the battery's wire harness and disconnect it from the device.

  6. Lenovo Ideatab A1107 Screen Replacement: adım 6, 1 resimden 1.
    • Do not puncture the lithium-ion battery. Ruptured batteries can catch fire or explode.

    • Wedge a plastic opening tool in between the battery and the internal components of the device.

    • Use the plastic opener tool to remove the battery from its casing.

  7. Lenovo Ideatab A1107 Screen Replacement, Screen: adım 7, 1 resimden 1.
    • Using you hands, lift off the digitizer.

  8. Lenovo Ideatab A1107 Screen Replacement: adım 8, 2 resimden 1. Lenovo Ideatab A1107 Screen Replacement: adım 8, 2 resimden 2.
    • Remove the three screws that are 2.0 mm in length and have a 5.25 mm head width with a Phillips #00 screwdriver.

  9. Lenovo Ideatab A1107 Screen Replacement: adım 9, 2 resimden 1. Lenovo Ideatab A1107 Screen Replacement: adım 9, 2 resimden 2.
    Bu adımda kullanılan alet:
    Tweezers
    $4.99
    Satın Al
    • Use a spudger to remove the plastic piece securing the zero insertion force (ZIF) cable connector.

    • Use tweezers to grasp the ribbon cable, then pull the cable to disconnect it from the device.

  10. Lenovo Ideatab A1107 Screen Replacement: adım 10, 1 resimden 1.
    • Locate the black electrical tape strip on the side of the device.

    • Gently remove the tape from the device using the tweezers.

  11. Lenovo Ideatab A1107 Screen Replacement: adım 11, 3 resimden 1. Lenovo Ideatab A1107 Screen Replacement: adım 11, 3 resimden 2. Lenovo Ideatab A1107 Screen Replacement: adım 11, 3 resimden 3.
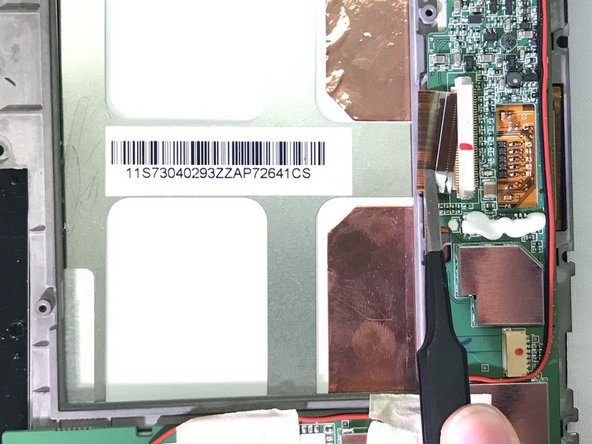
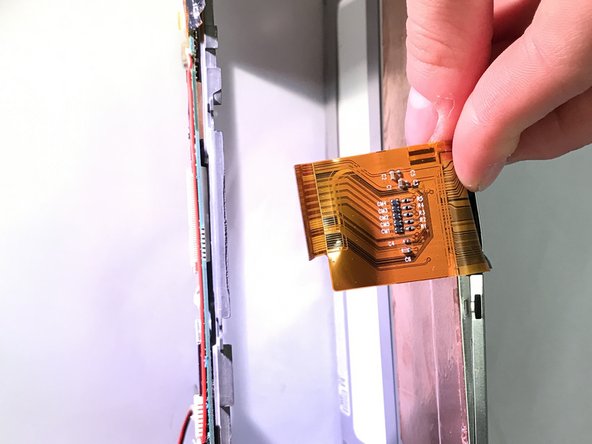
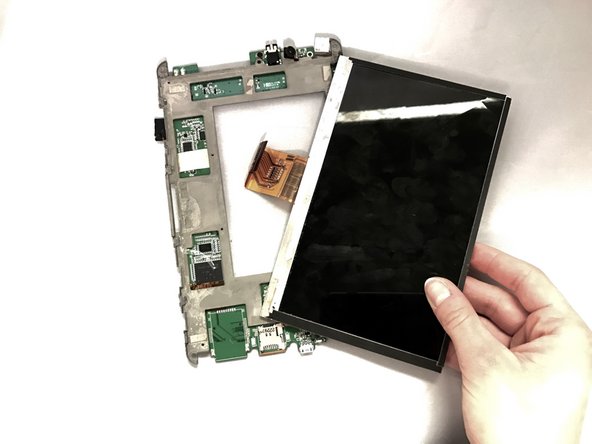
    • After removing the electric tape, gently lift up the green control panel.

    • Taking the tweezers, remove the ribbon cable from the control panel.

    • Once the ribbon cable is removed from the panel, the display should separate with ease.

Sonuç

To reassemble your device, follow these instructions in reverse order.

0 Yorum

Yorum Ekle

İstatistikleri Görüntüle:

Son 24 Saat: 0

Son 7 gün: 6

Son 30 gün: 13

Her zaman: 522