Giriş
If your Lenovo ThinkPad X1 Carbon (2nd Gen) charger will not work, the screen randomly turns blue, or the laptop randomly freezes, use this guide to replace the motherboard.
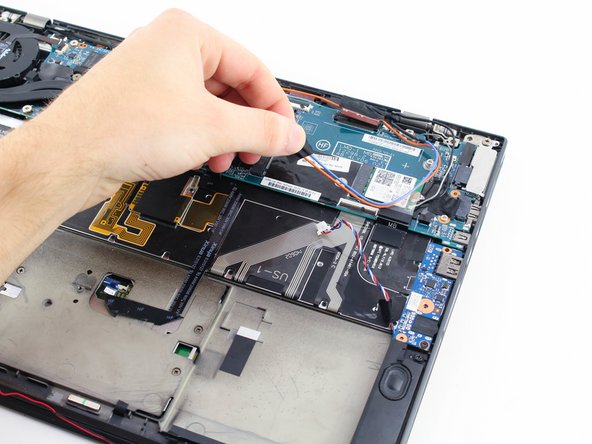
The motherboard allows all of the components of your computer to communicate with each other.
Before using this guide, if the charger will not work, try using a few different outlets to charge your computer and check that your battery firmware is updated.
Also, try turning it completely off and on again.
Before you begin, make sure your computer is off.
Neye ihtiyacın var
-
-
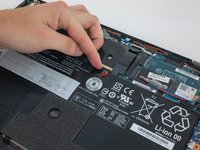
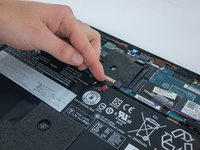
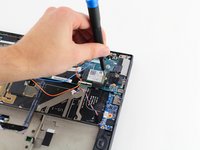
Using a Phillips #0 screwdriver, remove the seven 7mm screws holding the back cover onto your computer.
-
-
-
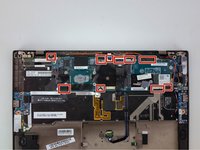
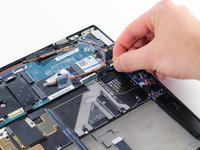
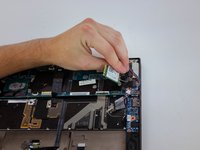
Use a Phillips #1 screwdriver to undo the four 5 mm screws attached to the heat sink.
-
-


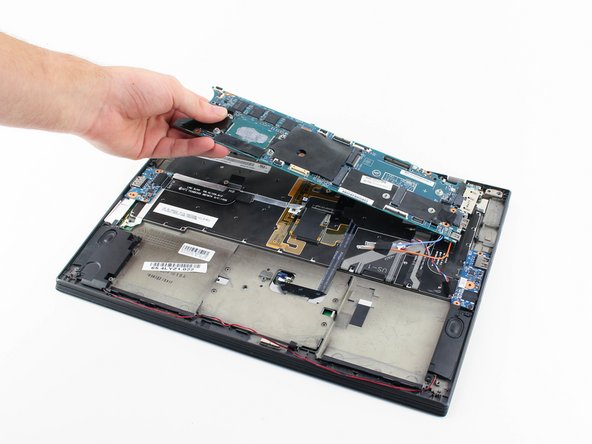
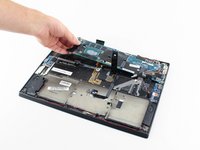

To reassemble your device, follow these instructions in reverse order.
To reassemble your device, follow these instructions in reverse order.
İptal et: Bu kılavuzu tamamlamadım.
4 farklı kişi bu kılavuzu tamamladı.

Ekip

Cal Poly, Team S18-G4, White Winter 2020 Cal Poly, Team S18-G4, White Winter 2020 üyesi
CPSU-WHITE-W20S18G4
4 Üyeler
9 adet Kılavuz yazıldı
2Kılavuz Yorumları
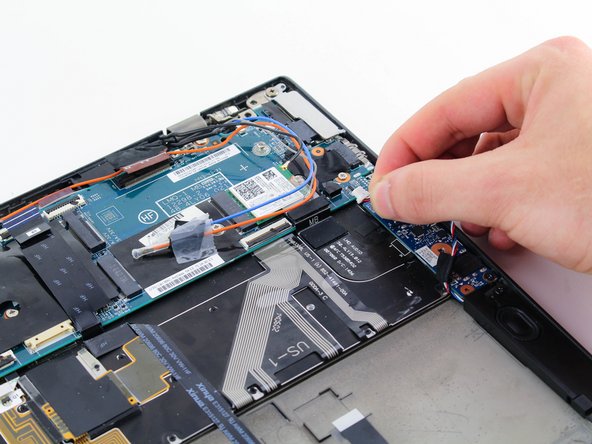
All going as described, until the final step trying to pull the motherboard out, and there is something still holding it in place. With a bit of a wiggle and pull, there is something about near the screw hole that was holding the wifi card down preventing the card from lifting there. Any clues?
Answering my own question: Removing the motherboard requires that you first pop the SIM card / MicroSD card holder out of the socket, otherwise it won’t lift out. Submitted an update to the guide to save others falling into the same trap.