Giriş
This guide shows you how to replace the Lenovo Yoga 720 15-IKB (88YG7000828) battery. Batteries tend to wear out over time, so if your battery isn’t holding a charge as long as it should, you might need to replace it. Refer to the troubleshooting page for more information about symptoms.
Neye ihtiyacın var
-
-
Power off the device before starting.
-
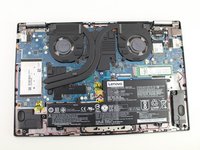
Flip the device over with the hinges facing away from you.
-
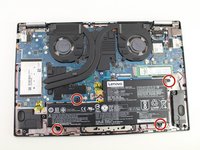
Remove seven 5.0 mm Torx T5 screws.
-
Remove three 9.5 mm Torx T5 screws.
-
-
-
-
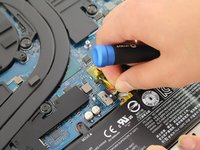
Remove the four 4mm screws surrounding the battery with a Phillips #0 screwdriver.
-


To reassemble your device, follow these instructions in reverse order.
To reassemble your device, follow these instructions in reverse order.
İptal et: Bu kılavuzu tamamlamadım.
11 farklı kişi bu kılavuzu tamamladı.
Ekip

Cal Poly, Team S19-G3, White Winter 2020 Cal Poly, Team S19-G3, White Winter 2020 üyesi
CPSU-WHITE-W20S19G3
4 Üyeler
25 adet Kılavuz yazıldı
6 Yorum
Excellent guide. Made the job a snap. Especially identifying the screwdriver bit requird.
Good guide. Fairly easy project. Getting the battery connector back in on the replacement battery was by far the hardest part. Be patient with it. It took me a few tries, but it slid in fairly easily once it was all lined up correctly.
Thank you for the great informative guide! ordering my battery and tools now!