Giriş
This guide will show you how to safely disassemble a Logitech G502 Hero mouse in preparation for replacing internal components of the mouse for repair or refurbishment.
Neye ihtiyacın var
-
-
-
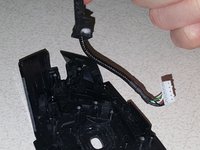
To keep it out of the way, wrap the USB cable using the integrated Velcro cable tie
 FixBot'a Sor
-
-
-
Remove the weight cover from the bottom of the mouse by lifting it up by the mouse foot.
-
-
-
Using a heat gun (set to low), heat up the three mouse feet for several seconds each.
-
Slide an opening pick under both the mouse feet and the adhesive underneath it.
-
-
-
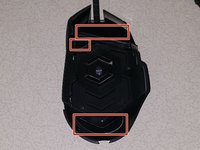
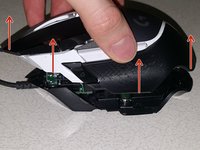
Remove the four Phillips screws holding the two halves of the mouse together.
-
-
-
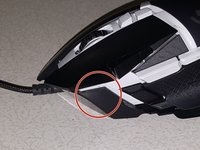
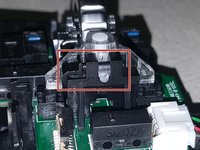
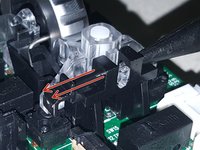
Insert the flat end of a plastic spudger into the area indicated between the top and bottom shells.
-
-
-
-
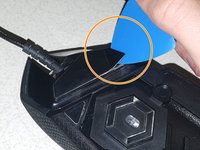
Insert the flat end of a plastic spudger between the top and bottom shells on the left side of the mouse, next to the left click.
-
-
-
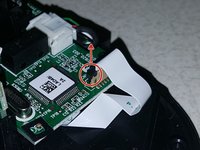
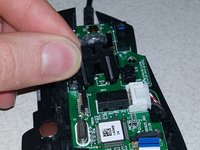
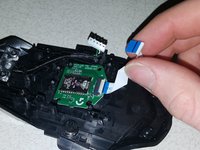
Using the flat end of a plastic spudger, carefully lift up both sides of the lock that secures the ribbon cable.
-
-
-
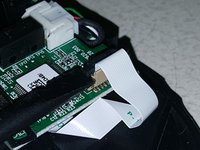
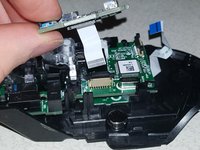
Remove the side board by pulling it straight out to access the ribbon cable connector.
-
Using the same technique that was used with the Hero sensor ribbon cable connector, disengage the cable lock.
-
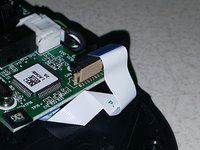
Remove the ribbon cable with the side board.
-
-
-
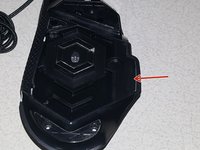
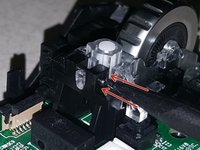
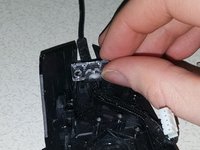
The scroll wheel assembly is held in by a retaining bar, which will need to be removed
-
Using the pointed end of a plastic spudger, push the retaining bar out from the right side.
-
Once you've done this you can remove the retaining bar.
-
-
-
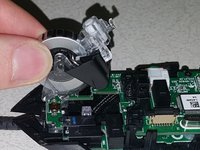
Pull the scroll wheel assembly off of the mouse.
-
-
-
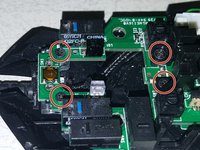
Remove the four Phillips screws near the front of the mouse.
-
Remove the Phillips screw near the ribbon cable plug for the Hero sensor.
-
The cradle for the scroll wheel assembly can now be removed.
-
-
-
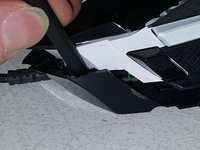
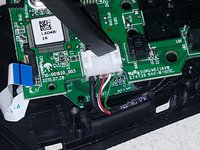
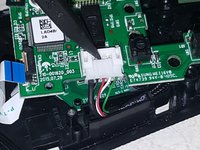
Using the flat end of a plastic spudger, disconnect the USB cable plug from the main board by pushing out the male end of the plug.
-
Once there is enough of a small gap, the pointed end of the spudger can be used to push the plug out
-
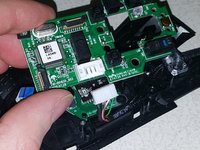
Remove the main board from the mouse bottom shell.
-
-
Bu adımda kullanılan alet:Tweezers$4.99
-
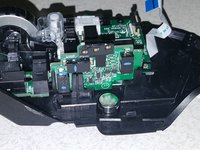
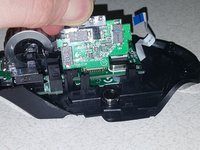
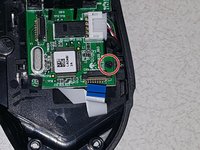
With the main board removed, the Hero sensor board is revealed.
-
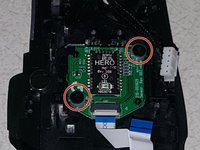
Remove the two Phillips screws holding the Hero board in.
-
Using tweezers, carefully remove the two nylon spacers from the posts.
-
Remove the Hero sensor board.
-
-
-
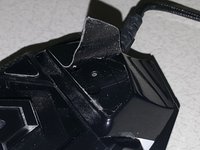
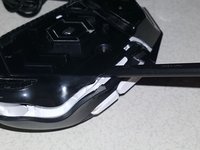
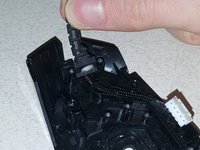
Start by taking off the clear plastic piece on top of the cable stress reliever.
-
With the clear plastic piece remove, the cable can be removed at the stress reliever and bottom shell.
-
-
-
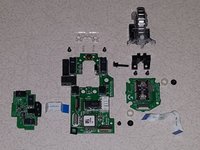
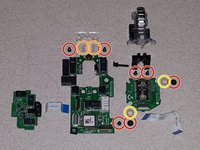
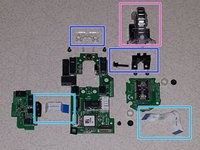
All internal components for reference
-
Phillips screws
-
Scroll wheel springs
-
Hero sensor nylon spacers
-
Ribbon cables for side board and Hero sensor board
-
Scroll wheel assembly
-
Scroll wheel cradles and retaining bar
-
-


Replace necessary parts and then follow these instructions in reverse order to reassemble.
İptal et: Bu kılavuzu tamamlamadım.
67 farklı kişi bu kılavuzu tamamladı.

34Kılavuz Yorumları
What’s a good replacement switch for the 2 main left/right buttons? They say OMRON 3159C21 D2FC-F-K
That’s a good switch to replace them with
Me personally, I like to pull the switches off of other mice, like those rebranded Logitech ones that are bundled with some computers
The G502 is easy enough to pull apart and put back together that I don't mind replacing the switches on occasion
Oh shoot, you have to do soldering to replace switches? Those black boxes? Yikes, may be something I dont want to mess with if so. If I can just figure out how to clean them I will try that, but if I have to replace them with soldering, I am doomed lol