Giriş
After long use of a keyboard, there will come a time when certain keys stop working. This can be difficult, especially if the key that has stopped working is a necessary key, like a letter. This guide shows you how to replace a broken Romer G Switch in a Logitech G Pro keyboard so you can continue using your keyboard without having to replace the entire unit. After you’ve finished this repair, you will be able to fix your keyboard in the future if more keys stop working.
Neye ihtiyacın var
-
-
Use your fingers to remove the keycaps of the keys that are no longer working.
-
-
-
-
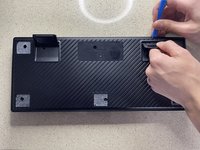
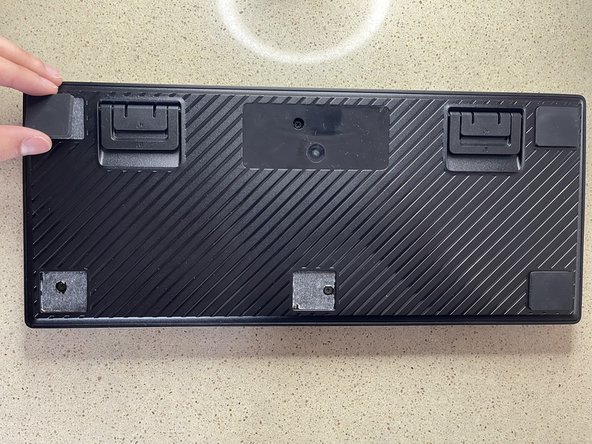
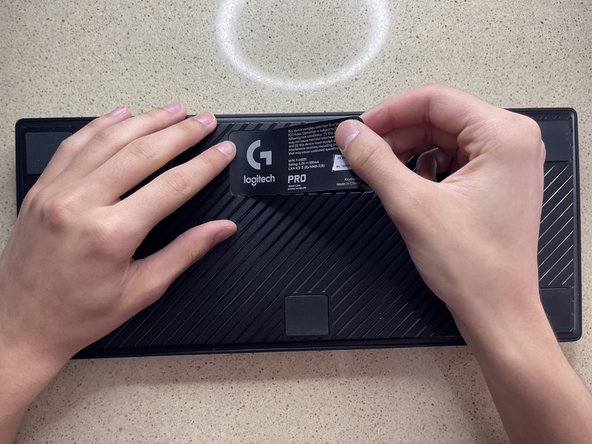
Flip the keyboard over so that you are looking at the keys.
-
To locate the solder joint on the board, count the number of rows down and keys from the right or left side to the broken key/switch.
-
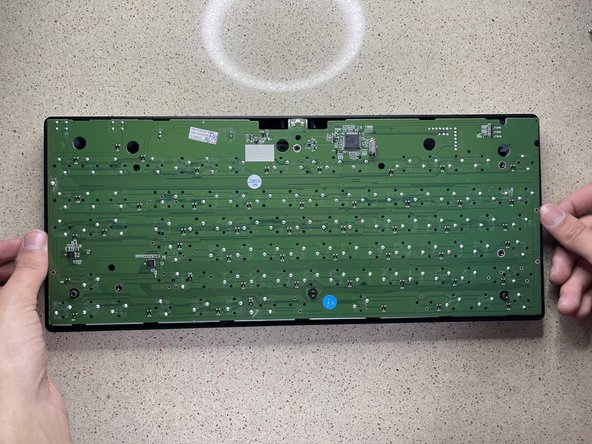
Flip the keyboard over so you can see the solder joints again.
-
Using the number of rows and keys from the left and right, count the solder joints which will find the solder joint you need to remove.
-
-
Bu adımda kullanılan alet:Desoldering Pump$3.99
-
Heat your soldering iron up to 350 degrees celsius.
-
The two pins you need to desolder will be diagonal of each other.
-
At this point, you want to desolder both pins holding the switch. As the solder is being melted you want to use your desoldering pump to remove the solder that has been melted.
-
-
-
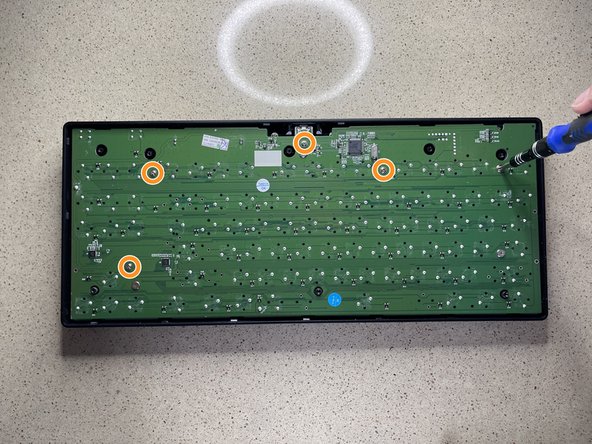
Take the keyboard and flip it over so you can see the side with all the solder joints.
-
After locating the new switch on the back of the board, press the soldering iron up against the pin, and push solder into the location of the iron slowly to create your solder joint. Do this for both pins.
-


Congratulations, you have now learned how to disassemble and reassemble a Logitech G Pro Keyboard as well as replace Romer G Switches in this keyboard.
Congratulations, you have now learned how to disassemble and reassemble a Logitech G Pro Keyboard as well as replace Romer G Switches in this keyboard.
İptal et: Bu kılavuzu tamamlamadım.
9 farklı kişi bu kılavuzu tamamladı.

Ekip

UMass Dartmouth, Team S1-G18, Sinclaire Spring 2021 UMass Dartmouth, Team S1-G18, Sinclaire Spring 2021 üyesi
UMASSD-SINCLAIRE-S21S1G18
1 Üye
5 adet Kılavuz yazıldı
12Kılavuz Yorumları
I dropped a full glass of milk on it. Took 2 hours to completely disassemble, clean, and reassemble it. It looks just like when I had it. Thanks !
A few additional points:
* If you also need to remove the lower cover from the board, the operation has a few tricky bits:
** The full-size version of the keyboard has two plastic hooks holding the cover to the board and there is no obvious way to release them. This means that even after you remove all the screws, the cover will not release. Be careful and confirm that it is just catching in the areas between the three sets of keys. They will probably break and I couldn't figure out a way to avoid it but it isn't critical and won't affect the reassembled keyboard. Just be aware of this and be aware of this.
** The power switch and the windows-key-disable switch are extremely delicate and easy to break. The switch itself is tiny and has a miniscule sliding arm sticking out that fits into the much-larger case switch cover.
to be continued because of dumb character limit. (I'm just trying to help here!)
continued...
* If you look carefully at the pictures of the solder points, you'll notice that there are two different orientations. If you, like me, want to cannibalise an unused key (such as one of the G1-6 keys or the three near-useless Print Screen, Scroll Lock, and Pause buttons, care a careful look at the broken key to see which orientation you need.
* The keycaps themselves are not that well-designed and become loose after repeated removal, no matter how careful you are. This means that if you like to vacuum your keyboard or shake out the lint, you may be in for a bit of annoyance.
* The shift and enter keys do not have adequate lateral support and you may find that, over time, they become misaligned with their adjacent keys. I think the takeaway message is to avoid Romer keys; they are just not as well-built or designed as Cherry.
Romer G's are absolutely terrible. I'm not talking about feel or function here, they feel great as long as they're working, but they break EXTREMELY easily in a way that is almost unrepairable - the little plastic "feet" that keep a keycap attached to the switch break off and get stuck in the switch, so now you have to replace both the switch and the keycap, good luck with that. After I cleaned my keyboard for the first time (removing all the keycaps from the switches), I found out I had broken like 5-10 of them, including the spacebar, and some were broken from before. The broken keys started double-clicking all the time, which is especially annoying with the spacebar, so now ky board is pretty much unusable. There's 100$ down the drain. Learn to make switches, Logitech!
Hey Nikoi, you might not read this for a while but I hope this helps. This keyboard chatter blocker program stops the double tapping entirely! https://github.com/mcmonkeyprojects/Keyb...
Joe Goh -