Giriş
So I soaked my mx ergo. this is how I disassembled and cleaned it.
Neye ihtiyacın var
-
-
Carefully lift the top shell.
-
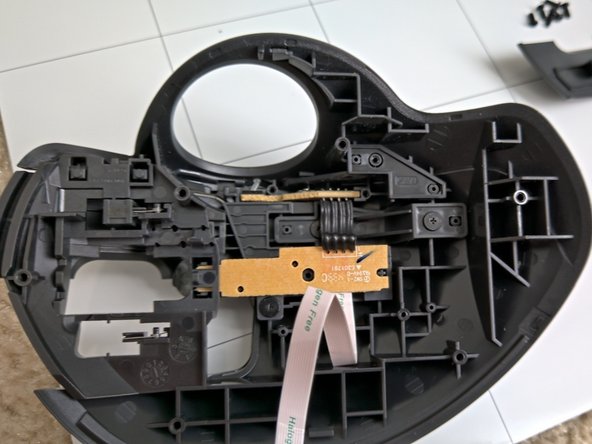
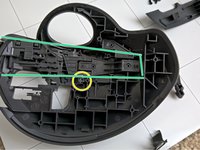
Release the flex ribbon from its socket.
Note the dark brown part of the connector LIFTS UP, don’t try to remove it or it could break. The brown part pushes against the cable to make it snug.
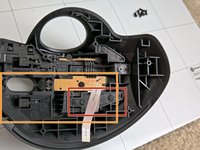
There is no need to disconnect the ribbon to clean the mouse wheel. Just take the cover and put it outside face down, like opening a clamshell towards the camera in the above picture. the flex ribbon is plenty long and there is no stress on either connection.
There is also no reason to do steps 4 through 10. They add nothing in terms of access to the wheel for cleaning.
If you do this, you can skip to steps 11 and 12.
I accidentally broke the black part that lifts up. Do you know the part number of this?
-
-
-
Lever the scrollwheel sub-assembly free
The scrub wheel has a metal lever pushing down on it, using a small spring. Those who have used other Logitech mice, such as G700s, would find that because of this level, the wheel doesn't rotate freely. The lever can be removed by pushing out and lifting the part pushed by the spring and gently and carefully removing that spring. Then the lever itself can be pushed sideways out of the tiny hole, to remove it fully. Now I have a freely rotating wheel. Gives much pleasure browsing long pages of text.
-
-
-
-
The right click lever comes out after the bracket covering the ribbon cable
-
The Right click lever comes out through the front/top of the mouse
-
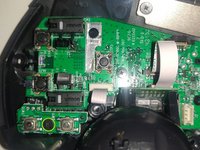
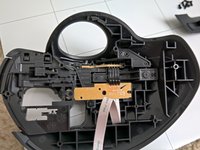
Then the circuit boards can be removed
-
-
-
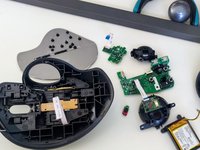
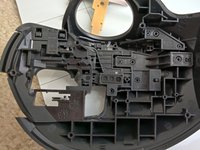
Under the circuit boards there is three piece that need to come out next
-
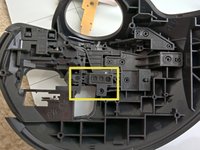
The first has one screw and two clear pieces that transmit the light from the circuit board to the outside of the mouse and hole to allow another to pass through it
-
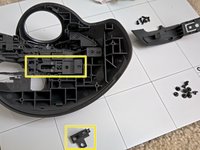
Then the computer selector switch lever can come out the front/top of the mouse
-
After that the connecting light indicator transmitter will fall out and the left click lever can be removed
-


To reassemble your device, follow these instructions in reverse order.
To reassemble your device, follow these instructions in reverse order.
İptal et: Bu kılavuzu tamamlamadım.
13 farklı kişi bu kılavuzu tamamladı.
20Kılavuz Yorumları
Thank you for the guide. The opening was hilarious— a picture says 1000 words.
I wanted to add a note that you need to use a T6 with a very long neck like the one iFixit offers for sale; an ordinary bit with a ~ 1/2” or ~1 cm long head will not be able to reach the two next to the opening to the thumb ball.
I had the same issue as you. My left click got damaged somehow and wouldn’t “return” when I clicked it. Opened it up, took both springs out and compared them. Looks like the left click spring got bent somehow. Straightened it up a bit and put it back in, seems to work perfectly now! I was going to buy a new one, but now I don’t have to. Thanks for the guide and +1 for iFixIt!!!
Hi,
My ergo fell down and I am unable to change the bluetooth selector : it is stuck on « 2 » and my pc does not see he mouse anymore.
Any idea how I could fix this ?
Thanks
tinker with the board in step 9. the button for bluetooth selection is on that board.
Frank -
Any updates on this? Having the same issue, but stuck on 1, and won't enter pairing mode either. Removed and cleaned with IPA, hoping that works. Any idea where the actual bluetooth module is located on the board(s)? Nothing appears loose but don't get a connection with a new receiver, via cable, or bluetooth to anything that should be able to see the device. Thanks in advance.
I have same issue as well. 1-2 button stuck on one or the other and blinking. Early on I had success cleaning the ribbon contacts and switch. after about 5x that no longer works. I originally had 1 pc using Logi unifying rcvr and the other with BT. Switch both to Logi to see if that would help - it didn't. Pretty sure its a bad switch - one of the smaller metal ones. I suppose next step is to reflow and then look for a replacement switch, or a parts doner mouse.
Are the Schematics for the PCB available?
I replaced the switches but now the right click does not work anymore.
When I press the right click button, I can hear the switch click, but nothing happens on the screen.
I had the same issue on a left switch after replaced it with a longer life (D2FC-F-K (50M), Further checked with multimeter for continuous of signal from the switch's pin to its circuit then found that it was my poor soldering at the switch's pin. You may encounter the same issue as mine...Hope this helps.
Thank you so much for this. I find the click sensitivity on the right button to be obscenely light. So much so that I experience 15-20 unintentional clicks per hour, just from resting my hand on it. I'm going to open this sucker up and carefully, delicately, bend the crap out of those springs.
Thank you so much for this. I too was having issues with the left click button being unresponsive/going back to it’s original setting. Adjusted the springs after performing the top disassembly and my mouse clicks like normal again.
The buttons (which start to get a bit iffy after a year or so of use) are these - https://www.amazon.co.uk/D2FC-F-7N-Switc.... Going to find out how tricky they are to desolder as I've an old MX Ergo and a new one, so I can practice the job. This disassembly guide was helpful, especially as I got a little stuck around the roller assembly, helpful to see where leverage could go.
spare parts available? I can't find a wheel (broken by a fall)
i have to substitute both microswitch of mouse left and right botons.
case you know the switch part number, please let me know it.
I accidentally broke the brown part that lifts up in Step 3. Does anyone know the part number of this?
Is there a replacement for the rubbery cover? Mine has started to "rot" but the mouse works great. So was considering to replace that part.
Great guide!
Mine has a cracked inductor at L3 which was whining really loudly, so I blobbed it with hot glue and now it's perfectly quiet.
A T6 in a bit driver will not work here. The two screws around the ball are recessed in the holes and the holes are too narrow for a 4mm bit to fit and reach the screw head. You need a dedicated T6 screwdriver with a "precision" diameter shaft to remove those.
alan - Yanıt
of the six torx screws, two have narrow, deep holes - my ifixit bits barely fit, scraping away some of the case as I went. Very minor cosmetic damage.
Zachary Coffin - Yanıt