Ana içeriğe geç

Mac Mini Late 2014 Logic Board Assembly Replacement

Salt Önkoşul
Bu kılavuz yalnızca diğer kılavuzlar için bir ön koşul olarak kullanılmak üzere tasarlanmıştır. Tek başına eksiktir.

Neye ihtiyacın var

  1. Mac Mini Late 2014 Logic Board Assembly Replacement, Logic Board Assembly: adım 1, 1 resimden 1.
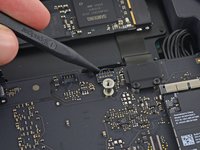
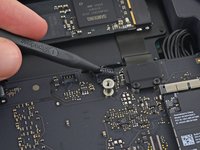
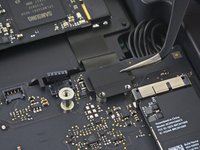
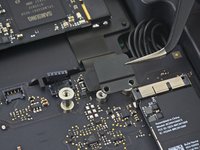
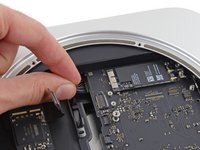
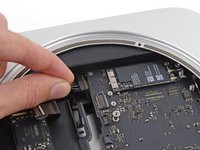
    • Remove the 2.6 mm T6 screw securing the SATA cable connector bracket.
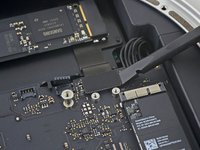
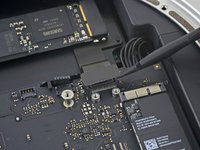
  2. Mac Mini Late 2014 Logic Board Assembly Replacement: adım 2, 2 resimden 1. Mac Mini Late 2014 Logic Board Assembly Replacement: adım 2, 2 resimden 2.
    • Remove the SATA cable connector bracket.

  3. Mac Mini Late 2014 Logic Board Assembly Replacement: adım 3, 2 resimden 1. Mac Mini Late 2014 Logic Board Assembly Replacement: adım 3, 2 resimden 2.
    • Use the flat end of a spudger to lift the SATA cable connector up off of its socket on the logic board.

  4. Mac Mini Late 2014 Logic Board Assembly Replacement: adım 4, 2 resimden 1. Mac Mini Late 2014 Logic Board Assembly Replacement: adım 4, 2 resimden 2.
    • Use the tip of a spudger to disconnect the IR sensor cable connector by prying it straight up from its socket.

  5. Mac Mini Late 2014 Logic Board Assembly Replacement: adım 5, 1 resimden 1.
    • The following three steps only apply to Mac minis equipped with a PCIe SSD. Skip the next three steps if your Mac mini only has a hard drive.

    • Remove the two 2.6 mm T6 screws securing the PCIe SSD cable bracket.

  6. Mac Mini Late 2014 Logic Board Assembly Replacement: adım 6, 2 resimden 1. Mac Mini Late 2014 Logic Board Assembly Replacement: adım 6, 2 resimden 2.
    • Remove the PCIe SSD cable bracket.

  7. Mac Mini Late 2014 Logic Board Assembly Replacement: adım 7, 2 resimden 1. Mac Mini Late 2014 Logic Board Assembly Replacement: adım 7, 2 resimden 2.
    • Lift the PCIe SSD connector up off its socket.

  8. Mac Mini Late 2014 Logic Board Assembly Replacement: adım 8, 1 resimden 1.
    • Remove the single 16 mm T6 screw securing the logic board.

  9. Mac Mini Late 2014 Logic Board Assembly Replacement: adım 9, 1 resimden 1.
    Bu adımda kullanılan alet:
    Mac mini Logic Board Removal Tool
    $4.99
    Satın Al
    • To remove the logic board, the two cylindrical rods of the Mac mini Logic Board Removal Tool must be inserted into the holes highlighted in red. Inserting instruments into any logic board holes other than the ones highlighted in red may destroy the logic board.

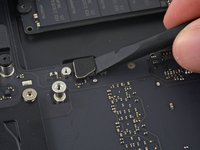
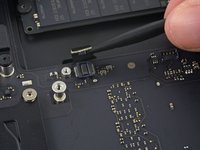
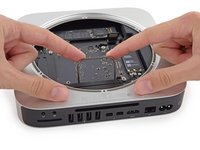
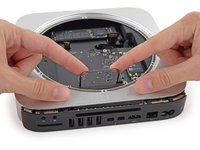
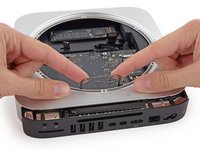
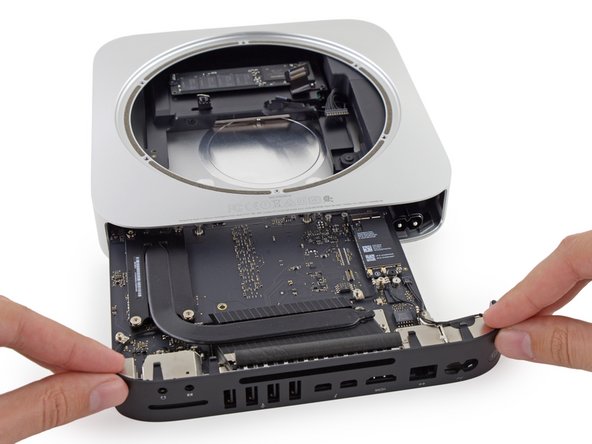
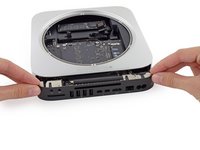
    • Insert the Mac mini Logic Board Removal Tool into the two holes highlighted in red. Be sure the rods make contact with the case under the logic board before proceeding.

  10. Mac Mini Late 2014 Logic Board Assembly Replacement: adım 10, 3 resimden 1. Mac Mini Late 2014 Logic Board Assembly Replacement: adım 10, 3 resimden 2. Mac Mini Late 2014 Logic Board Assembly Replacement: adım 10, 3 resimden 3.
    • Carefully pull the tool toward the I/O board. The logic board and I/O board assembly should slightly slide out of the outer case.

    • Cease prying when the removal tool makes contact with the opening in the rear case.

    • Remove the Mac mini Logic Board Removal tool.

  11. Mac Mini Late 2014 Logic Board Assembly Replacement: adım 11, 2 resimden 1. Mac Mini Late 2014 Logic Board Assembly Replacement: adım 11, 2 resimden 2.
    • Pull the DC-In cable connector straight out of its socket on the logic board.

  12. Mac Mini Late 2014 Logic Board Assembly Replacement: adım 12, 2 resimden 1. Mac Mini Late 2014 Logic Board Assembly Replacement: adım 12, 2 resimden 2.
    • Carefully slide the logic board assembly out of the Mac mini, minding any cables that may get caught.

Sonuç

To reassemble your device, follow these instructions in reverse order.

Bir başkası bu kılavuzu tamamladı.

Sam Goldheart

Üyelik tarihi: 10/18/12

465.659 İtibar

538 adet Kılavuz yazıldı

Ekip

iFixit iFixit üyesi

Staff

135 Üyeler

16.757 adet Kılavuz yazıldı

0 Yorum

Yorum Ekle

İstatistikleri Görüntüle:

Son 24 Saat: 0

Son 7 gün: 0

Son 30 gün: 0

Her zaman: 566