Ana içeriğe geç
Onarım Topluluğuna Katılın - Hesap Oluşturun

Mac Pro Late 2013 Interconnect Board Replacement

Neye ihtiyacın var

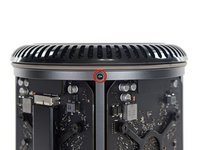
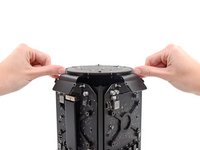
    1. Mac Pro Late 2013 Interconnect Board Replacement, Outer Case: adım 1, 2 resimden 1. Mac Pro Late 2013 Interconnect Board Replacement, Outer Case: adım 1, 2 resimden 2.
      • Slide the lock switch to the right, to the unlocked position.

      FixBot'a Sor

      Yorum Ekle

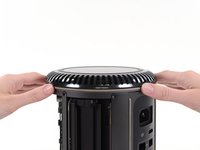
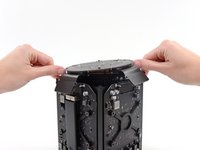
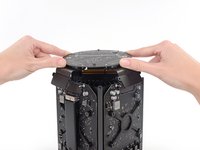
    2. Mac Pro Late 2013 Interconnect Board Replacement: adım 2, 3 resimden 1. Mac Pro Late 2013 Interconnect Board Replacement: adım 2, 3 resimden 2. Mac Pro Late 2013 Interconnect Board Replacement: adım 2, 3 resimden 3.
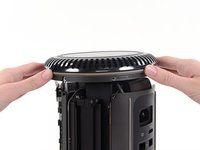
      • Lift the outer case straight up off the Mac Pro.

      • It may help to push down on the center of the fan while lifting the case up.

      FixBot'a Sor

      Yorum Ekle

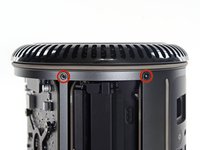
    1. Mac Pro Late 2013 Interconnect Board Replacement, Fan Assembly: adım 3, 3 resimden 1. Mac Pro Late 2013 Interconnect Board Replacement, Fan Assembly: adım 3, 3 resimden 2. Mac Pro Late 2013 Interconnect Board Replacement, Fan Assembly: adım 3, 3 resimden 3.
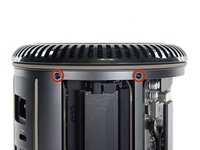
      • Remove five 5.1 mm T10 Torx screws from around the outer perimeter of the fan assembly.

      FixBot'a Sor

      Yorum Ekle

    2. Mac Pro Late 2013 Interconnect Board Replacement: adım 4, 2 resimden 1. Mac Pro Late 2013 Interconnect Board Replacement: adım 4, 2 resimden 2.
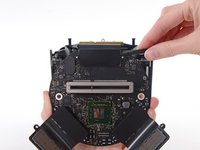
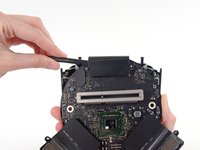
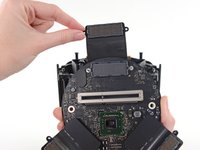
      • The fan assembly is attached to the rest of the computer by two cables on the IO board side.

      • Tilt the assembly up away from the IO board.

      • Do not try to remove the fan assembly yet, as it is still attached by two cables.

      FixBot'a Sor

      Yorum Ekle

    3. Mac Pro Late 2013 Interconnect Board Replacement: adım 5, 1 resimden 1.
      • While supporting the fan assembly with one hand, loosen the two T8 captive screws in the fan cable bracket.

      • These screws are captive in the Mac Pro. Do not try to remove these screws from your Mac Pro.

      FixBot'a Sor

      Yorum Ekle

    4. Mac Pro Late 2013 Interconnect Board Replacement: adım 6, 1 resimden 1.
      Bu adımda kullanılan alet:
      Tweezers
      $4.99
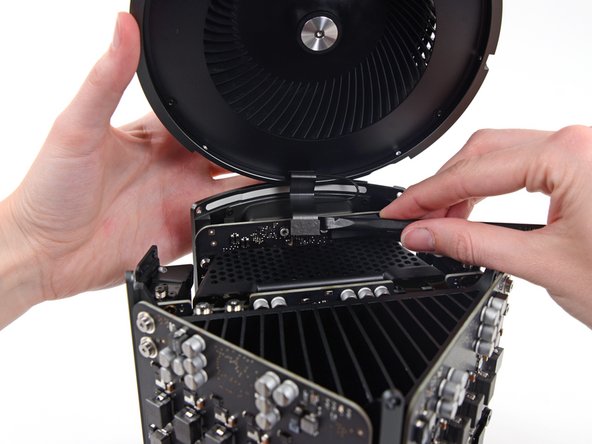
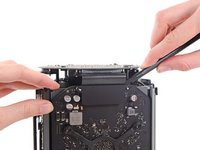
      • Use a pair of tweezers to pull the fan cable bracket away from the fan assembly.

      FixBot'a Sor

      Yorum Ekle

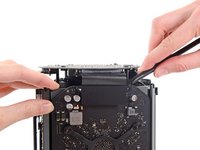
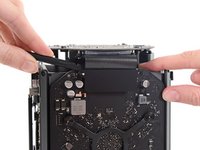
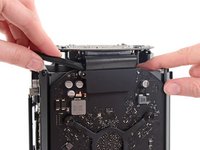
    5. Mac Pro Late 2013 Interconnect Board Replacement: adım 7, 2 resimden 1. Mac Pro Late 2013 Interconnect Board Replacement: adım 7, 2 resimden 2.
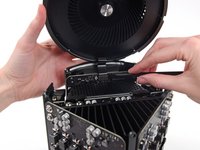
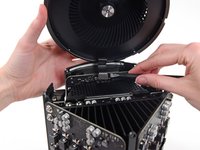
      • Use the flat end of a spudger to disconnect the fan assembly ribbon cable from the IO board.

      FixBot'a Sor

      Yorum Ekle

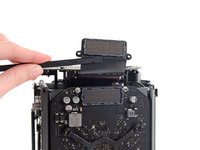
    6. Mac Pro Late 2013 Interconnect Board Replacement: adım 8, 1 resimden 1.
      • Disconnect the fan assembly antenna cable from the IO board.

      • Remove the fan assembly from the Mac Pro.

      FixBot'a Sor

      Yorum Ekle

    1. Mac Pro Late 2013 Interconnect Board Replacement, Lower Case: adım 9, 3 resimden 1. Mac Pro Late 2013 Interconnect Board Replacement, Lower Case: adım 9, 3 resimden 2. Mac Pro Late 2013 Interconnect Board Replacement, Lower Case: adım 9, 3 resimden 3.
      • Flip the Mac Pro upside down, 180 degrees.

      • Remove five 5.1 mm T10 Torx screws from the outer perimeter of the lower case.

      FixBot'a Sor

      Yorum Ekle

    2. Mac Pro Late 2013 Interconnect Board Replacement: adım 10, 2 resimden 1. Mac Pro Late 2013 Interconnect Board Replacement: adım 10, 2 resimden 2.
      • Carefully lift the lower case up and remove it from the Mac Pro.

      FixBot'a Sor

      Yorum Ekle

    1. Mac Pro Late 2013 Interconnect Board Replacement, Interconnect Board: adım 11, 2 resimden 1. Mac Pro Late 2013 Interconnect Board Replacement, Interconnect Board: adım 11, 2 resimden 2.
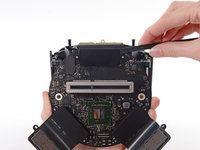
      • Use the flat end of a spudger and a twisting motion to gently separate one side of the graphics card data connection.

      FixBot'a Sor

      Yorum Ekle

    2. Mac Pro Late 2013 Interconnect Board Replacement: adım 12, 3 resimden 1. Mac Pro Late 2013 Interconnect Board Replacement: adım 12, 3 resimden 2. Mac Pro Late 2013 Interconnect Board Replacement: adım 12, 3 resimden 3.
      • Gently separate the other side as well.

      • Flip the connector up and out of the way of the graphics card.

      • Repeat this procedure on the other graphics card.

      FixBot'a Sor

      Yorum Ekle

    3. Mac Pro Late 2013 Interconnect Board Replacement: adım 13, 1 resimden 1.
      • Remove the two 6.0 mm T8 Torx screws securing the interconnect board to the heat sink.

      FixBot'a Sor

      Yorum Ekle

    4. Mac Pro Late 2013 Interconnect Board Replacement: adım 14, 3 resimden 1. Mac Pro Late 2013 Interconnect Board Replacement: adım 14, 3 resimden 2. Mac Pro Late 2013 Interconnect Board Replacement: adım 14, 3 resimden 3.
      • Gently walk the interconnect board straight up off the logic board's slot connection.

      • It is recommended to lift one side and then the other.

      • Do not try to remove the interconnect board from the Mac Pro yet, as it is still connected to the IO board.

      FixBot'a Sor

      Yorum Ekle

    5. Mac Pro Late 2013 Interconnect Board Replacement: adım 15, 2 resimden 1. Mac Pro Late 2013 Interconnect Board Replacement: adım 15, 2 resimden 2.
      • Flip the interconnect board up and over, exposing the IO board data cable.

      • Use the same sort of twisting and spreading motion with the flat end of a spudger to separate one side of the IO board data cable.

      FixBot'a Sor

      Yorum Ekle

    6. Mac Pro Late 2013 Interconnect Board Replacement: adım 16, 2 resimden 1. Mac Pro Late 2013 Interconnect Board Replacement: adım 16, 2 resimden 2.
      • Use the flat end of a spudger to separate the other side of the IO board data cable.

      • Bend the cable out of the way and remove the interconnect board from the Mac Pro.

      FixBot'a Sor

      Yorum Ekle

Sonuç

To reassemble your device, follow these instructions in reverse order.

İptal et: Bu kılavuzu tamamlamadım.

8 farklı kişi bu kılavuzu tamamladı.

Andrew Optimus Goldheart

Üyelik tarihi: 10/17/09

515.422 İtibar

406 adet Kılavuz yazıldı

Ekip

iFixit iFixit üyesi

Staff

123 Üyeler

42.764 adet Kılavuz yazıldı

5Kılavuz Yorumları

Why is it necessary to remove the fan?

johnsburdett - Yanıt Paylaş
I'm asking me the same question. Maybe it's for protecting the upper part and to have a stable stand when turning it around to remove the bottom part. I need to access the EFI Chip in the near future, I will see then.

Kris Wood - Yanıt Paylaş

Hola necesito comprar esta placa de interconexión, donde puedo encontrarla? Saludos

RailabMac - Yanıt Paylaş

excellent, thank you very much, I wanted to ask you where I can get this plate, what is the reference?

Asdrubal - Yanıt Paylaş

Yorum Ekle

İstatistikleri Görüntüle:

Son 24 Saat: 0

Son 7 gün: 9

Son 30 gün: 42

Her zaman: 7,581