Giriş
Use this guide to replace the I/O board.
Neye ihtiyacın var
-
Bu adımda kullanılan alet:P5 Pentalobe Screwdriver Retina MacBook Pro and Air$5.99
-
Use a P5 Pentalobe driver to remove ten screws securing the lower case, of the following lengths:
-
Two 9 mm screws
-
Eight 2.6 mm screws
-
-
-
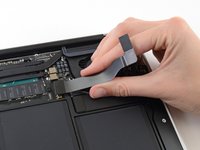
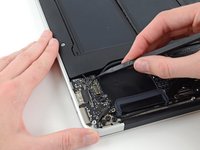
Grab the clear plastic pull tab attached to the battery connector and pull it parallel to the board toward the front edge of the Air.
-
-
-
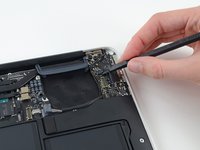
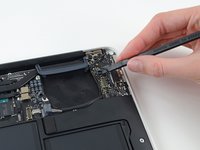
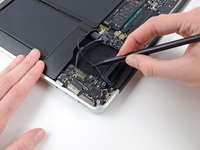
Use the flat end of a spudger to pry the I/O board cable connector up out of its socket on the I/O board.
-
-
-
-
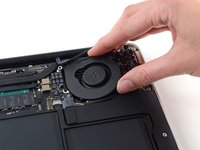
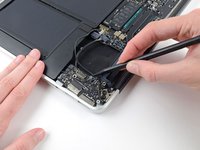
Use the tip of a spudger to carefully flip up the retaining flap on the fan cable ZIF socket.
-
-
-
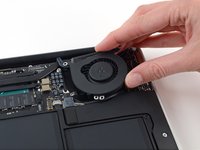
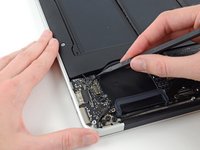
Disconnect the I/O board by pulling its power cable away from its socket on the logic board.
-


To reassemble your device, follow these instructions in reverse order.
To reassemble your device, follow these instructions in reverse order.
İptal et: Bu kılavuzu tamamlamadım.
34 farklı kişi bu kılavuzu tamamladı.


7Kılavuz Yorumları
I did this as my first DIY repair inside a MacBook. I'm pretty handy, but nothing close to a computer tech. I studied the guide a few times; ordered the Pentalope driver; bought a magnifying hobby light; set up an organized workstation and went to work. I did sweat through several of the cable and ribbon strap removals, but if you take your time and follow the guide it should work. I did find that having a set of precision tweezers and a couple of plastic spudgers was extremely helpful.
My need to attempt this was the result of stupidly spilling a beer all across my keyboard. After drying it out via a fan blowing on it 24/7 for 2 days I decided to crack it open and look for water damage to the LSI's . The area that appeared to be hit the worst was the I/0 board. So I removed it & cleaned with Isopropyl. Afterward, everything fired up and seemed to work fine. Until today. Now the left USB port seems to have died. Probably will replace the board. This guide made it possible. Thanks Jeff and Ifixit.
Very precise guide. I’d say I had this apart, the new board in and put back together in about 30 minutes. like stated above, take your time with some of the more delicate cables and you should be fine. Thanks Jeff.
Thanks, really great to have resources like this available. Only suggestion would be to make the photos a higher resolution so you can zoom in better. Whilst I am fairly handy with this sort of this I managed to replace my I/O board after the old one got killed by a damaged powersupply that developed a short on the DC side.