Ana içeriğe geç

MacBook Pro 13" Retina Display Early 2015 Logic Board Assembly Replacement

Salt Önkoşul
Bu kılavuz yalnızca diğer kılavuzlar için bir ön koşul olarak kullanılmak üzere tasarlanmıştır. Tek başına eksiktir.

Neye ihtiyacın var

  1. MacBook Pro 13" Retina Display Early 2015 Logic Board Assembly Replacement, Logic Board Assembly: adım 1, 2 resimden 1. MacBook Pro 13" Retina Display Early 2015 Logic Board Assembly Replacement, Logic Board Assembly: adım 1, 2 resimden 2.
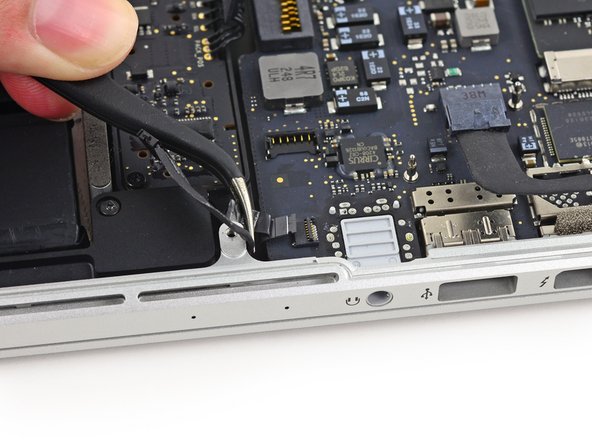
    • Remove the two 2.1 mm T5 Torx screws securing the I/O board cable bracket to the logic board.

    • Remove the I/O board cable bracket.

  2. MacBook Pro 13" Retina Display Early 2015 Logic Board Assembly Replacement: adım 2, 2 resimden 1. MacBook Pro 13" Retina Display Early 2015 Logic Board Assembly Replacement: adım 2, 2 resimden 2.
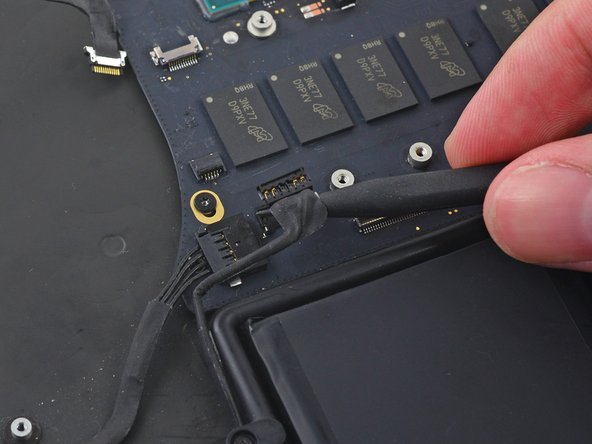
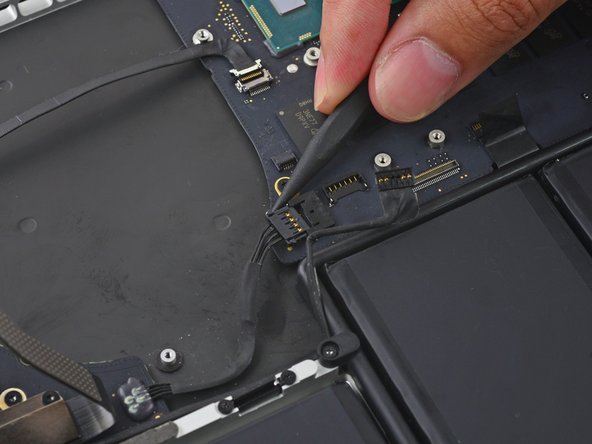
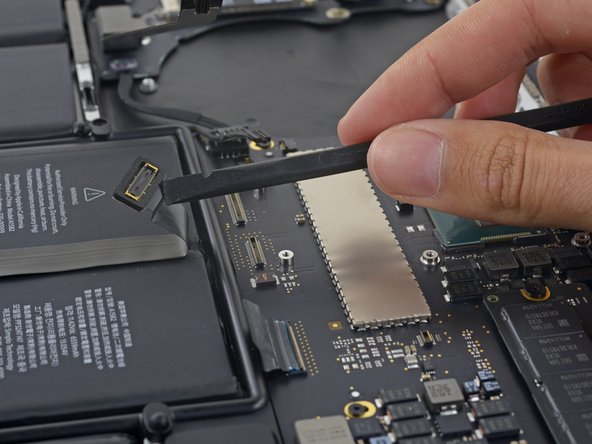
    • Use the flat end of a spudger to pop the I/O board connector straight up off its socket on the logic board.

    • Be careful to only pry up on the I/O board cable, not on the socket itself or you risk damaging your logic board.

  3. MacBook Pro 13" Retina Display Early 2015 Logic Board Assembly Replacement: adım 3, 2 resimden 1. MacBook Pro 13" Retina Display Early 2015 Logic Board Assembly Replacement: adım 3, 2 resimden 2.
    • Lift the logic board end of the I/O board cable straight up to bend it out of the way.

    • To avoid damage to the cable, fold only at the bend in the I/O board end of the cable.

  4. MacBook Pro 13" Retina Display Early 2015 Logic Board Assembly Replacement: adım 4, 2 resimden 1. MacBook Pro 13" Retina Display Early 2015 Logic Board Assembly Replacement: adım 4, 2 resimden 2.
    • Use the tip of a spudger to lift the right speaker connector straight up out of its socket on the logic board.

  5. MacBook Pro 13" Retina Display Early 2015 Logic Board Assembly Replacement: adım 5, 2 resimden 1. MacBook Pro 13" Retina Display Early 2015 Logic Board Assembly Replacement: adım 5, 2 resimden 2.
    • With the tip of a spudger, push on either side of the I/O board connector to walk it out of its socket on the logic board.

  6. MacBook Pro 13" Retina Display Early 2015 Logic Board Assembly Replacement: adım 6, 3 resimden 1. MacBook Pro 13" Retina Display Early 2015 Logic Board Assembly Replacement: adım 6, 3 resimden 2. MacBook Pro 13" Retina Display Early 2015 Logic Board Assembly Replacement: adım 6, 3 resimden 3.
    • Use the flat end of a spudger to disconnect the keyboard backlight cable and bend it up out of the way of the logic board.

  7. MacBook Pro 13" Retina Display Early 2015 Logic Board Assembly Replacement: adım 7, 3 resimden 1. MacBook Pro 13" Retina Display Early 2015 Logic Board Assembly Replacement: adım 7, 3 resimden 2. MacBook Pro 13" Retina Display Early 2015 Logic Board Assembly Replacement: adım 7, 3 resimden 3.
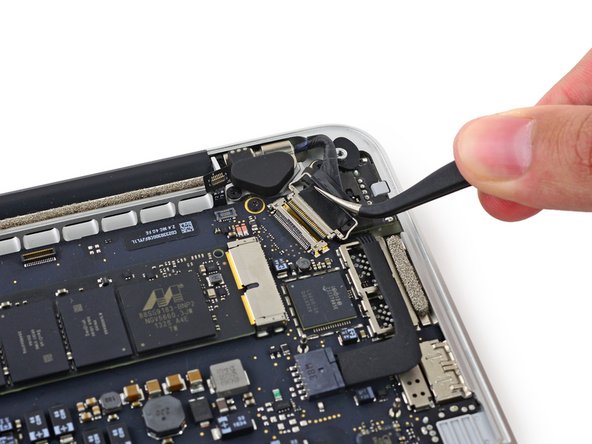
    • Grab the black plastic tab to flip the display cable connector open and pull it straight out of its socket on the logic board.

  8. MacBook Pro 13" Retina Display Early 2015 Logic Board Assembly Replacement: adım 8, 2 resimden 1. MacBook Pro 13" Retina Display Early 2015 Logic Board Assembly Replacement: adım 8, 2 resimden 2.
    • Carefully pull the DC-In board connector straight out of its socket on the logic board.

  9. MacBook Pro 13" Retina Display Early 2015 Logic Board Assembly Replacement: adım 9, 3 resimden 1. MacBook Pro 13" Retina Display Early 2015 Logic Board Assembly Replacement: adım 9, 3 resimden 2. MacBook Pro 13" Retina Display Early 2015 Logic Board Assembly Replacement: adım 9, 3 resimden 3.
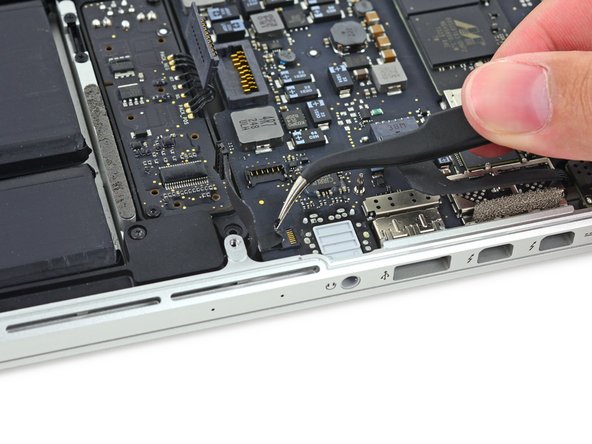
    • Wedge the flat end of a spudger under the left speaker cable near the connector and lift it straight up out of its socket and fold it out of the way.

  10. MacBook Pro 13" Retina Display Early 2015 Logic Board Assembly Replacement: adım 10, 2 resimden 1. MacBook Pro 13" Retina Display Early 2015 Logic Board Assembly Replacement: adım 10, 2 resimden 2.
    • If necessary, peel back any tape covering the microphone cable ZIF connector.

  11. MacBook Pro 13" Retina Display Early 2015 Logic Board Assembly Replacement: adım 11, 3 resimden 1. MacBook Pro 13" Retina Display Early 2015 Logic Board Assembly Replacement: adım 11, 3 resimden 2. MacBook Pro 13" Retina Display Early 2015 Logic Board Assembly Replacement: adım 11, 3 resimden 3.
    • Use the tip of a spudger to flip the retaining tab on the microphone cable ZIF connector.

    • Pull the microphone cable out of its socket on the logic board.

  12. MacBook Pro 13" Retina Display Early 2015 Logic Board Assembly Replacement: adım 12, 3 resimden 1. MacBook Pro 13" Retina Display Early 2015 Logic Board Assembly Replacement: adım 12, 3 resimden 2. MacBook Pro 13" Retina Display Early 2015 Logic Board Assembly Replacement: adım 12, 3 resimden 3.
    • If necessary, peel back any tape covering the keyboard cable connector.

    • Use the tip of a spudger to flip the retaining tab on the ZIF connector.

  13. MacBook Pro 13" Retina Display Early 2015 Logic Board Assembly Replacement: adım 13, 2 resimden 1. MacBook Pro 13" Retina Display Early 2015 Logic Board Assembly Replacement: adım 13, 2 resimden 2.
    • Pull the keyboard cable straight out of its ZIF socket on the logic board.

  14. MacBook Pro 13" Retina Display Early 2015 Logic Board Assembly Replacement: adım 14, 3 resimden 1. MacBook Pro 13" Retina Display Early 2015 Logic Board Assembly Replacement: adım 14, 3 resimden 2. MacBook Pro 13" Retina Display Early 2015 Logic Board Assembly Replacement: adım 14, 3 resimden 3.
    • Use the flat end of a spudger to pop the trackpad connector straight up off its socket on the logic board.

    • Fold the cable out back over the battery to clear the way for the logic board.

  15. MacBook Pro 13" Retina Display Early 2015 Logic Board Assembly Replacement: adım 15, 1 resimden 1.
    • Remove the five 3.5 mm T5 Torx screws securing the logic board to the upper case.

  16. MacBook Pro 13" Retina Display Early 2015 Logic Board Assembly Replacement: adım 16, 3 resimden 1. MacBook Pro 13" Retina Display Early 2015 Logic Board Assembly Replacement: adım 16, 3 resimden 2. MacBook Pro 13" Retina Display Early 2015 Logic Board Assembly Replacement: adım 16, 3 resimden 3.
    • Lift the processor end of the logic board up slightly and pull it toward the fan recess to free the ports from the edge of the upper case.

    • Remove the logic board.

Sonuç

To reassemble your device, follow these instructions in reverse order.

Bir başkası bu kılavuzu tamamladı.

Sam Goldheart

Üyelik tarihi: 10/18/12

465.116 İtibar

538 adet Kılavuz yazıldı

Ekip

iFixit iFixit üyesi

Staff

135 Üyeler

16.475 adet Kılavuz yazıldı

0 Yorum

Yorum Ekle

İstatistikleri Görüntüle:

Son 24 Saat: 0

Son 7 gün: 0

Son 30 gün: 0

Her zaman: 175