Giriş
Replace the optical drive in your MacBook Pro 13" Unibody Mid 2010.
Neye ihtiyacın var
-
-
Remove the following 10 screws securing the lower case to the MacBook Pro 13" Unibody:
-
Seven 3 mm Phillips screws.
-
Three 13.5 mm Phillips screws.
-
-
-
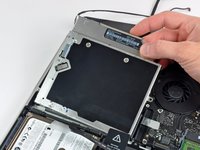
Slightly lift the lower case and push it toward the rear of the computer to free the mounting tabs.
-
-
-
Use the flat end of a spudger to lift the battery connector up out of its socket on the logic board.
-
-
-
Remove the soft padding that may be on top and gently pull the connector up out of its socket on the logic board.
-
-
-
-
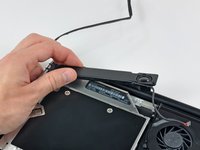
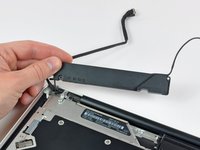
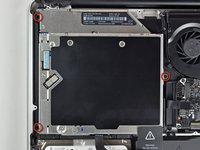
Remove the optical drive cable by pulling it straight away from the optical drive.
-
-
-
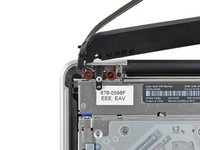
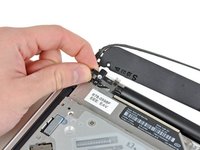
Remove the two black Phillips #0 screws securing the small metal mounting bracket. Transfer this bracket to your new optical drive or hard drive enclosure.
-


To reassemble your device, follow these instructions in reverse order.
To reassemble your device, follow these instructions in reverse order.
İptal et: Bu kılavuzu tamamlamadım.
81 farklı kişi bu kılavuzu tamamladı.

2Kılavuz Yorumları
I removed my optical drive without disconnecting the hard drive or anything else. I just unplugged the optical drive from the board, unscrewed the speaker, and very slowly removed the drive after taking out the three screws holding it in place. I was discouraged at first to remove my optical drive because it looked a little too tricky for me from the directions, but it was actually quite easy! I'm going to be interested to see if pulling the optical drive results in any noticeable improvement in battery performance on my 13" 2.4GHz MBP! I doubt it haha
I skipped down to the step with 3 screws holding the optical drive, removed them, gently pried out the optical cable, and slid out the optical drive (at a slight 10 degree angle)!! Thank you!