Giriş
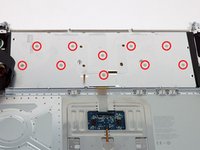
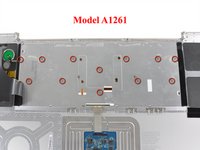
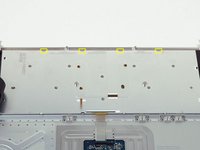
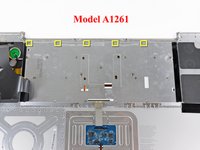
This guide shows the hidden screws you must remove when replacing the keyboard.
Neye ihtiyacın var
-
-
Use your fingers to push both battery release tabs away from the battery and lift the battery out of the computer.
-
-
-
Remove the four identical Phillips 3.4 mm screws from the memory door. These screws have 4 mm diameter heads rather than the 3 mm heads on the body screws.
-
-
-
Remove the three Phillips screws in the battery compartment near the latch. Apple was nice enough to tilt these screws at a slight angle to make them easier to remove. On the A1261 these screws have 4 mm diameter heads rather than the 3 mm heads on the body screws.
-
-
-
-
Use a spudger to pry up the translucent plastic sheath covering the keyboard connector.
-
To reassemble your device, follow these instructions in reverse order.
To reassemble your device, follow these instructions in reverse order.
İptal et: Bu kılavuzu tamamlamadım.
74 farklı kişi bu kılavuzu tamamladı.
4Kılavuz Yorumları
I was able to complete the process but the keyboard backlight does not work. When I press the up/down buttons for the keyboard backlight intensity, the widget for showing the keybaord backlight intensity is displayed on the screen but with a zero with a slash through it and no bars for the intensity. I rechecked the two steps having to do with the backlight cable to ensure it was firmly connected but I still don't get backlight anymore. :(
This is not a problem because your backlight is not broken in any way. Simply try again when it’s dark and it will work properly.
Max Mara -
Grazie ! Guida Eccezzionale ! Cambiata tastiera senza nessun problema !
hi, can hi use the keyboard of macbook pro 15 A1226 for a macbook pro 17 A1229?
thanks!
posso utilizzare la tastiera del macbook pro 15 A1226 e installarla in un macbook pro 17 A1229?
Grazie!


