Ana içeriğe geç
Onarım Topluluğuna Katılın - Hesap Oluşturun

Mechanical Pencil Spring Replacement

Neye ihtiyacın var

    1. Mechanical Pencil Spring Replacement, Spring: adım 1, 2 resimden 1. Mechanical Pencil Spring Replacement, Spring: adım 1, 2 resimden 2.
      • Remove the eraser from the mechanical pencil.

      • Removing the eraser may be difficult if the eraser is too short.

      FixBot'a Sor

      Yorum Ekle

    2. Mechanical Pencil Spring Replacement: adım 2, 1 resimden 1.
      • Remove the graphite lead from the pencil.

      • Make sure to give the pencil a few clicks to get any remaining lead out of the front of the pencil.

      FixBot'a Sor

      Yorum Ekle

    3. Mechanical Pencil Spring Replacement: adım 3, 2 resimden 1. Mechanical Pencil Spring Replacement: adım 3, 2 resimden 2.
      • Unscrew the cone/cap from the pencil.

      • You may be able to unscrew the cap. Some require you to pull it off using force. Procedures vary based on each pencil.

      FixBot'a Sor

      Yorum Ekle

    4. Mechanical Pencil Spring Replacement: adım 4, 2 resimden 1. Mechanical Pencil Spring Replacement: adım 4, 2 resimden 2.
      • Depress the shaft into the sleeve.

      FixBot'a Sor

      Yorum Ekle

    5. Mechanical Pencil Spring Replacement: adım 5, 3 resimden 1. Mechanical Pencil Spring Replacement: adım 5, 3 resimden 2. Mechanical Pencil Spring Replacement: adım 5, 3 resimden 3.
      • While keeping the shaft depressed, slide the gold dispenser ring back into the sleeve to expose the dispenser.

      FixBot'a Sor

      Yorum Ekle

    6. Mechanical Pencil Spring Replacement: adım 6, 3 resimden 1. Mechanical Pencil Spring Replacement: adım 6, 3 resimden 2. Mechanical Pencil Spring Replacement: adım 6, 3 resimden 3.
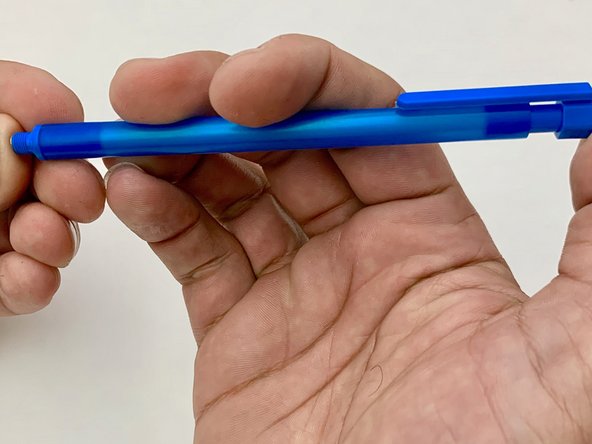
      • Use pliers to grasp the dispenser perpendicular to the open split.

      • Apply pressure and pull the dispenser straight out from the shaft and sleeve. This may be difficult.

      • If the dispenser is grasped incorrectly it could cause damage.

      • Be careful not to lose or bend the dispenser ring in the process. It is small and fragile.

      FixBot'a Sor
      Yorum Ekle

    7. Mechanical Pencil Spring Replacement: adım 7, 1 resimden 1.
      • Remove the shaft and spring from the sleeve.

      • The spring is small. Be sure not to lose it so it can be discarded properly.

      FixBot'a Sor

      Yorum Ekle

    8. Mechanical Pencil Spring Replacement: adım 8, 2 resimden 1. Mechanical Pencil Spring Replacement: adım 8, 2 resimden 2.
      • Place the dispenser and dispenser ring into the sleeve in the order it was removed.

      • The flange or widest portion of the dispenser ring will be closest to the opening of the dispenser.

      • You will need to hold it in place for the next step.

      FixBot'a Sor

      Yorum Ekle

    9. Mechanical Pencil Spring Replacement: adım 9, 2 resimden 1. Mechanical Pencil Spring Replacement: adım 9, 2 resimden 2.
      • Place the new spring and old shaft into the sleeve in the order it was taken out.

      • The spring is small. Be sure not to lose it.

      FixBot'a Sor

      Yorum Ekle

    10. Mechanical Pencil Spring Replacement: adım 10, 3 resimden 1. Mechanical Pencil Spring Replacement: adım 10, 3 resimden 2. Mechanical Pencil Spring Replacement: adım 10, 3 resimden 3.
      • Using your thumb or a hard surface pressed against the dispenser, push the shaft into the dispenser.

      • There should be an audible clicking sound.

      • Pushing the dispenser into the shaft from the front could cause damage to dispenser and dispenser ring.

      FixBot'a Sor

      Yorum Ekle

Sonuç

To reassemble your device, follow steps 1 - 3 of these instructions in reverse order.

İptal et: Bu kılavuzu tamamlamadım.

5 farklı kişi bu kılavuzu tamamladı.

0Kılavuz Yorumları

Yorum Ekle

İstatistikleri Görüntüle:

Son 24 Saat: 2

Son 7 gün: 31

Son 30 gün: 122

Her zaman: 14,027