Giriş
Como desarmar el botón de luces de emergencia, intermitentes o hazards, para limpiar contactos, reparar piezas sueltas o atascos.
O bien si quieres cambiar una cubierta gastada o carcasa rota
Neye ihtiyacın var
-
-
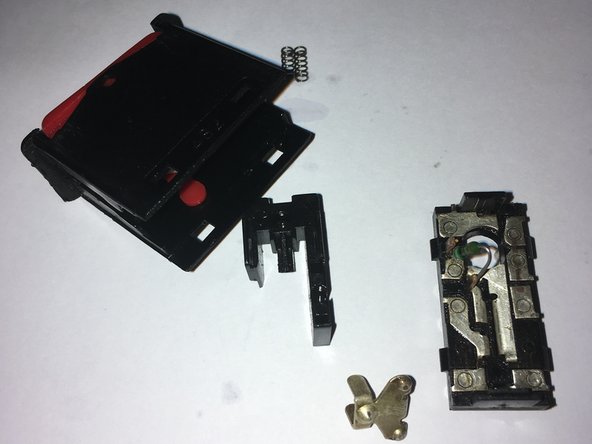
En primer lugar debes desmontar el switch para ello revisa las otras guias de esta pagina
-
-
-
-
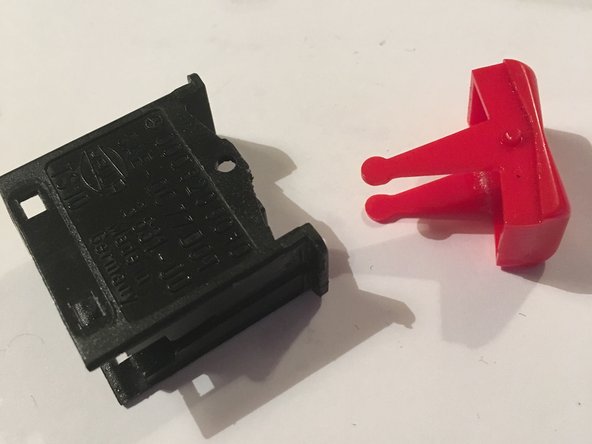
Este paso es opcional, en caso que tengas que cambiar la cubierta roja, o repararla.
-
Con el destornillador paleta fino, debes hacer palanca entre el eje rojo y el plastico negro CUIDADO! no introduzcas mucho el destornillador pues al hacer palanca puedes quebrar las patas del switch rojo que es lo que activa el mecanismo
-
-
-
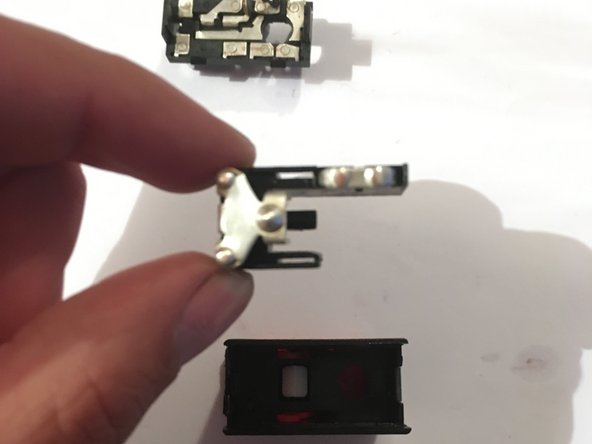
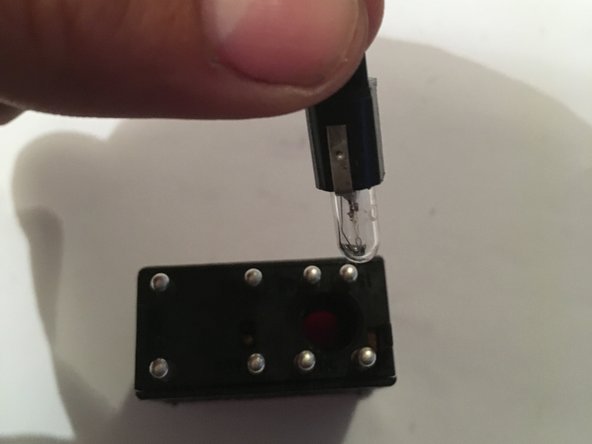
finalmente tomamos el panel de contacto y lo colocamos en el cuerpo de switch, hacemos presión hasta que haga clic! Tener precaución de colocar las piezas de manera que el orificio para la ampolleta queden alineados.
-
Finalmente si removiste el switch rojo vuelve a introducirlo hasta que haga clic! El icono del triangulo debe ir hacia el lado donde esta la ampolleta.
-


Para reensamblar tu dispositivo, sigue estas instrucciones en orden inverso.
Para reensamblar tu dispositivo, sigue estas instrucciones en orden inverso.
İptal et: Bu kılavuzu tamamlamadım.
6 farklı kişi bu kılavuzu tamamladı.
2 Yorum
Hey, thanks for the guide…I'm wondering about something, that maybe you could help me with… I love the look of the older ,pre 1980 hazard switch, is it possible to change the newer style switch, to the older bigger switch…even just to change the cover, to make it look like the old one would be fine…..What do you think?…thañks…Michael
Hellow there, the older switch is diferent, it works by pushing it down to activate it, rahter than pivoting like the newer style, I thing the easy solution is to massure the old style switch and bore the center consol to make it fit, the console is easy to remove, and its all plastic, or wood, so shouldent be hard to bore the hole. The switch stays in place by pressure
Carlos -