Bu sürüm, hatalı düzenlemeler içerebilir. En son doğrulanmış bellek kopyası dönün.
Neye ihtiyacın var
-
Bu adım çevrilmemiş. Çevrilmesine yardım edin
-
Warm up an iOpener following the instructions found in the iOpener guide.
-
Place the warm iOpener on top of the edges of the screen. This heat will weaken the strength of the adhesive between the display and body.
-
-
Bu adım çevrilmemiş. Çevrilmesine yardım edin
-
Use iFixit opening picks to wedge under the edge of the screen at the speaker port.
-
-
Bu adım çevrilmemiş. Çevrilmesine yardım edin
-
Carefully try to work your way around the device using the picks, reapplications of the heated iOpener, and luck.
-
-
Bu adım çevrilmemiş. Çevrilmesine yardım edin
-
Flip the display over so that parts underneath it are easily accessible.
-
-
-
Bu adım çevrilmemiş. Çevrilmesine yardım edin
-
You will be working in this area of the Surface 3 when replacing the audio jack and Micro SD port
-
-
Bu adım çevrilmemiş. Çevrilmesine yardım edin
-
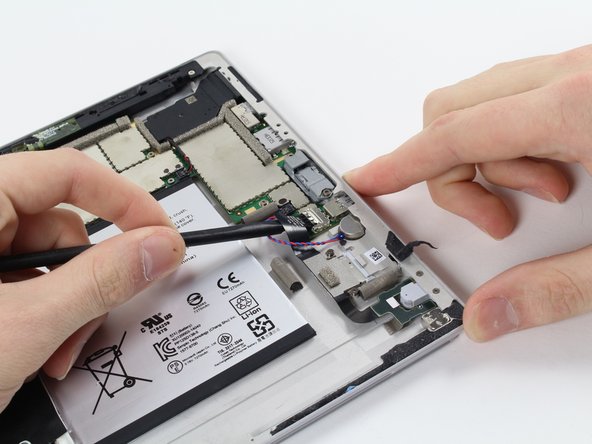
Remove the black adhesive covering next to the audio jack in order to get to the screws underneath.
-
-
Bu adım çevrilmemiş. Çevrilmesine yardım edin
-
Remove the silver bracket using the black pick in order to properly remove the entire audio jack.
-
-
Bu adım çevrilmemiş. Çevrilmesine yardım edin
-
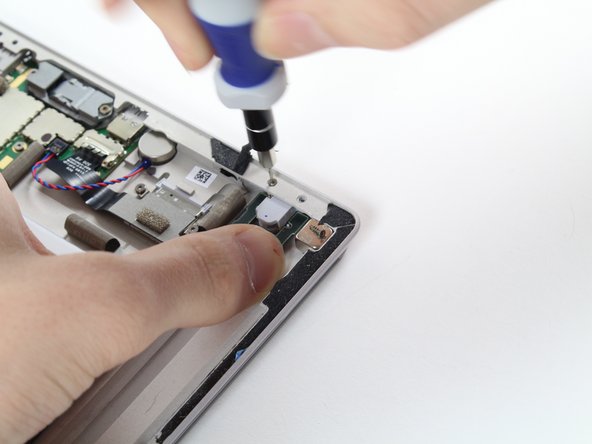
Remove the two 3/16" Torx #2 screws directly beside the audio jack.
-
-
Bu adım çevrilmemiş. Çevrilmesine yardım edin
-
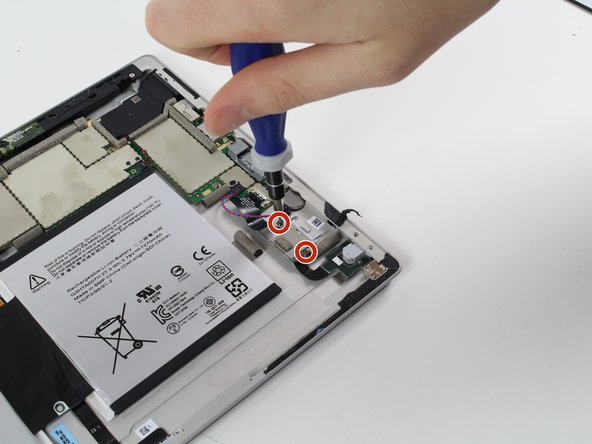
Remove the two 1/16" Torx #3 screws that hold in the MicroSD slot.
-
-
Bu adım çevrilmemiş. Çevrilmesine yardım edin
-
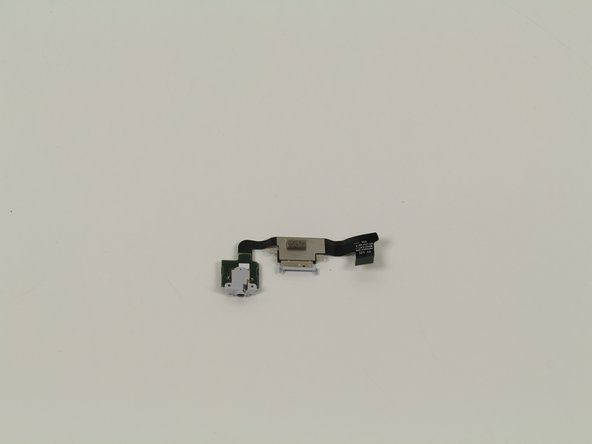
Carefully remove the entire audio jack . It should look like the picture of the single part to the left.
-


İptal et: Bu kılavuzu tamamlamadım.
4 farklı kişi bu kılavuzu tamamladı.
Ekip

Cal Poly, Team 5-12, Maness Fall 2015 Cal Poly, Team 5-12, Maness Fall 2015 üyesi
CPSU-MANESS-F15S5G12
4 Üyeler
18 adet Kılavuz yazıldı