Ana içeriğe geç

Monster Soundstage S2 Front Panel Replacement

Neye ihtiyacın var

  1. Monster Soundstage S2 Front Panel Replacement, Speaker Grille: adım 1, 2 resimden 1. Monster Soundstage S2 Front Panel Replacement, Speaker Grille: adım 1, 2 resimden 2.
    • Use a spudger or your fingers to pry off and remove the rubber pad on the bottom of the speaker.

  2. Monster Soundstage S2 Front Panel Replacement: adım 2, 3 resimden 1. Monster Soundstage S2 Front Panel Replacement: adım 2, 3 resimden 2. Monster Soundstage S2 Front Panel Replacement: adım 2, 3 resimden 3.
    • Remove the five 10mm screws with a TR 10 screwdriver.

    • Use a spudger to break the remaining adhesive holding the grille to the speaker body.

    • Be sure you don't bend the grille; it is not free from the speaker yet.

  3. Monster Soundstage S2 Front Panel Replacement: adım 3, 1 resimden 1.
    • Flip speaker around and use a plastic opening tool to remove the top panel from the speaker.

  4. Monster Soundstage S2 Front Panel Replacement: adım 4, 3 resimden 1. Monster Soundstage S2 Front Panel Replacement: adım 4, 3 resimden 2. Monster Soundstage S2 Front Panel Replacement: adım 4, 3 resimden 3.
    • Use a plastic opening tool to remove the foam and uncover four more screws.

    • Use a TR 10 screwdriver to remove the five 10mm screws on the top of the speaker.

  5. Monster Soundstage S2 Front Panel Replacement: adım 5, 2 resimden 1. Monster Soundstage S2 Front Panel Replacement: adım 5, 2 resimden 2.
    • Carefully remove the top cover.

    • Be careful not to tear or stress the cable that provides power to the power LED.

  6. Monster Soundstage S2 Front Panel Replacement: adım 6, 2 resimden 1. Monster Soundstage S2 Front Panel Replacement: adım 6, 2 resimden 2.
    • Use a TR 10 screwdriver to remove two of the 10mm screws that secure the speaker grille.

    • Do not attempt to remove the grille just yet.

  7. Monster Soundstage S2 Front Panel Replacement: adım 7, 3 resimden 1. Monster Soundstage S2 Front Panel Replacement: adım 7, 3 resimden 2. Monster Soundstage S2 Front Panel Replacement: adım 7, 3 resimden 3.
    • With the top panel removed, use a spudger to remove the display panel.

    • The clips on the display panel are quite fragile. Pry up both edges of the display before attempting removal.

    • Use a TR 10 screwdriver to remove the four final 10mm screws securing the speaker grille.

  8. Monster Soundstage S2 Front Panel Replacement: adım 8, 1 resimden 1.
    • Remove the front speaker grille.

  9. Monster Soundstage S2 Front Panel Replacement, Front Speakers: adım 9, 3 resimden 1. Monster Soundstage S2 Front Panel Replacement, Front Speakers: adım 9, 3 resimden 2. Monster Soundstage S2 Front Panel Replacement, Front Speakers: adım 9, 3 resimden 3.
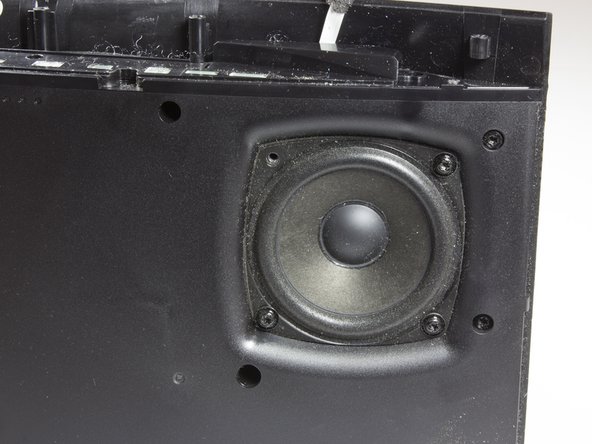
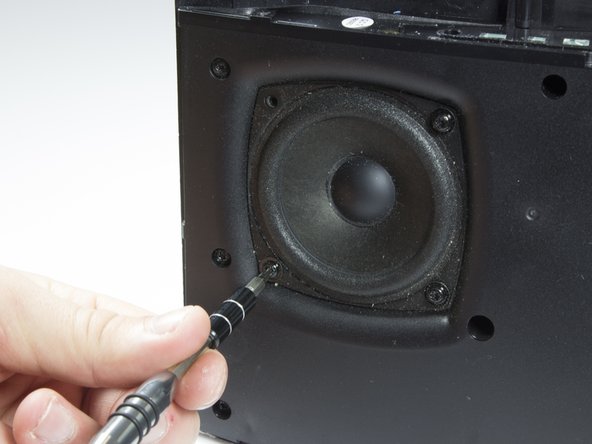
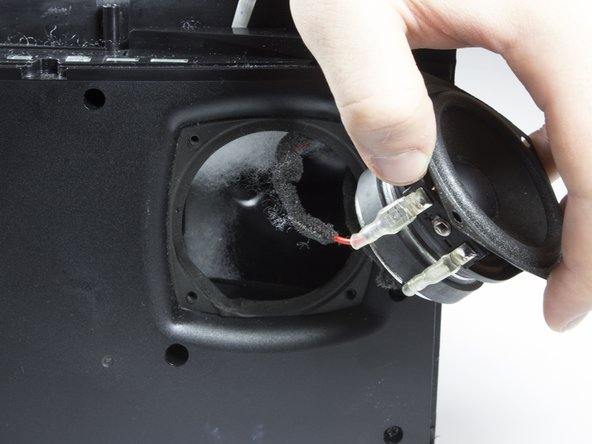
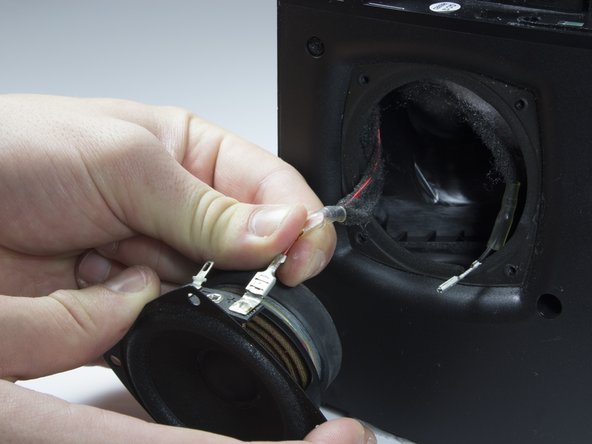
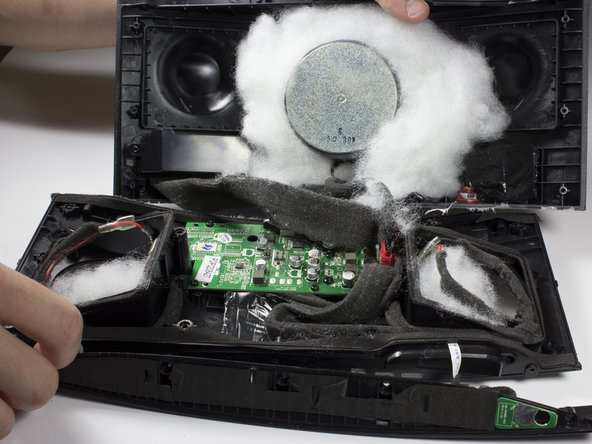
    • After removing grille, you will see the speakers.

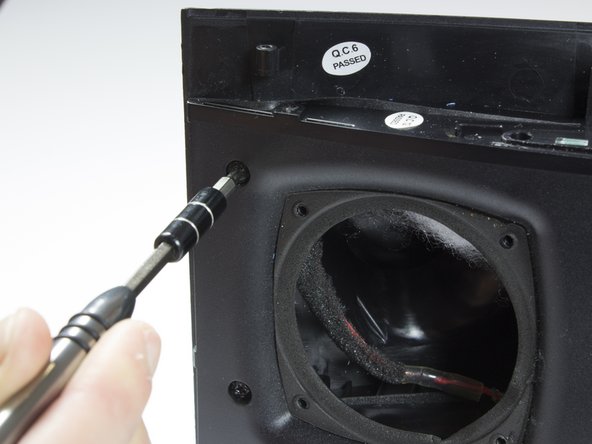
    • Remove the eight 10mm screws that surround the speakers. There will be four around each speaker.

  10. Monster Soundstage S2 Front Panel Replacement: adım 10, 2 resimden 1. Monster Soundstage S2 Front Panel Replacement: adım 10, 2 resimden 2.
    • Carefully lift each speaker from the housing. It may be necessary to break a light adhesive seal.

    • Be aware of the two wires that are connected to each speaker.

    • Set each speaker beside the main housing.

  11. Monster Soundstage S2 Front Panel Replacement: adım 11, 3 resimden 1. Monster Soundstage S2 Front Panel Replacement: adım 11, 3 resimden 2. Monster Soundstage S2 Front Panel Replacement: adım 11, 3 resimden 3.
    • Carefully but firmly unplug the two wires from each driver.

    • The front speakers can now be removed.

  12. Monster Soundstage S2 Front Panel Replacement, Front Panel: adım 12, 2 resimden 1. Monster Soundstage S2 Front Panel Replacement, Front Panel: adım 12, 2 resimden 2.
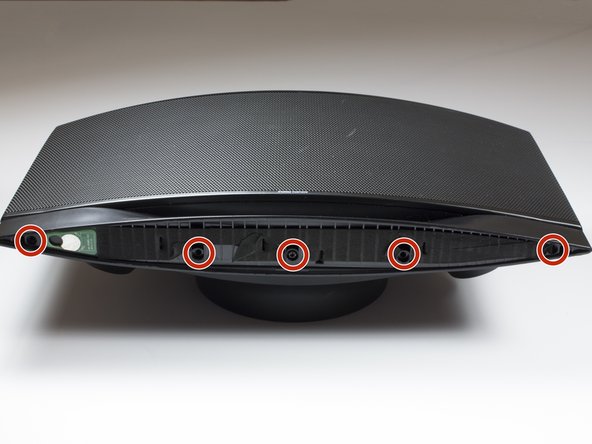
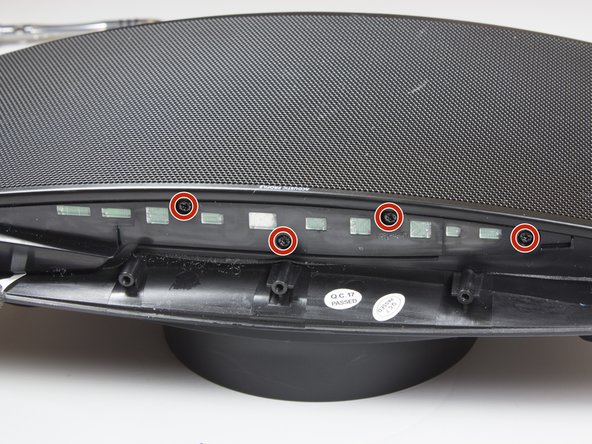
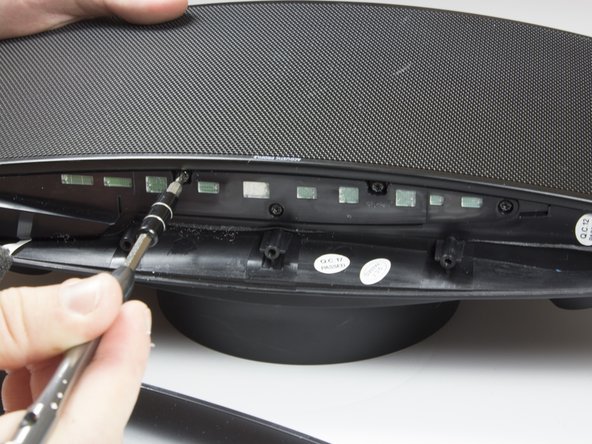
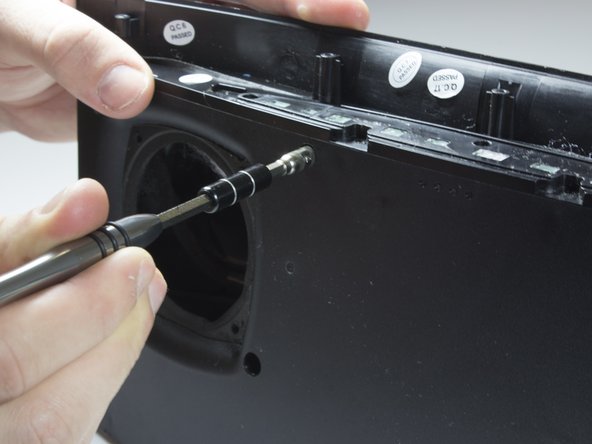
    • Identify the eight screws around the border of the front panel.

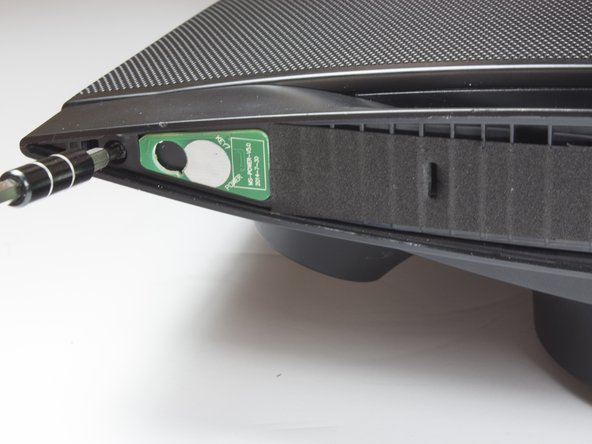
    • Using the TR 10 driver, remove the two 8mm screws.

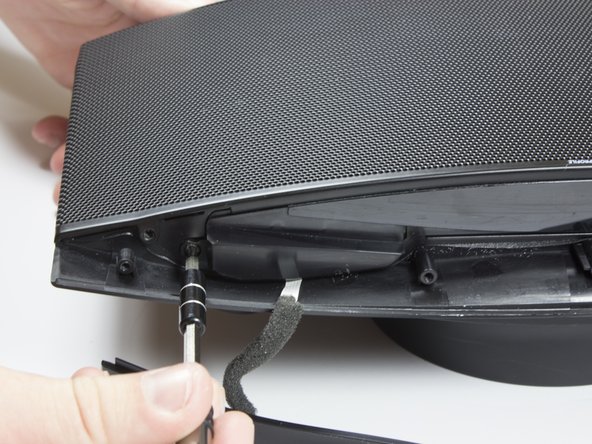
    • Using the TR 10 driver, remove the six 12mm screws.

  13. Monster Soundstage S2 Front Panel Replacement: adım 13, 1 resimden 1.
    • Use a 5 mm hex driver to extend the TR 10 driver. This allows the driver to access screws with deeper countersinks.

  14. Monster Soundstage S2 Front Panel Replacement: adım 14, 2 resimden 1. Monster Soundstage S2 Front Panel Replacement: adım 14, 2 resimden 2.
    • Identify the remaining four screws in the front panel.

    • Use the extended driver from the previous step to remove the four 12mm TR 10 screws.

  15. Monster Soundstage S2 Front Panel Replacement: adım 15, 2 resimden 1. Monster Soundstage S2 Front Panel Replacement: adım 15, 2 resimden 2.
    • Gently pull the front panel away from the back panel.

    • There are wires that connect the front and back panels. The two sides can be safely folded away from each other and laid flat on the table.

    • Remove the white sound dampening material from the speaker. Note the location of the material and set aside.

Sonuç

To reassemble your device, follow these instructions in reverse order.

2 farklı kişi bu kılavuzu tamamladı.

Shaw Hughes

Üyelik tarihi: 01/30/17

831 İtibar

5 adet Kılavuz yazıldı

Ekip

Cal Poly, Team 21-5, Maness Winter 2017 Cal Poly, Team 21-5, Maness Winter 2017 üyesi

CPSU-MANESS-W17S21G5

4 Üyeler

12 adet Kılavuz yazıldı

0 Yorum

Yorum Ekle

İstatistikleri Görüntüle:

Son 24 Saat: 1

Son 7 gün: 3

Son 30 gün: 4

Her zaman: 522