Ana içeriğe geç

Moto X Pure Edition Back Panel Removal

Arşivlenmiş Kılavuz
Bu kılavuz sadece arşivsel amaçlarla muhafaza edilmiştir. Onarımınızı gerçekleştirmek için kılavuzun güncel halini kullanın.
Salt Önkoşul
Bu kılavuz yalnızca diğer kılavuzlar için bir ön koşul olarak kullanılmak üzere tasarlanmıştır. Tek başına eksiktir.

Neye ihtiyacın var

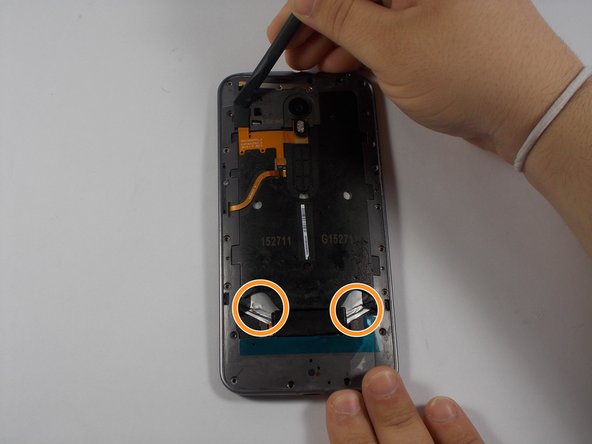
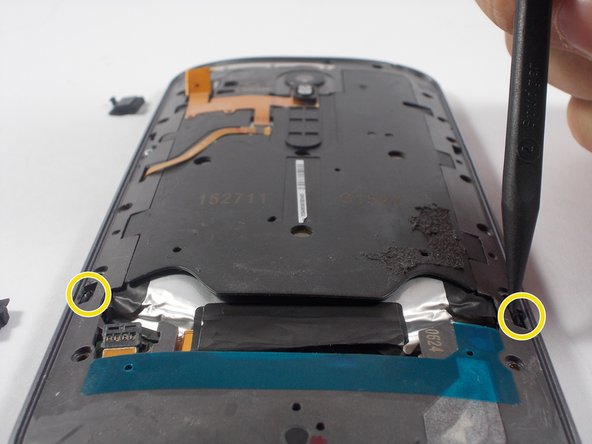
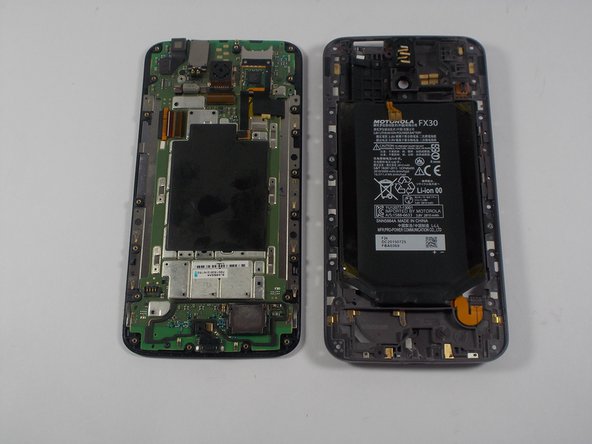
  1. Moto X Pure Edition Back Panel Removal, Back Panel: adım 1, 3 resimden 1. Moto X Pure Edition Back Panel Removal, Back Panel: adım 1, 3 resimden 2. Moto X Pure Edition Back Panel Removal, Back Panel: adım 1, 3 resimden 3.
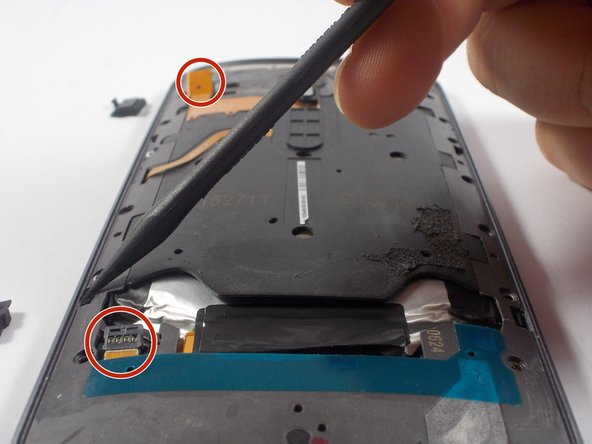
    • Disconnect the two battery connections.

    • Remove the two parallel black tabs by pulling on them.

  2. Moto X Pure Edition Back Panel Removal: adım 2, 3 resimden 1. Moto X Pure Edition Back Panel Removal: adım 2, 3 resimden 2. Moto X Pure Edition Back Panel Removal: adım 2, 3 resimden 3.
    • All screw lengths are 2.5mm

    • Using the T3 screw driver, remove all 20 T3 screws.

    • Do NOT remove the silver screw circled in orange.

    • This holds in the Power/Volume buttons and is not necessary to remove. There are 2 very tiny springs behind the volume buttons that are easy to lose if you remove this screw.

    • Using the nylon spudger, remove the two clips holding the panel in place.

Sonuç

To reassemble your device, follow these instructions in reverse order.

2 farklı kişi bu kılavuzu tamamladı.
Lucas Dos Santos

Üyelik tarihi: 03/06/16

1.053 İtibar

5 adet Kılavuz yazıldı

Ekip

UMass Dartmouth, Team 5-2, Landers Spring 2016 UMass Dartmouth, Team 5-2, Landers Spring 2016 üyesi

UMASSD-LANDERS-S16S5G2

3 Üyeler

15 adet Kılavuz yazıldı

0 Yorum

Yorum Ekle

İstatistikleri Görüntüle:

Son 24 Saat: 0

Son 7 gün: 0

Son 30 gün: 0

Her zaman: 148