Giriş
Prereq only. Dropped into existing guide.
This guide shows how to open the Motorola Moto Z in order to replace an old or dead battery.
Before you begin, discharge your battery below 25%. A charged lithium-ion battery can catch fire and/or explode if accidentally punctured.
If your battery is swollen, do not heat your phone. If needed, you can use a dropper or syringe to inject isopropyl alcohol (90+%) around the edges of the back cover to weaken the adhesive. Swollen batteries can be very dangerous, so wear eye protection and exercise due caution, or take it to a professional if you're not sure how to proceed.
The display assembly is extremely fragile and has no reinforcement. Work slowly and methodically when handling the display assembly.
Neye ihtiyacın var
-
-
-
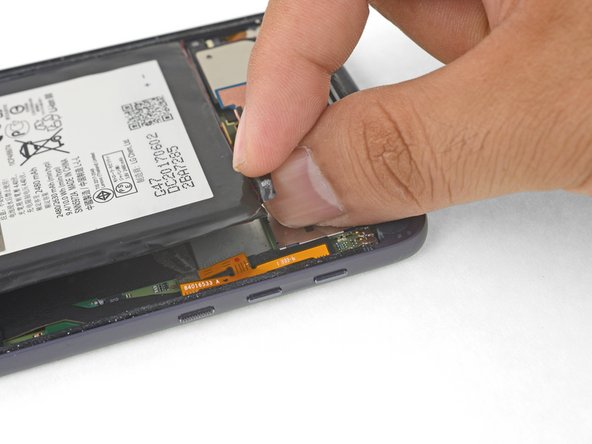
Remove the battery.
-
Remove any remaining adhesive from the phone, and clean the glued areas with isopropyl alcohol and a lint-free cloth.
-
Apply pre-cut adhesive strips or double-sided tape to the exposed, silver part of the battery compartment, not on the black foam layer.
-
Press the battery firmly into place for 5-10 seconds.
-


Compare your new replacement part to the original part. You may need to transfer remaining components or remove adhesive backings from the new part before installing.
To reassemble your device, follow these instructions in reverse order.
For optimal performance, calibrate your newly installed battery: Charge it to 100% and keep charging it for at least 2 more hours. Then use your device until it shuts off due to low battery. Finally, charge it uninterrupted to 100%.
Take your e-waste to an R2 or e-Stewards certified recycler.
Repair didn’t go as planned? Try some basic troubleshooting, or ask our Motorola Moto Z Answers community for troubleshooting help.

