Bu sürüm, hatalı düzenlemeler içerebilir. En son doğrulanmış bellek kopyası dönün.
Neye ihtiyacın var
-
Bu adım çevrilmemiş. Çevrilmesine yardım edin
-
Heat an iOpener and apply it to the left edge of the phone for at least 90 seconds.
-
-
Bu adım çevrilmemiş. Çevrilmesine yardım edin
-
In the following steps you will be cutting through the adhesive around the edge of the display assembly.
-
To avoid damage, do not cut in the following areas:
-
The OLED panel
-
The home button
-
The flash unit
-
-
Bu adım çevrilmemiş. Çevrilmesine yardım edin
-
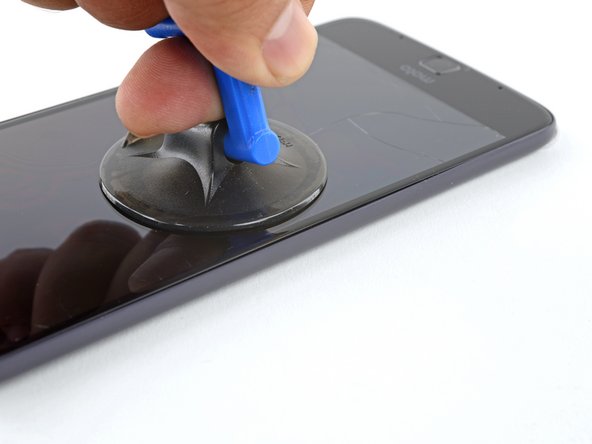
Apply a suction cup as close to the heated edge as possible.
-
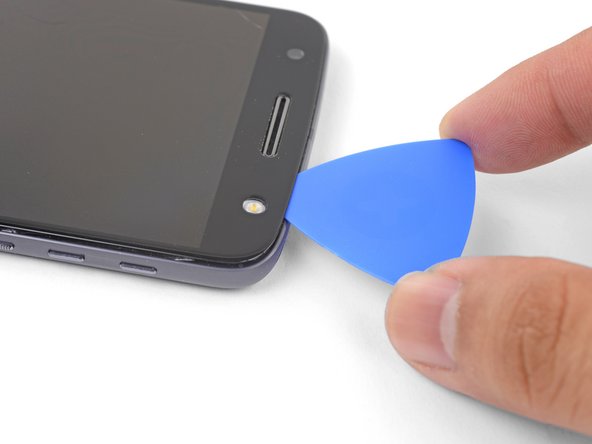
Lift on the suction cup and insert the tip of an opening pick into the gap.
-
-
Bu adım çevrilmemiş. Çevrilmesine yardım edin
-
Carefully slide the tip of the opening pick down and up the side of the phone, making sure not to cut deeper than 1/16" (1.5 mm).
-
Once you have separated the adhesive, leave an opening pick in the side to keep the adhesive from resealing.
-
-
Bu adım çevrilmemiş. Çevrilmesine yardım edin
-
Repeat the heating, lifting, and cutting steps for the remaining long edge of the phone.
-
-
Bu adım çevrilmemiş. Çevrilmesine yardım edin
-
Apply a heated iOpener to the top edge of the phone for at least 90 seconds.
-
-
Bu adım çevrilmemiş. Çevrilmesine yardım edin
-
Insert an opening pick into the flash side corner of the phone and carefully slice around the flash unit.
-
Once you are done cutting, leave the pick in the corner to prevent the adhesive from resealing.
-
-
-
Bu adım çevrilmemiş. Çevrilmesine yardım edin
-
Insert an opening pick into the remaining top corner of the phone.
-
Carefully slice through the adhesive across the top of the phone.
-
-
Bu adım çevrilmemiş. Çevrilmesine yardım edin
-
Apply a heated iOpener to the bottom edge of the phone for at least 90 seconds.
-
-
Bu adım çevrilmemiş. Çevrilmesine yardım edin
-
Insert an opening pick into a bottom corner and slice towards the home button, stopping before you reach it.
-
Once you're done with the corner, leave a pick in place to prevent the adhesive from sealing.
-
Repeat the process for the other bottom corner.
-
-
Bu adım çevrilmemiş. Çevrilmesine yardım edin
-
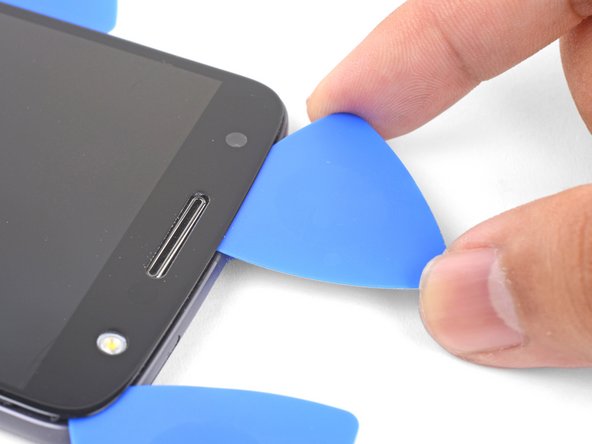
Carefully twist the first opening pick slightly to help release the edge adhesive.
-
Repeat the same process for each remaining pick, moving them as necessary and twisting slightly to release the adhesive.
-
-
Bu adım çevrilmemiş. Çevrilmesine yardım edin
-
Lift the earpiece end of the display up to provide access to the display cables.
-
-
Bu adım çevrilmemiş. Çevrilmesine yardım edin
-
Use the point of a spudger to pry the display cable shield up.
-
Remove the display cable shield.
-
-
Bu adım çevrilmemiş. Çevrilmesine yardım edin
-
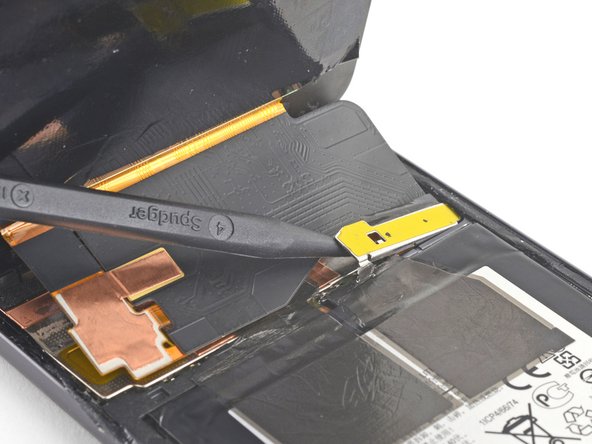
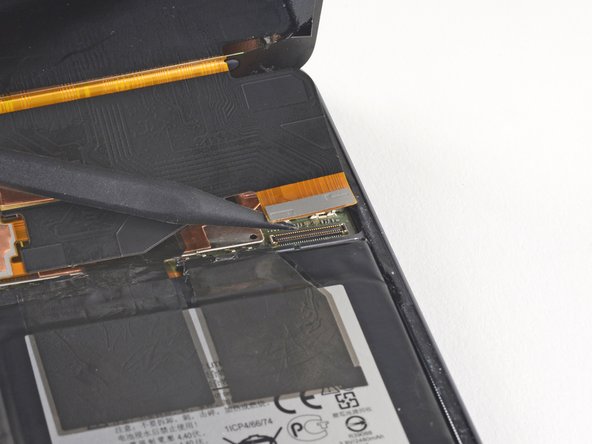
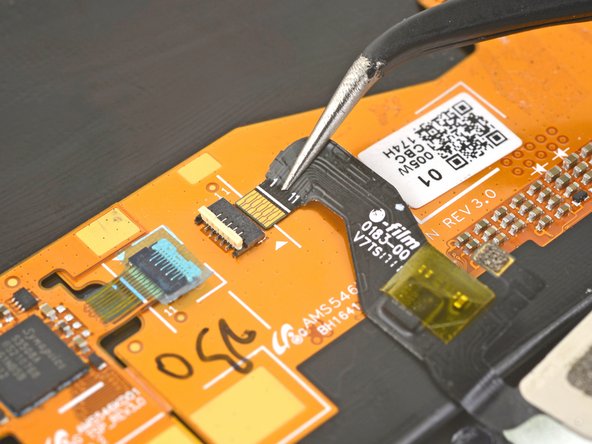
Use the point of the spudger to lift and disconnect the display cable connector from its socket.
-
-
Bu adım çevrilmemiş. Çevrilmesine yardım edin
-
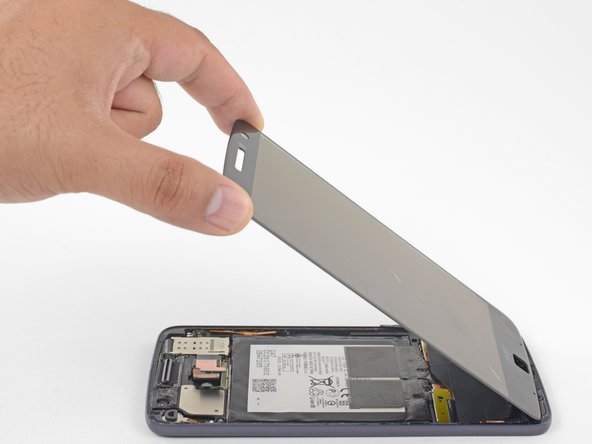
Remove the display assembly.
-
After removing all traces of glue and glass from the frame, clean the adhesion areas with 90% (or higher) isopropyl alcohol and a lint-free cloth or coffee filter.
-
-
Bu adım çevrilmemiş. Çevrilmesine yardım edin
-
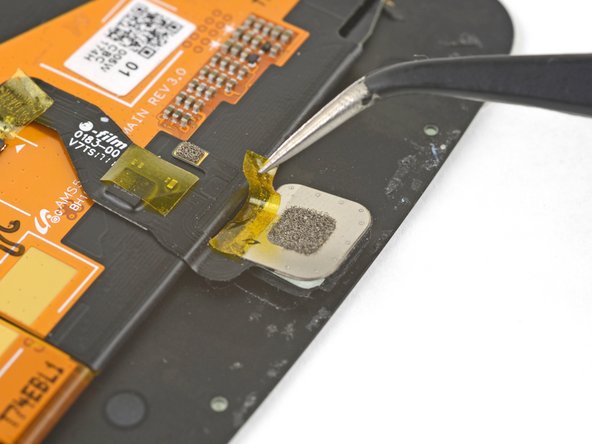
Use tweezers to peel off any tape on the home button connector and home button
-
-
Bu adım çevrilmemiş. Çevrilmesine yardım edin
-
Use the point of a spudger to flip up the home button connector's lock.
-
-
Bu adım çevrilmemiş. Çevrilmesine yardım edin
-
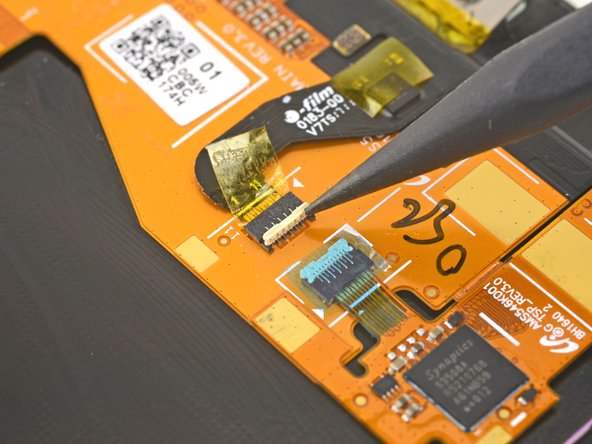
Use tweezers to carefully pull the home button cable straight out of the socket.
-


İptal et: Bu kılavuzu tamamlamadım.
18 farklı kişi bu kılavuzu tamamladı.


14 Yorum
Watch the youtube video it’s a lot better also instead of sending a sticker that connects the phone and the screen they should’ve added adhesive to the new screen.
Hi Jonathan,
Unlike aftermarket screens that may have adhesive pre-attached, we are an authorized Motorola reseller and sell OEM Motorola parts. In this case, the OEM screen comes without adhesive pre-attached.
For the most part this was a helpful guide, but what about the flash? When following the directions the flash comes off with the screen/digitizer, and it appears to have happened to the author as well. There is no mention or help in reattaching this component or needing to purchase a new flash component prior to beginning the repair. It will be too late for me, but any insight might help others.
Hey Joe,
You’re right—depending on the part you order, you may need to transfer the flash lens from your original back cover to the replacement part. This involves prying the original off and sticking it back onto the replacement cover. I’ll add a note to one of the steps.