Ana içeriğe geç

Motorola Atrix 4G LCD Replacement

Neye ihtiyacın var

  1. Motorola Atrix 4G LCD Replacement, Battery: adım 1, 1 resimden 1.
    • Pry the rear cover from the back of the phone.

  2. Motorola Atrix 4G LCD Replacement: adım 2, 2 resimden 1. Motorola Atrix 4G LCD Replacement: adım 2, 2 resimden 2.
    • Insert a spudger or plastic opening tool into the small notch at the base of the battery.

    • Lift the battery out of the phone.

  3. Motorola Atrix 4G LCD Replacement, Antenna: adım 3, 3 resimden 1. Motorola Atrix 4G LCD Replacement, Antenna: adım 3, 3 resimden 2. Motorola Atrix 4G LCD Replacement, Antenna: adım 3, 3 resimden 3.
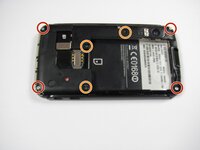
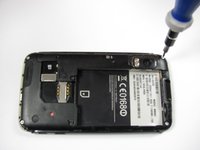
    • Remove the four 5.0 mm T5 Torx screws from the corners of the phone.

    • Remove three 5.5 mm T5 Torx screws from the back of the phone.

    • Lift up the black rubber flap near the SD card slot.

    • Remove the single 5.5 mm T5 Torx screw beneath the flap.

    • Do not attempt to loosen the screws with too much force. These screws are small, and easily stripped.

  4. Motorola Atrix 4G LCD Replacement: adım 4, 2 resimden 1. Motorola Atrix 4G LCD Replacement: adım 4, 2 resimden 2.
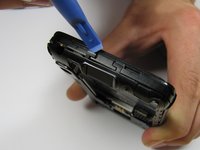
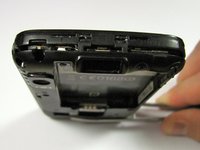
    • Remove the back case of the phone by gently lifting the tabs located on top of the phone near the lock button.

    • Use the case opener or spudger in these small areas because the plastic tabs can be easily broken.

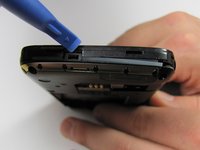
    • Lift the tabs located on the bottom of the phone to continue removing the back cover.

  5. Motorola Atrix 4G LCD Replacement: adım 5, 2 resimden 1. Motorola Atrix 4G LCD Replacement: adım 5, 2 resimden 2.
    • Slide an opening tool between the gap from the back of the case to the front.

    • After separating the sides, make sure there is a noticeable gap between the back case and the rest of the phone.

    • After detaching the tabs and sliding down the sides, there should be a noticeable gap between the front and back cases.

  6. Motorola Atrix 4G LCD Replacement: adım 6, 1 resimden 1.
    • Carefully separate the back case from the rest of the phone by lifting it away from the phone.

    • Do not completely remove the case from the rest of the phone. The antenna is connected to both cases.

  7. Motorola Atrix 4G LCD Replacement: adım 7, 1 resimden 1.
    • Disconnect the antenna from its housing on the motherboard by gently lifting beneath it.

  8. Motorola Atrix 4G LCD Replacement: adım 8, 1 resimden 1.
    • Ease the antenna from out of its guide along the side of the phone

    • Once the antenna is detached, remove the back case and the antenna from the phone

    • The antenna is soldered to the back case. Do not pull with too much force.

  9. Motorola Atrix 4G LCD Replacement, Motherboard: adım 9, 2 resimden 1. Motorola Atrix 4G LCD Replacement, Motherboard: adım 9, 2 resimden 2.
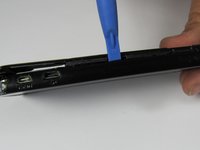
    • To remove the motherboard, first dislodge the right side of the motherboard, where the external connections are located, from the rest of the phone.

    • This can be done by placing a spudger in between the two ports on the phone, between the black plastic and motherboard, and prying out.

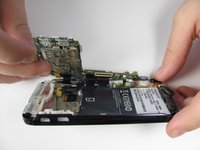
    • The motherboard should be able to be easily lifted upwards after dislodging it.

    • If the white rubber piece moves, replace it where it came from upon reassembly.

  10. Motorola Atrix 4G LCD Replacement: adım 10, 2 resimden 1. Motorola Atrix 4G LCD Replacement: adım 10, 2 resimden 2.
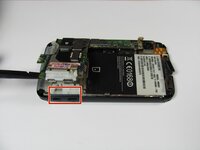
    • First, several connections must be disconnected to completely separate the motherboard from the rest of the phone.

    • The connection highlighted with a red box must be pulled down instead of out.

    • Using the spudger tool, separate the two connections on the motherboard highlighted with orange circles by pulling them out.

    • The black switch on top of this connection acts as a lock. Push it forwards to unlock the connection.

  11. Motorola Atrix 4G LCD Replacement: adım 11, 1 resimden 1.
    • After disconnecting the motherboard, there should be five distinct and separate parts of the phone: back cover, back case, front case, battery, and motherboard.

  12. Motorola Atrix 4G LCD Replacement, Screen: adım 12, 1 resimden 1.
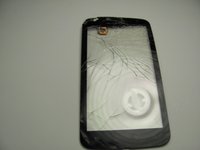
    • Using a heat gun or a hair dryer on high heat, soften the adhesive securing the glass screen.

    • Direct the hot air along the front edges of the glass until the phone is warm to the touch.

  13. Motorola Atrix 4G LCD Replacement: adım 13, 3 resimden 1. Motorola Atrix 4G LCD Replacement: adım 13, 3 resimden 2. Motorola Atrix 4G LCD Replacement: adım 13, 3 resimden 3.
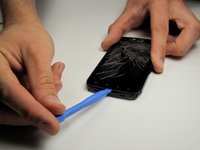
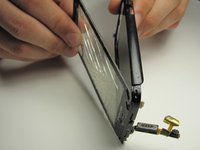
    • Using a plastic opening tool, carefully pry up the bottom of the display glass.

    • Slowly work your way around the phone, using the plastic opening tool to separate the glass from the phone.

    • As you work, the adhesive may cool and harden. You may need to heat up the glass again as you work your way around the screen.

  14. Motorola Atrix 4G LCD Replacement: adım 14, 2 resimden 1. Motorola Atrix 4G LCD Replacement: adım 14, 2 resimden 2.
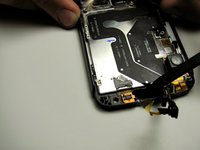
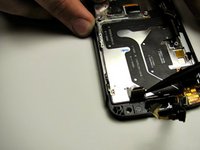
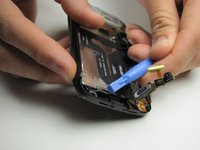
    • Using a spudger, lift up the digitizer cable that is attached to the glass.

    • Be careful not to damage the cable. It is glued in place and hard to remove.

  15. Motorola Atrix 4G LCD Replacement: adım 15, 3 resimden 1. Motorola Atrix 4G LCD Replacement: adım 15, 3 resimden 2. Motorola Atrix 4G LCD Replacement: adım 15, 3 resimden 3.
    • Now that the cable has been removed you can slide it through the opening and detach the glass.

    • Be careful as you pull the cable through the opening. The cable is easily damaged.

    • Once the cable is pushed through the slot, the glass can be fully removed.

  16. Motorola Atrix 4G LCD Replacement, LCD: adım 16, 3 resimden 1. Motorola Atrix 4G LCD Replacement, LCD: adım 16, 3 resimden 2. Motorola Atrix 4G LCD Replacement, LCD: adım 16, 3 resimden 3.
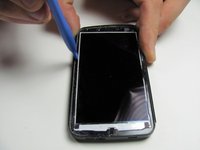
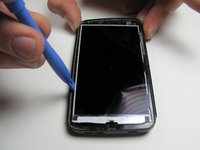
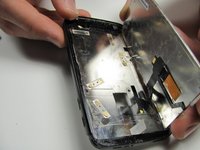
    • With the glass removed you can now access the LCD screen.

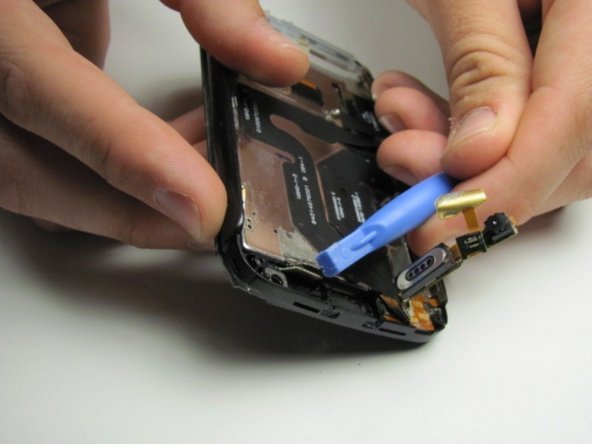
    • Using a plastic opening tool, slide it in between LCD screen and the case of the phone and then pry it out carefully.

    • Slide the case opener tool along the side until the LCD pops out of the case.

    • Carefully guide the cables attached to the back of the LCD through the hole.

  17. Motorola Atrix 4G LCD Replacement: adım 17, 1 resimden 1.
    • The LCD is now ready to be replaced.

Sonuç

To reassemble your device, follow these instructions in reverse order.

4 farklı kişi bu kılavuzu tamamladı.

Paul Sullivan

Üyelik tarihi: 04/19/12

238 İtibar

1 Kılavuz yazıldı

Ekip

Cal Poly, Team 9-42, Regan Spring 2012 Cal Poly, Team 9-42, Regan Spring 2012 üyesi

CPSU-REGAN-S12S9G42

6 Üyeler

15 adet Kılavuz yazıldı

0 Yorum

Yorum Ekle

İstatistikleri Görüntüle:

Son 24 Saat: 1

Son 7 gün: 2

Son 30 gün: 5

Her zaman: 6,892