Ana içeriğe geç
Onarım Topluluğuna Katılın - Hesap Oluşturun

Motorola Droid RAZR Volume Rocker Replacement

Neye ihtiyacın var

  1. Motorola Droid RAZR Volume Rocker Replacement, Back Cover: adım 1, 2 resimden 1. Motorola Droid RAZR Volume Rocker Replacement, Back Cover: adım 1, 2 resimden 2.
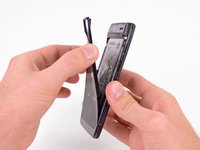
    • Insert a plastic opening tool between the back cover and rear case at the lower left edge of the back cover.

    • Pry the back cover up with the plastic opening tool to free the plastic clips.

    • Continue prying along the left edge of the back cover towards the top of the phone.

    FixBot'a Sor

    Yorum Ekle

  2. Motorola Droid RAZR Volume Rocker Replacement: adım 2, 3 resimden 1. Motorola Droid RAZR Volume Rocker Replacement: adım 2, 3 resimden 2. Motorola Droid RAZR Volume Rocker Replacement: adım 2, 3 resimden 3.
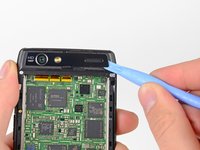
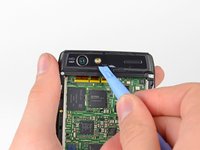
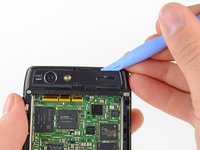
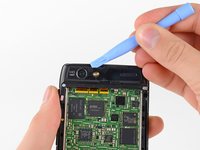
    • Work the plastic opening tool across the top of the back case to free the plastic clips.

    • The top edge of the back case is very thin. Pry carefully to avoid cracking or snapping it.

    • Continue prying down the right side of the back cover to free the remaining clips.

    FixBot'a Sor

    Yorum Ekle

  3. Motorola Droid RAZR Volume Rocker Replacement: adım 3, 3 resimden 1. Motorola Droid RAZR Volume Rocker Replacement: adım 3, 3 resimden 2. Motorola Droid RAZR Volume Rocker Replacement: adım 3, 3 resimden 3.
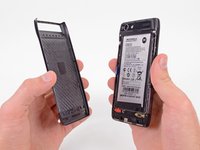
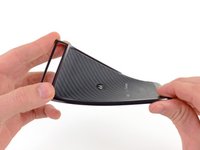
    • Pull the back cover away from the phone to remove it.

    • The back cover is attached to the battery with a generous amount of adhesive, so you may have to use quite a bit of force to separate the two pieces.

    • The battery must remain in the phone and not come off with the back cover or you will break the power lead.

    • Since the back cover is made of Kevlar, it can handle a fair amount of twisting and tugging without breaking.

    FixBot'a Sor

    Yorum Ekle

  4. Motorola Droid RAZR Volume Rocker Replacement, Battery: adım 4, 2 resimden 1. Motorola Droid RAZR Volume Rocker Replacement, Battery: adım 4, 2 resimden 2.
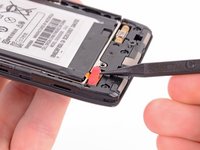
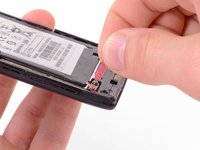
    • Use the tip of a spudger to lift up the red silicone cover over the battery terminal screws and remove it.

    FixBot'a Sor

    Yorum Ekle

  5. Motorola Droid RAZR Volume Rocker Replacement: adım 5, 3 resimden 1. Motorola Droid RAZR Volume Rocker Replacement: adım 5, 3 resimden 2. Motorola Droid RAZR Volume Rocker Replacement: adım 5, 3 resimden 3.
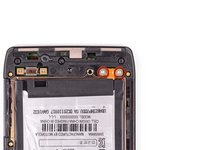
    • Remove the two 3.3 mm T5 Torx battery terminal screws.

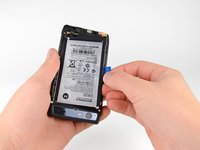
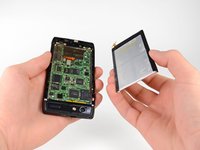
    • Grab the blue battery removal tab and lift the battery out to remove it.

    • There is quite a bit of adhesive securing the battery to the motherboard. Work slowly to avoid deforming the battery.

    • Your phone will have a number of metal EMI shields on the motherboard, rather than the bare ICs seen here.

    FixBot'a Sor

    Yorum Ekle

  6. Motorola Droid RAZR Volume Rocker Replacement, Camera Cover: adım 6, 2 resimden 1. Motorola Droid RAZR Volume Rocker Replacement, Camera Cover: adım 6, 2 resimden 2.
    • Use a heat gun or hair dryer to soften the adhesive underneath the camera cover.

    • The following steps were performed without the use of a heat gun. Notice that the camera cover cracks very easily if you do not heat the adhesive that holds it in place.

    • Gently pry up the bottom edge of the camera cover with a plastic opening tool.

    • Carefully slide the plastic opening tool across the bottom edge to free it from the adhesive.

    • Continue to use the heat gun as needed to soften the adhesive as you remove the camera cover.

    FixBot'a Sor

    Yorum Ekle

  7. Motorola Droid RAZR Volume Rocker Replacement: adım 7, 3 resimden 1. Motorola Droid RAZR Volume Rocker Replacement: adım 7, 3 resimden 2. Motorola Droid RAZR Volume Rocker Replacement: adım 7, 3 resimden 3.
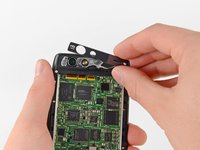
    • Insert the plastic opening tool underneath the top edge of the camera cover.

    • Gently pry the camera cover up as you slide the plastic opening tool across the top edge to free it from the adhesive.

    • Remove the camera cover.

    FixBot'a Sor

    Yorum Ekle

  8. Motorola Droid RAZR Volume Rocker Replacement, Rear Case: adım 8, 1 resimden 1.
    • Remove the six screws securing the rear case to the rest of the phone:

    • three 6.7 mm silver T3 Torx screws at the top,

    • four 4.0 mm gold T3 Torx screws in the middle,

    • and three 4.5 mm black T5 Torx screws at the bottom.

    FixBot'a Sor

    Yorum Ekle

  9. Motorola Droid RAZR Volume Rocker Replacement: adım 9, 3 resimden 1. Motorola Droid RAZR Volume Rocker Replacement: adım 9, 3 resimden 2. Motorola Droid RAZR Volume Rocker Replacement: adım 9, 3 resimden 3.
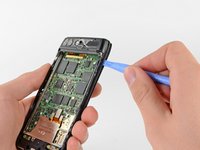
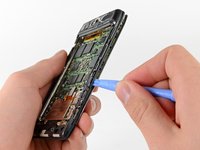
    • Insert a plastic opening tool between the rear case and the motherboard assembly.

    • Work your way down the side of the phone and gently pry the rear case up.

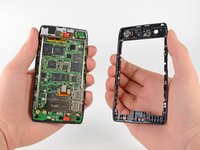
    • Separate the rear case from the motherboard assembly.

    FixBot'a Sor

    Yorum Ekle

  10. Motorola Droid RAZR Volume Rocker Replacement, Volume Rocker: adım 10, 1 resimden 1.
    • Remove the volume rocker from the rear panel.

    • Be sure to note how the volume rocker sat in the rear case to properly install your replacement.

    FixBot'a Sor

    Yorum Ekle

Sonuç

To reassemble your device, follow these instructions in reverse order.

İptal et: Bu kılavuzu tamamlamadım.

2 farklı kişi bu kılavuzu tamamladı.

David Hodson

Üyelik tarihi: 04/13/10

156.397 İtibar

127 adet Kılavuz yazıldı

0Kılavuz Yorumları

Yorum Ekle

İstatistikleri Görüntüle:

Son 24 Saat: 1

Son 7 gün: 4

Son 30 gün: 44

Her zaman: 7,289