Bu sürüm, hatalı düzenlemeler içerebilir. En son doğrulanmış bellek kopyası dönün.
Neye ihtiyacın var
-
Bu adım çevrilmemiş. Çevrilmesine yardım edin
-
Insert your fingernail or the flat end of a spudger into the notch on the bottom right corner of the phone.
-
Pry with your fingernail or twist the spudger to release the back cover's clips from the phone.
-
-
Bu adım çevrilmemiş. Çevrilmesine yardım edin
-
Insert your fingernail or the flat end of a spudger into the seam on the bottom of the phone and slide it along the edge to release the clips holding the back cover to the phone.
-
-
Bu adım çevrilmemiş. Çevrilmesine yardım edin
-
Continue sliding your fingernail or spudger along the seam around the rest of the phone to release the remaining clips.
-
-
Bu adım çevrilmemiş. Çevrilmesine yardım edin
-
Insert your fingernail or the flat end of the spudger into the notch at the bottom of the battery.
-
Pry with your fingernail or spudger to free the battery from its recess.
-
-
Bu adım çevrilmemiş. Çevrilmesine yardım edin
-
Remove the thirteen 3.5 mm-long T5 Torx screws securing the motherboard and daughterboard covers to the phone's frame.
-
-
Bu adım çevrilmemiş. Çevrilmesine yardım edin
-
Insert the flat end of a spudger into the seam on the bottom of the daughterboard cover.
-
Twist the spudger slightly to unclip the daughterboard cover.
-
Remove the daughterboard cover.
-
-
Bu adım çevrilmemiş. Çevrilmesine yardım edin
-
Use the point of a spudger to pry up and disconnect the antenna cable from the daughterboard.
-
-
Bu adım çevrilmemiş. Çevrilmesine yardım edin
-
Use a spudger to pry up and disconnect the motherboard flex cable connector from the daughterboard.
-
-
-
Bu adım çevrilmemiş. Çevrilmesine yardım edin
-
Remove the 3 mm-long T5 Torx screws securing the daughterboard to the phone's frame.
-
-
Bu adım çevrilmemiş. Çevrilmesine yardım edin
-
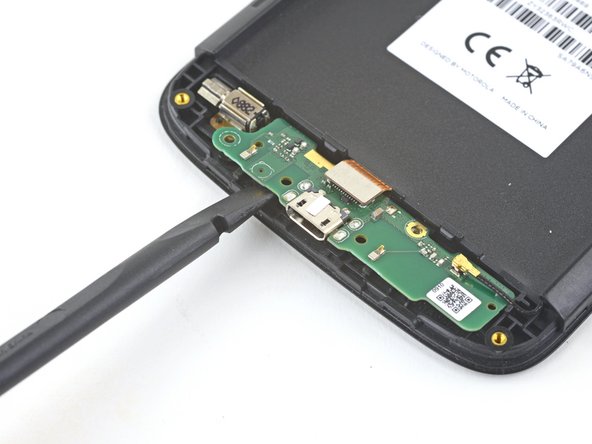
Insert the flat end of a spudger into the gap below the daughterboard and to the left of the charging port.
-
Pry the daughterboard up slightly with the spudger to loosen it from its recess.
-
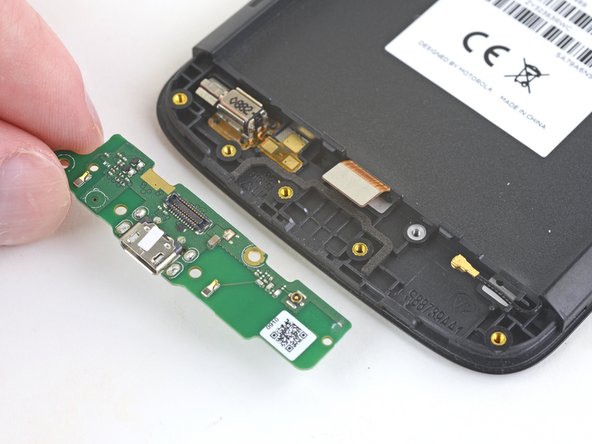
Lift and remove the daughterboard, taking care not to snag any cables.
-
-
Bu adım çevrilmemiş. Çevrilmesine yardım edin
-
Use the point of a spudger to pry up and loosen the vibration motor from its recess.
-
-
Bu adım çevrilmemiş. Çevrilmesine yardım edin
-
Use an opening pick to carefully slice the adhesive underneath the vibration motor's contact pads.
-
Remove the vibration motor.
-
-
Bu adım çevrilmemiş. Çevrilmesine yardım edin
-
Insert an opening tool into the seam on the right side of the phone near the top.
-
Gently pry upwards until the hidden clip on the motherboard cover releases.
-
-
Bu adım çevrilmemiş. Çevrilmesine yardım edin
-
Insert an opening tool into the seam on the top of the phone, to the right of the indentation.
-
Gently pry upwards until the hidden clip on the motherboard cover releases.
-
-
Bu adım çevrilmemiş. Çevrilmesine yardım edin
-
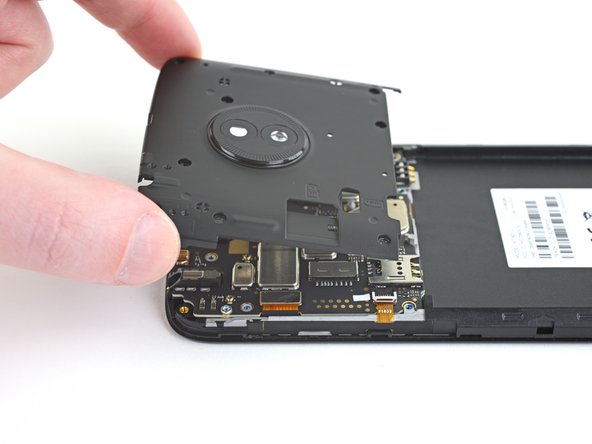
Lift the motherboard cover from the top and remove it.
-
-
Bu adım çevrilmemiş. Çevrilmesine yardım edin
-
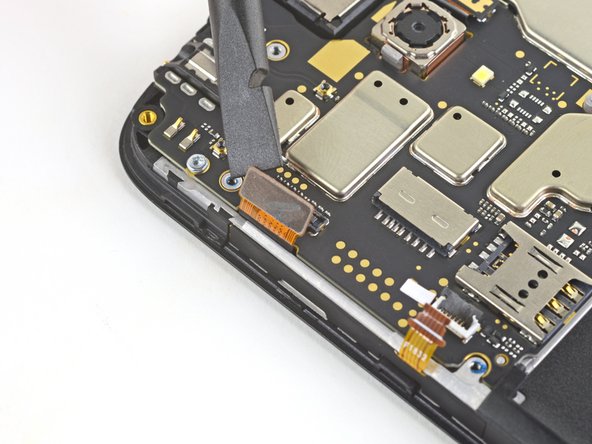
Take note of which socket the antenna cable is attached to on the motherboard.
-
Use the point of a spudger to pry up and disconnect the antenna cable from the motherboard.
-
-
Bu adım çevrilmemiş. Çevrilmesine yardım edin
-
Use the point of a spudger to lift up the locking mechanism securing the ribbon cable to the ZIF connector.
-
-
Bu adım çevrilmemiş. Çevrilmesine yardım edin
-
Slide an opening pick between the ribbon cable and the motherboard to remove the cable from its connector.
-
-
Bu adım çevrilmemiş. Çevrilmesine yardım edin
-
Use a spudger to pry up and disconnect the display connector from the motherboard.
-
-
Bu adım çevrilmemiş. Çevrilmesine yardım edin
-
Remove the two 3 mm-long T5 Torx screws securing the motherboard to the phone's frame.
-
-
Bu adım çevrilmemiş. Çevrilmesine yardım edin
-
Insert the flat end of a spudger underneath the motherboard, anywhere near the top edge of the phone.
-
Lift the spudger slightly to loosen the motherboard from the frame.
-
Remove the motherboard from the phone.
-
-
Bu adım çevrilmemiş. Çevrilmesine yardım edin
-
Use the flat end of a spudger to pry up and loosen the earpiece module from its recess.
-
Use your fingers or a pair of tweezers to remove the earpiece module.
-
-
Bu adım çevrilmemiş. Çevrilmesine yardım edin
-
Insert an opening pick in between the frame and button assembly.
-
Carefully slide the opening pick underneath the button assembly to slice the adhesive.
-
Remove the button assembly.
-
-
Bu adım çevrilmemiş. Çevrilmesine yardım edin
-
Use the point of a spudger to pry up a corner of the black battery mat.
-
Use your fingers to slowly peel the battery mat from the frame.
-
-
Bu adım çevrilmemiş. Çevrilmesine yardım edin
-
Use your fingers or a pair of tweezers to lift and de-route the antenna cable from its groove on the right edge of the phone.
-
-
Bu adım çevrilmemiş. Çevrilmesine yardım edin
-
Insert an opening pick underneath the daughterboard flex cable.
-
Slide the pick along the underside of the cable, slicing the adhesive and removing the cable from the phone.
-
-
Bu adım çevrilmemiş. Çevrilmesine yardım edin
-
Only the frame and the LCD screen and digitizer assembly remain. Double-check that you removed all of the necessary components.
-


İptal et: Bu kılavuzu tamamlamadım.
15 farklı kişi bu kılavuzu tamamladı.

6 Yorum
How do i get the screen out of the frame?
It’s all one component! I suppose it’s possible to separate them, but the part we sell includes the screen and the frame in one piece.
Yup, screen and frame comes as one piece. Just completed!
Do I need any adhesive to put it on the new frame? If so, what type and where does it go? Thanks!