Ana içeriğe geç

Motorola Moto G 1st Generation Battery Replacement

Neye ihtiyacın var

  1. Motorola Moto G 1st Generation Battery Replacement, Rear Panel: adım 1, 3 resimden 1. Motorola Moto G 1st Generation Battery Replacement, Rear Panel: adım 1, 3 resimden 2. Motorola Moto G 1st Generation Battery Replacement, Rear Panel: adım 1, 3 resimden 3.
    • Before you start following any of the steps of this guide, completely turn the device off.

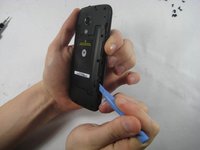
    • Take the plastic back cover off by either using a plastic Pry tool or simply using your hands. Start from the bottom by the charging port

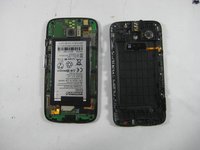
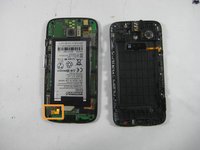
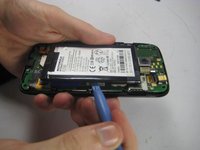
    • Remove any installed SIM card and memory microSD cards.

    • Push the SIM card into the phone, and the spring eject mechanism should release the card.

    • The microSD memory card(s) may not have an eject mechanism. If so, they must be removed carefully by pushing on the raised edge/bump that is built onto the card. Use your fingernail or a plastic or rubber tool, but not one that will scratch and damage the delicate card.

    • Patience must be taken to prevent irreversible damage and loss of data on the card.

  2. Motorola Moto G 1st Generation Battery Replacement, Removing the Screws: adım 2, 1 resimden 1.
    • Unscrew the 3.5mm screws, total of 14, located on the back protective cover by using a T5 Torx screwdriver.

  3. Motorola Moto G 1st Generation Battery Replacement, Battery Cover: adım 3, 2 resimden 1. Motorola Moto G 1st Generation Battery Replacement, Battery Cover: adım 3, 2 resimden 2.
    • Use a plastic opening tool to remove the protective cover.

    • Carefully work the plastic tool around all the edges of the phone.

    • The protective cover holds the Volume and the Home buttons which might fall off the assembly when the cover is removed.

  4. Motorola Moto G 1st Generation Battery Replacement, Disconnecting the Battery: adım 4, 2 resimden 1. Motorola Moto G 1st Generation Battery Replacement, Disconnecting the Battery: adım 4, 2 resimden 2.
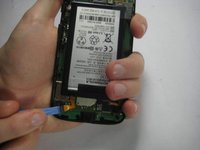
    • Disconnect the connection between the Battery and the Mother Board by using the Pry tool.

  5. Motorola Moto G 1st Generation Battery Replacement, Removing the Battery: adım 5, 2 resimden 1. Motorola Moto G 1st Generation Battery Replacement, Removing the Battery: adım 5, 2 resimden 2.
    • With the battery already disconnected,work around its edge with the pry tool to remove it from the assembly.

    • The battery is attached with a sticker, so it may take some work to pry up. Just work at it slowly and carefully until you get it.

Sonuç

To reassemble your device, follow these instructions in reverse order.

3 farklı kişi bu kılavuzu tamamladı.

Radostin Lobodov

Üyelik tarihi: 10/16/14

2.904 İtibar

6 adet Kılavuz yazıldı

Ekip

UMass Dartmouth, Team 5-7, Vijaybhaskar Fall 2014 UMass Dartmouth, Team 5-7, Vijaybhaskar Fall 2014 üyesi

UMASSD-VIJAYBHASKAR-F14S5G7

3 Üyeler

8 adet Kılavuz yazıldı

Bir Yorum

Hello!

I have just completed this operation. I would like you to know that my Moto G 1st Generation needed a T4 Torx screwdriver.

Other than that, everything went fine!

Best Wishes,

Bubba G

Bubba G - Yanıt

Yorum Ekle

İstatistikleri Görüntüle:

Son 24 Saat: 0

Son 7 gün: 1

Son 30 gün: 3

Her zaman: 4,058