Ana içeriğe geç
Onarım Topluluğuna Katılın - Hesap Oluşturun

NETGEAR WGT624 v3 Antenna Replacement

Neye ihtiyacın var

  1. NETGEAR WGT624 v3 Antenna Replacement, Lower Case: adım 1, 1 resimden 1.
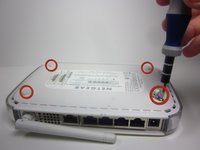
    • Turn the device so that the bottom is facing up.

    FixBot'a Sor
    Yorum Ekle

  2. NETGEAR WGT624 v3 Antenna Replacement: adım 2, 3 resimden 1. NETGEAR WGT624 v3 Antenna Replacement: adım 2, 3 resimden 2. NETGEAR WGT624 v3 Antenna Replacement: adım 2, 3 resimden 3.
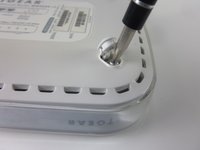
    • Use the plastic opening tool to carefully lift the rubber stops in each corner.

    • Do not completely remove the rubber stops, because they are difficult to replace.

    FixBot'a Sor

    Yorum Ekle

  3. NETGEAR WGT624 v3 Antenna Replacement: adım 3, 2 resimden 1. NETGEAR WGT624 v3 Antenna Replacement: adım 3, 2 resimden 2.
    • Unscrew the 4 11.8 mm T-8 Torx screws from each corner of the device.

    FixBot'a Sor

    Yorum Ekle

  4. NETGEAR WGT624 v3 Antenna Replacement: adım 4, 2 resimden 1. NETGEAR WGT624 v3 Antenna Replacement: adım 4, 2 resimden 2.
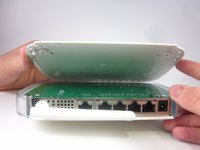
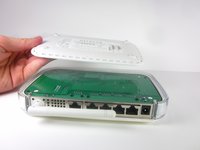
    • Lift the lower case straight up from the rest of the router.

    FixBot'a Sor

    Yorum Ekle

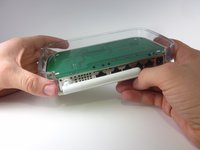
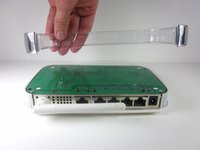
  5. NETGEAR WGT624 v3 Antenna Replacement, Motherboard: adım 5, 2 resimden 1. NETGEAR WGT624 v3 Antenna Replacement, Motherboard: adım 5, 2 resimden 2.
    • Remove the clear plastic casing by lifting it straight up from the router.

    FixBot'a Sor

    Yorum Ekle

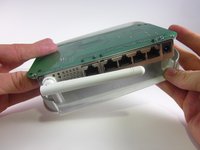
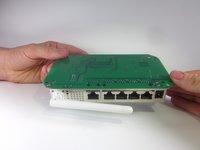
  6. NETGEAR WGT624 v3 Antenna Replacement: adım 6, 2 resimden 1. NETGEAR WGT624 v3 Antenna Replacement: adım 6, 2 resimden 2.
    • Separate the motherboard from the top shell by lifting it straight up from the router.

    FixBot'a Sor
    Yorum Ekle

  7. NETGEAR WGT624 v3 Antenna Replacement, Antenna: adım 7, 1 resimden 1.
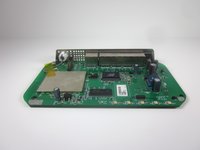
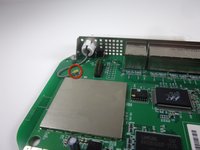
    • Turn the motherboard, so that the top is facing upwards.

    • Place the motherboard on a clean flat surface.

    FixBot'a Sor
    Yorum Ekle

  8. NETGEAR WGT624 v3 Antenna Replacement: adım 8, 2 resimden 1. NETGEAR WGT624 v3 Antenna Replacement: adım 8, 2 resimden 2.
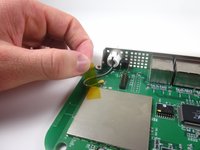
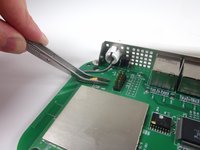
    • Remove the yellow tape that holds the wire.

    • Make sure that you set the tape aside on a clean surface, so that it can be reused.

    FixBot'a Sor
    Yorum Ekle

  9. NETGEAR WGT624 v3 Antenna Replacement: adım 9, 3 resimden 1. NETGEAR WGT624 v3 Antenna Replacement: adım 9, 3 resimden 2. NETGEAR WGT624 v3 Antenna Replacement: adım 9, 3 resimden 3.
    Bu adımda kullanılan alet:
    Tweezers
    $4.99
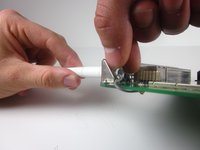
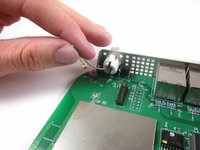
    • Use tweezers to gently pull the metal bracket that connects the antenna to the motherboard.

    • The wire should now be completely separate from the motherboard.

    FixBot'a Sor

    Yorum Ekle

  10. NETGEAR WGT624 v3 Antenna Replacement: adım 10, 1 resimden 1.
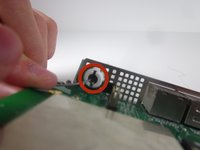
    • Extend the antenna away from the device, so that it becomes straight.

    FixBot'a Sor

    Yorum Ekle

  11. NETGEAR WGT624 v3 Antenna Replacement: adım 11, 3 resimden 1. NETGEAR WGT624 v3 Antenna Replacement: adım 11, 3 resimden 2. NETGEAR WGT624 v3 Antenna Replacement: adım 11, 3 resimden 3.
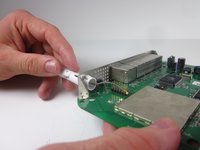
    • Find the clips that hold the antenna onto the router.

    • Use one hand to push the clips in, while using your other hand to pull out the antenna. You may need to gently twist the antenna so it can separate from the hole.

    • The antenna may take considerable force to remove.

    FixBot'a Sor

    Yorum Ekle

  12. NETGEAR WGT624 v3 Antenna Replacement: adım 12, 1 resimden 1.
    • Completely separate the antenna and wire from the rest of the device.

    FixBot'a Sor

    Yorum Ekle

Sonuç

To reassemble your device, follow these instructions in reverse order.
İptal et: Bu kılavuzu tamamlamadım.

Jonathon Sather

Üyelik tarihi: 01/23/13

45 İtibar

3 adet Kılavuz yazıldı

Ekip

Cal Poly, Team 3-31, Amido Winter 2013 Cal Poly, Team 3-31, Amido Winter 2013 üyesi

CPSU-AMIDO-W13S3G31

3 Üyeler

12 adet Kılavuz yazıldı

0Kılavuz Yorumları

Yorum Ekle

İstatistikleri Görüntüle:

Son 24 Saat: 1

Son 7 gün: 6

Son 30 gün: 38

Her zaman: 4,841