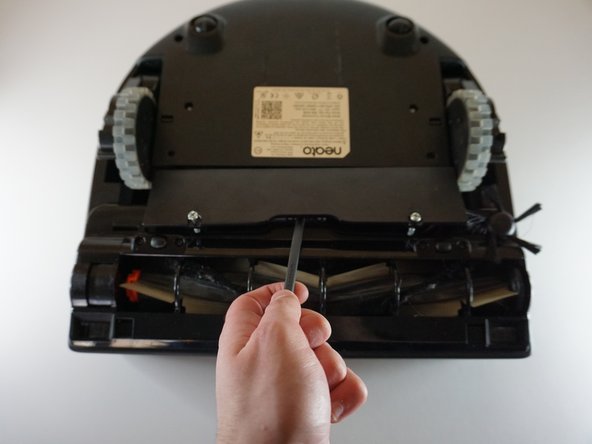
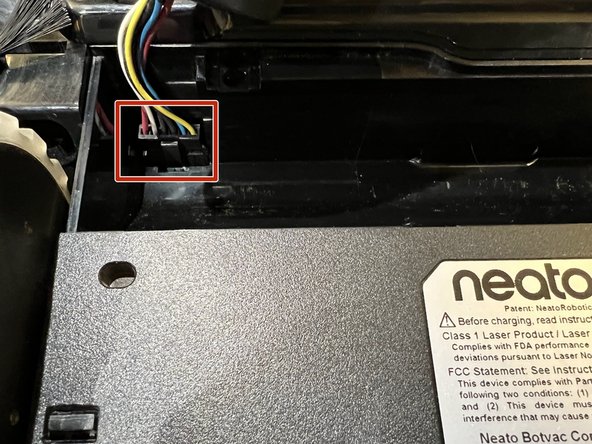
Ana içeriğe geç

Neato BOTVAC CONNECTED Front Roller Brush Replacement

Neye ihtiyacın var

  1. Neato BOTVAC CONNECTED Front Roller Brush Replacement, Battery: adım 1, 1 resimden 1.
    • Place the top of the Neato Botvac Connected against a flat surface.

  2. Neato BOTVAC CONNECTED Front Roller Brush Replacement: adım 2, 2 resimden 1. Neato BOTVAC CONNECTED Front Roller Brush Replacement: adım 2, 2 resimden 2.
    • Remove the two 5.5 mm screws with a Phillips #2 screwdriver.

  3. Neato BOTVAC CONNECTED Front Roller Brush Replacement: adım 3, 2 resimden 1. Neato BOTVAC CONNECTED Front Roller Brush Replacement: adım 3, 2 resimden 2.
    • Using the spudger, remove the panel covering the battery.

  4. Neato BOTVAC CONNECTED Front Roller Brush Replacement: adım 4, 3 resimden 1. Neato BOTVAC CONNECTED Front Roller Brush Replacement: adım 4, 3 resimden 2. Neato BOTVAC CONNECTED Front Roller Brush Replacement: adım 4, 3 resimden 3.
    • Gently remove the connecting wires attached to the battery.

    • The wires are attached to the vacuum through a clip.

  5. Neato BOTVAC CONNECTED Front Roller Brush Replacement: adım 5, 1 resimden 1.
    • Using the spudger, gently remove the battery from the device.

  6. Neato BOTVAC CONNECTED Front Roller Brush Replacement, Front Roller Brush: adım 6, 2 resimden 1. Neato BOTVAC CONNECTED Front Roller Brush Replacement, Front Roller Brush: adım 6, 2 resimden 2.
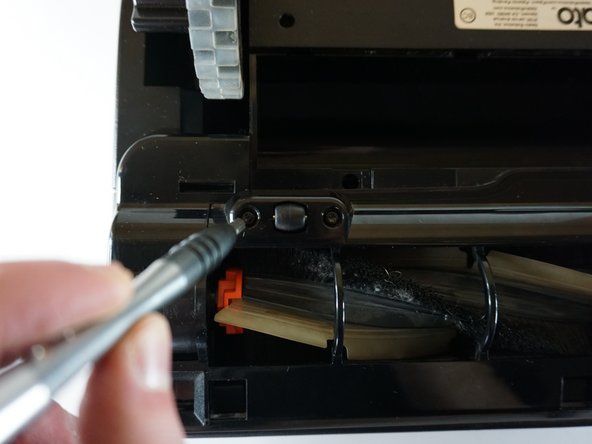
    • Remove the following screws with a Torx screwdriver:

    • Four 2.3 mm screws.

  7. Neato BOTVAC CONNECTED Front Roller Brush Replacement: adım 7, 1 resimden 1.
    • Gently remove the thin panel held by the four screws with a spudger.

  8. Neato BOTVAC CONNECTED Front Roller Brush Replacement: adım 8, 1 resimden 1.
    • Gently remove the two small wheels, and the axles attached to them.

  9. Neato BOTVAC CONNECTED Front Roller Brush Replacement: adım 9, 1 resimden 1.
    • Gently remove the panel that is on top of the front roller with the spudger.

  10. Neato BOTVAC CONNECTED Front Roller Brush Replacement: adım 10, 1 resimden 1.
    • Gently remove the front brush.

Sonuç

To reassemble your device, follow these instructions in reverse order.

Justin Silva

Üyelik tarihi: 03/20/23

645 İtibar

5 adet Kılavuz yazıldı

Ekip

UMass Dartmouth, Team 6-3, Botvin Spring 2023 UMass Dartmouth, Team 6-3, Botvin Spring 2023 üyesi

UMASSD-BOTVIN-S23S6G3

4 Üyeler

5 adet Kılavuz yazıldı

0 Yorum

Yorum Ekle

İstatistikleri Görüntüle:

Son 24 Saat: 1

Son 7 gün: 1

Son 30 gün: 14

Her zaman: 119