Ana içeriğe geç

Nest Hello Casing and Faceplate Replacement

Neye ihtiyacın var

  1. Nest Hello Casing and Faceplate Replacement, Casing and Faceplate: adım 1, 1 resimden 1.
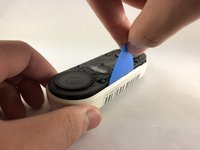
    • Insert the pick between the black faceplate and white casing of the Nest Hello.

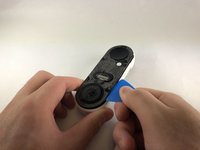
    • Pry the faceplate away from the device with the opening pick.

    • If you have not opened the Nest Hello before, there will be a protective foam mesh that is glued to the plastic covering and the inside of the mesh, use a pick to cut through the mesh as much as possible.

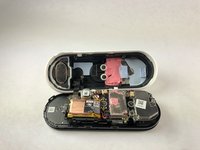
    • Completely remove the faceplate from the device, do not be afraid to pull hard.

  2. Nest Hello Casing and Faceplate Replacement: adım 2, 2 resimden 1. Nest Hello Casing and Faceplate Replacement: adım 2, 2 resimden 2.
    • Peel back the cover stickers and use the Phillips #000 screwdriver to remove the four screws.

  3. Nest Hello Casing and Faceplate Replacement: adım 3, 3 resimden 1. Nest Hello Casing and Faceplate Replacement: adım 3, 3 resimden 2. Nest Hello Casing and Faceplate Replacement: adım 3, 3 resimden 3.
    • Insert opening pick between the white casing and the black internal circuitry and pry it out.

    • There is a ribbon cable connecting the white casing to the circuit boards. Be careful not to tear out the cable while separating the casing from the circuit boards.

Sonuç

To reassemble your device, follow these instructions in reverse order.

2 Yorum

Are Replacement parts available anywhere? Can’t seem to find anything… thanks!

Andres Chavez - Yanıt

Aside from fine grit sanding and spray painting or using a silicone cover, has anyone found a creative way to fix the delaminated an existing Gen 1 Google Nest wired / Nest Hello doorbell faceplate (remove the rest of the flaking off laminate)?

RickSoFlo - Yanıt

Yorum Ekle

İstatistikleri Görüntüle:

Son 24 Saat: 1

Son 7 gün: 21

Son 30 gün: 74

Her zaman: 2,049