Ana içeriğe geç

Netgear Arlo Plastic Housing Replacement

Neye ihtiyacın var

  1. Netgear Arlo Plastic Housing Replacement, Battery: adım 1, 3 resimden 1. Netgear Arlo Plastic Housing Replacement, Battery: adım 1, 3 resimden 2. Netgear Arlo Plastic Housing Replacement, Battery: adım 1, 3 resimden 3.
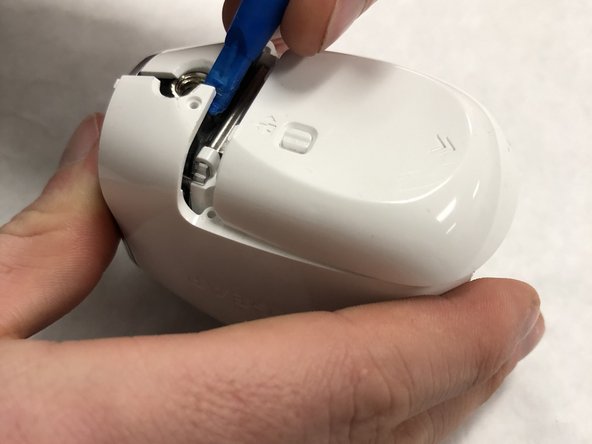
    • Locate unlock switch on underside of camera and unlock it by sliding it.

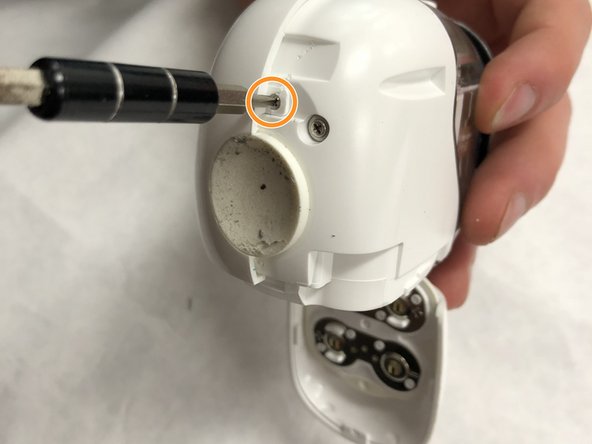
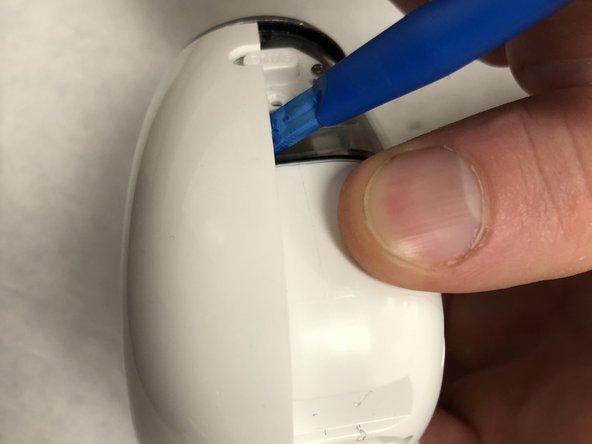
    • Once unlocked, slide the cover out and up to open the battery housing.

  2. Netgear Arlo Plastic Housing Replacement: adım 2, 1 resimden 1.
    • Remove all 4 of the 3.0 Volt batteries from the battery housing.

  3. Netgear Arlo Plastic Housing Replacement: adım 3, 1 resimden 1.
    • Inspect prongs at the bottom of the battery housing to ensure that they are not bent or broken before replacing the batteries.

  4. Netgear Arlo Plastic Housing Replacement, Plastic Housing: adım 4, 1 resimden 1.
    • Remove the 2 (3.5mm) housing screws with a J0 screwdriver.

  5. Netgear Arlo Plastic Housing Replacement: adım 5, 2 resimden 1. Netgear Arlo Plastic Housing Replacement: adım 5, 2 resimden 2.
    • Slide the unlocked battery cover forward to remove 2 (3.5mm) screws, that are behind the cover.

  6. Netgear Arlo Plastic Housing Replacement: adım 6, 1 resimden 1.
    • Open the battery cover and remove the 2 (3.5mm") screws from under the cover.

  7. Netgear Arlo Plastic Housing Replacement: adım 7, 3 resimden 1. Netgear Arlo Plastic Housing Replacement: adım 7, 3 resimden 2. Netgear Arlo Plastic Housing Replacement: adım 7, 3 resimden 3.
    • Use a plastic opening tool to start separating the plastic housing from the front side of the battery cover.

    • Next, start separating the plastic cover from the rear of the plastic housing, and work your way down the seam line.

    • Make sure the plastics snaps on the front of the plastic get unhooked from the grey plastic ring around the front of the camera.

  8. Netgear Arlo Plastic Housing Replacement: adım 8, 3 resimden 1. Netgear Arlo Plastic Housing Replacement: adım 8, 3 resimden 2. Netgear Arlo Plastic Housing Replacement: adım 8, 3 resimden 3.
    • Remove the screw (3.5mm) near the sync button holding the opposite side of the camera on.

    • Remove the second screw (3.5mm) on the back of the camera to remove the second housing.

    • Once the screws are removed use an opening tool to pry back the second plastic mount.

Sonuç

To reassemble your device, follow these instructions in reverse order.

Bir başkası bu kılavuzu tamamladı.

Connor Krampen

Üyelik tarihi: 01/08/18

399 İtibar

3 adet Kılavuz yazıldı

Ekip

IUPUI, Team S1-G1, Freund Spring 2018 IUPUI, Team S1-G1, Freund Spring 2018 üyesi

IUPUI-FREUND-S18S1G1

2 Üyeler

6 adet Kılavuz yazıldı

2 Yorum

Where can I buy replacement parts like a battery cover for Arlo

L R Hardy - Yanıt

Note that under the rubber cover shown in step 6 there is a USB-B port.
You can run the Arlo on a USB adapter as well.
You only need to make a hole in the battery lid or 3D print a new cover.

Bas Vijfwinkel - Yanıt

Yorum Ekle

İstatistikleri Görüntüle:

Son 24 Saat: 0

Son 7 gün: 2

Son 30 gün: 8

Her zaman: 2,324