Bu sürüm, hatalı düzenlemeler içerebilir. En son doğrulanmış bellek kopyası dönün.
Neye ihtiyacın var
-
Bu adım çevrilmemiş. Çevrilmesine yardım edin
-
On the bottom right of the camera, locate the battery flap switch.
-
-
Bu adım çevrilmemiş. Çevrilmesine yardım edin
-
Move this switch to the right so the battery flap can flip open.
-
-
Bu adım çevrilmemiş. Çevrilmesine yardım edin
-
Slide the orange switch to the right as shown. Now the battery can be pulled out. Reverse these steps to re-install.
-
-
Bu adım çevrilmemiş. Çevrilmesine yardım edin
-
Remove the three 3x3mm screws attached to the rear casing.
-
-
Bu adım çevrilmemiş. Çevrilmesine yardım edin
-
Remove the 5x3mm screw holding down the panel on the side closest to the lens.
-
-
Bu adım çevrilmemiş. Çevrilmesine yardım edin
-
Pry the panel off from the bottom using your fingernail.
-
-
-
Bu adım çevrilmemiş. Çevrilmesine yardım edin
-
Remove the 3x2mm screw underneath the panel near the top of the camera.
-
-
Bu adım çevrilmemiş. Çevrilmesine yardım edin
-
Remove the 4x3mm on the opposite side near the selector wheel.
-
Remove the 2x2mm and 3x2mm screws underneath the a/v flap.
-
-
Bu adım çevrilmemiş. Çevrilmesine yardım edin
-
Pry the back panel away from the body of the camera, using the space you just opened up.
-
A small piece of the frame of the camera may fall off, but it can be easily put back into place during reassembly.
-
-
Bu adım çevrilmemiş. Çevrilmesine yardım edin
-
Pry up the plastic ribbon connectors on the body of the camera to release the ribbon cables.
-
-
Bu adım çevrilmemiş. Çevrilmesine yardım edin
-
Remove the three 3x3mm screws that attach the front casing to the bottom.
-
-
Bu adım çevrilmemiş. Çevrilmesine yardım edin
-
Remove the two 3x2 screws and two 3.5x2.5 screws attaching the rear panel to the motherboard.
-
-
Bu adım çevrilmemiş. Çevrilmesine yardım edin
-
Detach the ribbon cable from the motherboard by flipping up the latch on the ribbon connector.
-
-
Bu adım çevrilmemiş. Çevrilmesine yardım edin
-
Remove the final 4x3mm screw at the top of the camera near the lens.
-
-
Bu adım çevrilmemiş. Çevrilmesine yardım edin
-
Pry the front casing away from the body of the camera.
-
-
Bu adım çevrilmemiş. Çevrilmesine yardım edin
-
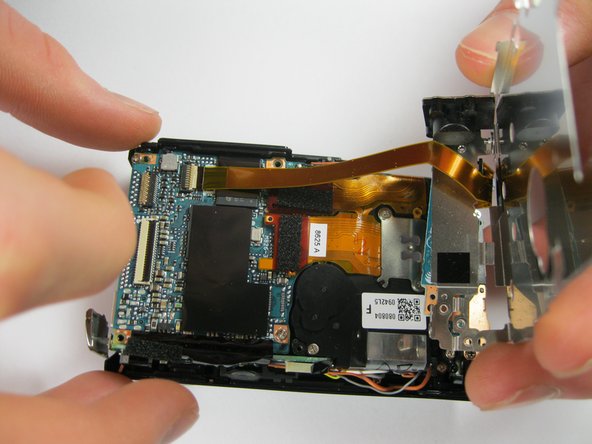
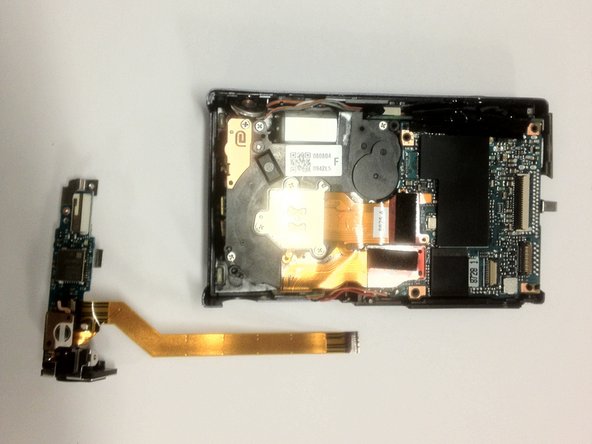
Unscrew the three 3x2mm screws that attach the cables to the front casing.
-


Ekip

Cal Poly, Team 9-5, Regan Winter 2012 Cal Poly, Team 9-5, Regan Winter 2012 üyesi
CPSU-REGAN-W12S9G5
5 Üyeler
12 adet Kılavuz yazıldı