Ana içeriğe geç

Nikon Coolpix L32 LCD Replacement

Neye ihtiyacın var

  1. Nikon Coolpix L32 LCD Replacement, Front Panel: adım 1, 3 resimden 1. Nikon Coolpix L32 LCD Replacement, Front Panel: adım 1, 3 resimden 2. Nikon Coolpix L32 LCD Replacement, Front Panel: adım 1, 3 resimden 3.
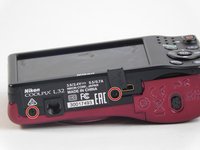
    • Remove the six(3.93mm screws) on the outside of the camera using a Phillips 00 screwdriver.

  2. Nikon Coolpix L32 LCD Replacement: adım 2, 1 resimden 1.
    • Open the battery compartment door and pull the black back face apart from the front red face.

  3. Nikon Coolpix L32 LCD Replacement, LCD: adım 3, 1 resimden 1.
    • Using the spudger, gently pull the LCD screen from the tray holding it.

    • Do not pull the LCD screen far from the camera because there is a ribbon cable connected to it.

  4. Nikon Coolpix L32 LCD Replacement: adım 4, 1 resimden 1.
    • Use the spudger to lift up the small white retaining flap on the motherboard that is connected to the LCD screen's ribbon cable.

  5. Nikon Coolpix L32 LCD Replacement: adım 5, 1 resimden 1.
    • With the small retaining white flap up, remove the LCD screen ribbon cable from the motherboard by sliding it out.

Sonuç

To reassemble your device, follow these instructions in reverse order.

Bir başkası bu kılavuzu tamamladı.

Sherika Jacobs

Üyelik tarihi: 09/15/16

348 İtibar

3 adet Kılavuz yazıldı

Ekip

USF Tampa, Team 2-4, Blackwell Fall 2016 USF Tampa, Team 2-4, Blackwell Fall 2016 üyesi

USFT-BLACKWELL-F16S2G4

4 Üyeler

10 adet Kılavuz yazıldı

0 Yorum

Yorum Ekle

İstatistikleri Görüntüle:

Son 24 Saat: 0

Son 7 gün: 0

Son 30 gün: 6

Her zaman: 790