Ana içeriğe geç

Nintendo 3DS SD Board Replacement

Salt Önkoşul
Bu kılavuz yalnızca diğer kılavuzlar için bir ön koşul olarak kullanılmak üzere tasarlanmıştır. Tek başına eksiktir.

Neye ihtiyacın var

  1. Nintendo 3DS SD Board Replacement, SD Board: adım 1, 1 resimden 1.
    • Remove the two 4.5 mm Phillips screws securing the SD board to the motherboard.

  2. Nintendo 3DS SD Board Replacement: adım 2, 2 resimden 1. Nintendo 3DS SD Board Replacement: adım 2, 2 resimden 2.
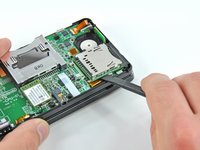
    • Use the flat end of a spudger to pry the SD board ribbon cable connector off its socket on the motherboard.

  3. Nintendo 3DS SD Board Replacement: adım 3, 3 resimden 1. Nintendo 3DS SD Board Replacement: adım 3, 3 resimden 2. Nintendo 3DS SD Board Replacement: adım 3, 3 resimden 3.
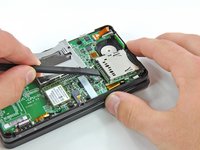
    • Insert the flat end of a spudger between the SD board and the motherboard.

    • Pry up slowly to loosen the SD board from the RF shield underneath it. If you pry too quickly, you may tear the shield or break its solder points.

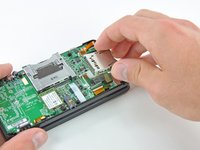
    • Run the spudger along the sides of the SD board to free it from the adhesive holding it in place.

    • Once completely freed, lift the SD board straight off the motherboard.

Sonuç

To reassemble your device, follow these instructions in reverse order.

David Hodson

Üyelik tarihi: 04/13/10

150.352 İtibar

127 adet Kılavuz yazıldı

0 Yorum

Yorum Ekle

İstatistikleri Görüntüle:

Son 24 Saat: 0

Son 7 gün: 0

Son 30 gün: 0

Her zaman: 232