Ana içeriğe geç

Nintendo DS Lite Lower Case Replacement

Neye ihtiyacın var

  1. Nintendo DS Lite Lower Case Replacement, Battery: adım 1, 2 resimden 1. Nintendo DS Lite Lower Case Replacement, Battery: adım 1, 2 resimden 2.
    • Unscrew the Phillips screw securing the battery cover to the lower case.

    • The screw remains captive to the battery cover.

    • Pry the battery cover upward with a spudger or fingernail, and lift out of the lower case.

  2. Nintendo DS Lite Lower Case Replacement: adım 2, 1 resimden 1.
    • Wedge the edge of a spudger in between the side of the battery and the lower case housing and pry upward to dislodge the battery.

    • Remove the battery from the DS Lite.

  3. Nintendo DS Lite Lower Case Replacement, Lower Case: adım 3, 2 resimden 1. Nintendo DS Lite Lower Case Replacement, Lower Case: adım 3, 2 resimden 2.
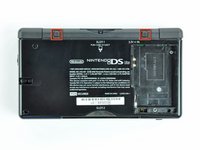
    • Use the tip of a spudger to pry both rubber feet off the DS Lite.

  4. Nintendo DS Lite Lower Case Replacement: adım 4, 1 resimden 1.
    • Remove the following screws securing the lower case to the body of the DS Lite:

    • Two 4.3 mm gold Phillips screws

    • One 3.9 mm black Tri-Wing screw

    • One 3.3 mm silver Phillips screw

    • Three 5.5 mm silver Tri-Wing screws

  5. Nintendo DS Lite Lower Case Replacement: adım 5, 3 resimden 1. Nintendo DS Lite Lower Case Replacement: adım 5, 3 resimden 2. Nintendo DS Lite Lower Case Replacement: adım 5, 3 resimden 3.
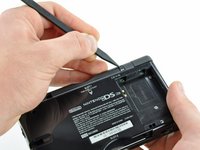
    • Remove the cover from the Game Pak slot before continuing.

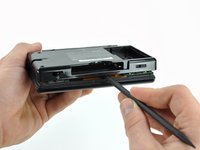
    • Insert the edge of a spudger in between the lower and upper case near the top right corner of the DS Lite.

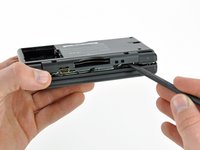
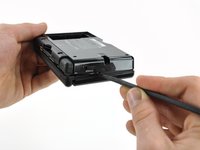
    • Carefully run the spudger along the right edge of the DS Lite, creating an opening in the process.

    • Continue running the spudger along the backside of the DS Lite until the majority of the lower case has been separated from the upper case.

  6. Nintendo DS Lite Lower Case Replacement: adım 6, 1 resimden 1.
    • Lift the lower case away from the rest of the DS Lite.

    • Pull carefully. Some units are sealed with adhesive, and pulling too hard can damage the power switch.

    • When re-assembling, make sure that power switch and volume sliders are properly aligned with the switches on the motherboard.

Sonuç

To reassemble your device, follow these instructions in reverse order.

33 farklı kişi bu kılavuzu tamamladı.

Matthew Newsom

Üyelik tarihi: 01/05/10

39.402 İtibar

67 adet Kılavuz yazıldı

0 Yorum

Yorum Ekle

İstatistikleri Görüntüle:

Son 24 Saat: 6

Son 7 gün: 41

Son 30 gün: 205

Her zaman: 27,030