Ana içeriğe geç

Nintendo Entertainment System Controller Outlet Replacement

Neye ihtiyacın var

  1. Nintendo Entertainment System Controller Outlet Replacement, Game Cartridge Tray: adım 1, 2 resimden 1. Nintendo Entertainment System Controller Outlet Replacement, Game Cartridge Tray: adım 1, 2 resimden 2.
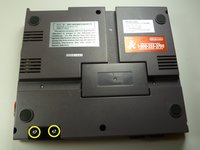
    • Remove the six 13.25mm Phillips screws on the bottom of the game console with a #2.5 flathead screwdriver.

    • The screws are recessed about 40 mm.

    • Flip the game console right side up and take off the top by pulling it up and away from the rest of the device with your hands.

  2. Nintendo Entertainment System Controller Outlet Replacement: adım 2, 2 resimden 1. Nintendo Entertainment System Controller Outlet Replacement: adım 2, 2 resimden 2.
    • Remove the seven 13.25mm Phillips screws from the metal cover with a Phillips head #2 screwdriver.

    • Remove the metal cover by pulling it up and away from the rest of the console with your hands.

  3. Nintendo Entertainment System Controller Outlet Replacement: adım 3, 3 resimden 1. Nintendo Entertainment System Controller Outlet Replacement: adım 3, 3 resimden 2. Nintendo Entertainment System Controller Outlet Replacement: adım 3, 3 resimden 3.
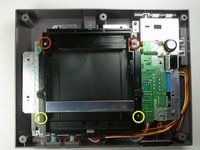
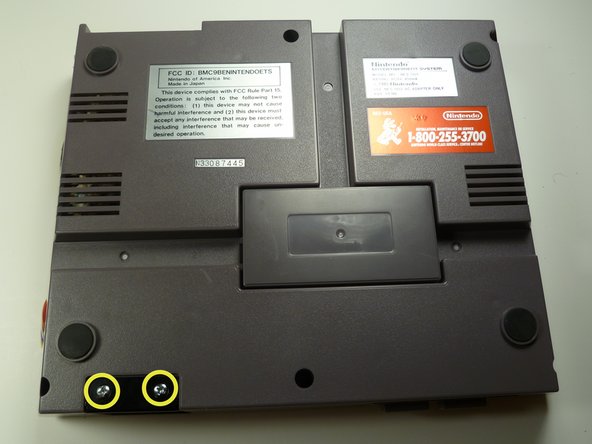
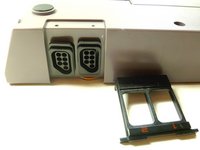
    • Remove the two silver 17.45mm Phillips screws from the cartridge tray using a Phillips head #2 screwdriver.

    • Remove the two bronze 13.25mm Phillips screws from the cartridge tray using a Phillips head #2 screwdriver.

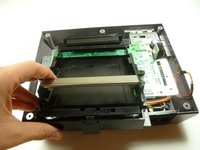
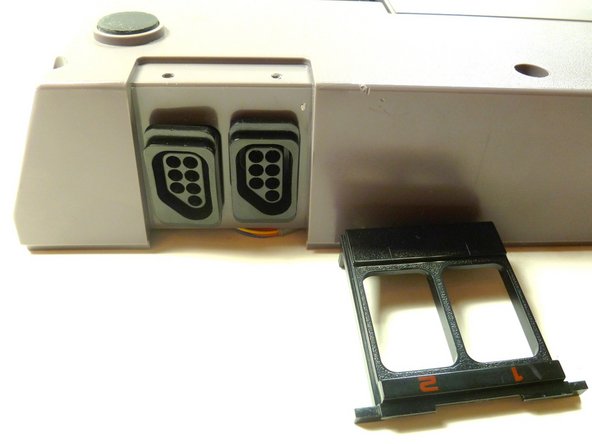
    • Slide the cartridge tray toward you, away from the 72-PIN connector, and off the motherboard assembly.

  4. Nintendo Entertainment System Controller Outlet Replacement: adım 4, 2 resimden 1. Nintendo Entertainment System Controller Outlet Replacement: adım 4, 2 resimden 2.
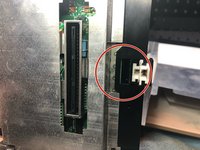
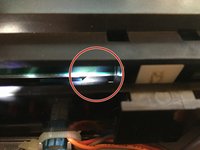
    • Note: Underneath the cartridge tray is a black trapezoid-shaped tab/lip (see marker). When properly assembled this tab/lip goes below the motherboard and shielding as seen here.

    • During reassembly, make sure you orient this tab underneath the motherboard in addition to orienting the tray on top. Failure to do so will bow the cartridge tray and place stress on the component, causing the cartridge spring mechanism to bind.

  5. Nintendo Entertainment System Controller Outlet Replacement, Motherboard: adım 5, 3 resimden 1. Nintendo Entertainment System Controller Outlet Replacement, Motherboard: adım 5, 3 resimden 2. Nintendo Entertainment System Controller Outlet Replacement, Motherboard: adım 5, 3 resimden 3.
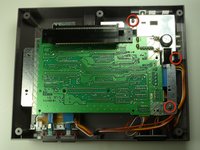
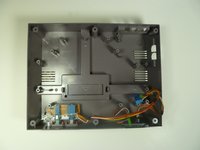
    • Remove the three 13.25mm Phillips screws that secure the motherboard to the lower case with a Phillips head #2 screwdriver.

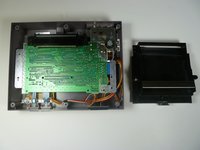
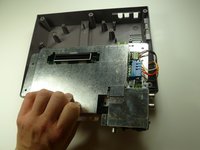
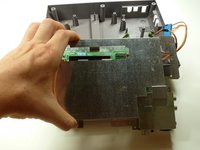
    • Pull the motherboard assembly straight up and out of the plastic case with your hands.

    • Turn the motherboard assembly over so the metal cover is facing you.

  6. Nintendo Entertainment System Controller Outlet Replacement: adım 6, 1 resimden 1.
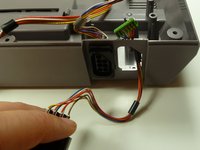
    • Disconnect the wire harnesses from the motherboard assembly:

    • Player 1

    • Player 2

    • Power

    • Make sure you remember where player 1 and player 2 cables are plugged in; do not mix them up. A good technique would be to write each title on a piece of tape and wrap them around the appropriate wire.

  7. Nintendo Entertainment System Controller Outlet Replacement: adım 7, 3 resimden 1. Nintendo Entertainment System Controller Outlet Replacement: adım 7, 3 resimden 2. Nintendo Entertainment System Controller Outlet Replacement: adım 7, 3 resimden 3.
    • Lift off the EMI shield (metal cover) from the motherboard assembly.

    • Turn over the motherboard assembly so the 72-PIN connector is on the top of the motherboard assembly.

  8. Nintendo Entertainment System Controller Outlet Replacement, Controller Outlet: adım 8, 3 resimden 1. Nintendo Entertainment System Controller Outlet Replacement, Controller Outlet: adım 8, 3 resimden 2. Nintendo Entertainment System Controller Outlet Replacement, Controller Outlet: adım 8, 3 resimden 3.
    • Flip the bottom cover of the game console over.

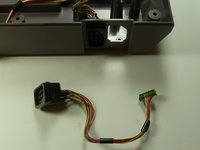
    • Remove the two 7.6mm Phillips screws that secure the plastic controller outlet cover with a Phillips head #2 screwdriver.

    • Pull the plastic cover off of the plastic NES case with your hands.

  9. Nintendo Entertainment System Controller Outlet Replacement: adım 9, 2 resimden 1. Nintendo Entertainment System Controller Outlet Replacement: adım 9, 2 resimden 2.
    • Pull the controller outlet straight out with your hands, leaving an open hole in the plastic NES case.

Sonuç

To reassemble your device, follow these instructions in reverse order.

7 farklı kişi bu kılavuzu tamamladı.

nicholasweiser

Üyelik tarihi: 09/22/10

2.634 İtibar

6 adet Kılavuz yazıldı

Ekip

Cal Poly, Team 14-40, Forte Fall 2010 Cal Poly, Team 14-40, Forte Fall 2010 üyesi

CPSU-FORTE-F10S14G40

4 Üyeler

20 adet Kılavuz yazıldı

Bir Yorum

I have the Mario track and duck hunt game but when j plug in the remote it switches from super Mario to the track meet but I can't control the remote ?

oh Dice - Yanıt

Yorum Ekle

İstatistikleri Görüntüle:

Son 24 Saat: 0

Son 7 gün: 10

Son 30 gün: 45

Her zaman: 15,868