Giriş
If you are having issues with ejecting your game cartridge, you will need to open you NES and remove the game cartridge tray. Follow our guide for more information.
Neye ihtiyacın var
-
-
Remove the six 13.25mm Phillips screws on the bottom of the game console with a #2.5 flathead screwdriver.
-
Flip the game console right side up and take off the top by pulling it up and away from the rest of the device with your hands.
-
-
-
-
Remove the two silver 17.45mm Phillips screws from the cartridge tray using a Phillips head #2 screwdriver.
-
Remove the two bronze 13.25mm Phillips screws from the cartridge tray using a Phillips head #2 screwdriver.
-
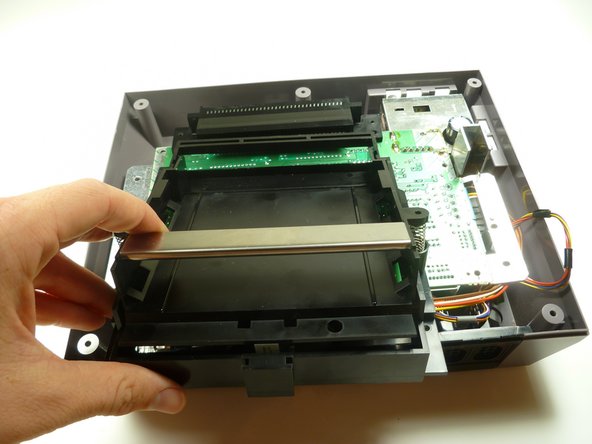
Slide the cartridge tray toward you, away from the 72-PIN connector, and off the motherboard assembly.
-
-
-
Note: Underneath the cartridge tray is a black trapezoid-shaped tab/lip (see marker). When properly assembled this tab/lip goes below the motherboard and shielding as seen here.
This is so unclear! I have no idea what tab this step is referring to.
So, it’s a year later, and I have a lot more experience with this system now. The front of the cartridge tray needs to hook under the edge of the board.
It’s much easier to get the tray on and off if you just make sure the board is unscrewed from the case. Then pick the board up a little and the tray should be much easier to slide on and off.
its when your replacing the cartridge tray, if u do it wrong the tray will feel like it's bowing up in the middle, like when u put in the screws u have to press the tray down to get the screw holes to line up / be flush, if u get the lip underneath to catch correctly there will be no issue/bow u wan't have to press down on it, or make the screws pull the tray to the motherboard, instead the tray will be flush with no pressure applied, i had no idea what he meant either until i was reversing the steps.
also not all NES are the same underneath, my tab was much less noticeable and i had one less screw to get the shield off then he showed. and 2 less screws to remove the cartridge tray.
This seemed very unclear to me at first, until I tried to replace the cart tray. I apparently didn’t get the little lip under the mobo on my first attempt, and I noticed there was a pretty decent chunk of space between the front brass screw holes and their corresponding holes on the mobo. I reseated it, and the second time I heard a little click (apparently the lip going under the mobo). This time the bottom/brass screw holes were virtually FLUSH with the mobo holes. If you see a chunk of space between the cart tray and the mobo near the brass screw holes you didn’t get the lip under the mobo.
-


To reassemble your device, follow these instructions in reverse order.
To reassemble your device, follow these instructions in reverse order.
İptal et: Bu kılavuzu tamamlamadım.
8 farklı kişi bu kılavuzu tamamladı.
Ekip

Cal Poly, Team 14-40, Forte Fall 2010 Cal Poly, Team 14-40, Forte Fall 2010 üyesi
CPSU-FORTE-F10S14G40
4 Üyeler
20 adet Kılavuz yazıldı
the outside screws are a little deep, plan ahead :)
Joseph McCord - Yanıt
Why use a slotted driver? The screws are phillips. Both #1 and #2 work for me.
kmcrawford111 - Yanıt